Azure VM Windows 10 Pro Deployment: A Complete Guide
Deploying a Windows Virtual Machine (VM) on Microsoft Azure allows you to create a scalable and flexible environment for development, testing, or any other business needs. Azure provides a cloud-based platform where you can easily deploy and manage Windows VMs, taking advantage of the power and security of Microsoft’s infrastructure. This document will guide you through the process of deploying a Windows 10 Pro VM on Azure, from the initial setup to accessing the VM remotely.
Note: While you can select other versions of Windows, including Windows 11 Pro, this guide focuses on Windows 10 Pro to support the deployment of Kubert AI Assistant Lite for developers, who mostly use Windows 10 Pro on their personal development PCs.
Prerequisites
Before you begin, ensure you have the following:
- Azure Subscription: An active Azure subscription is required. If you don’t have one, you can sign up for a free account at the Azure portal.
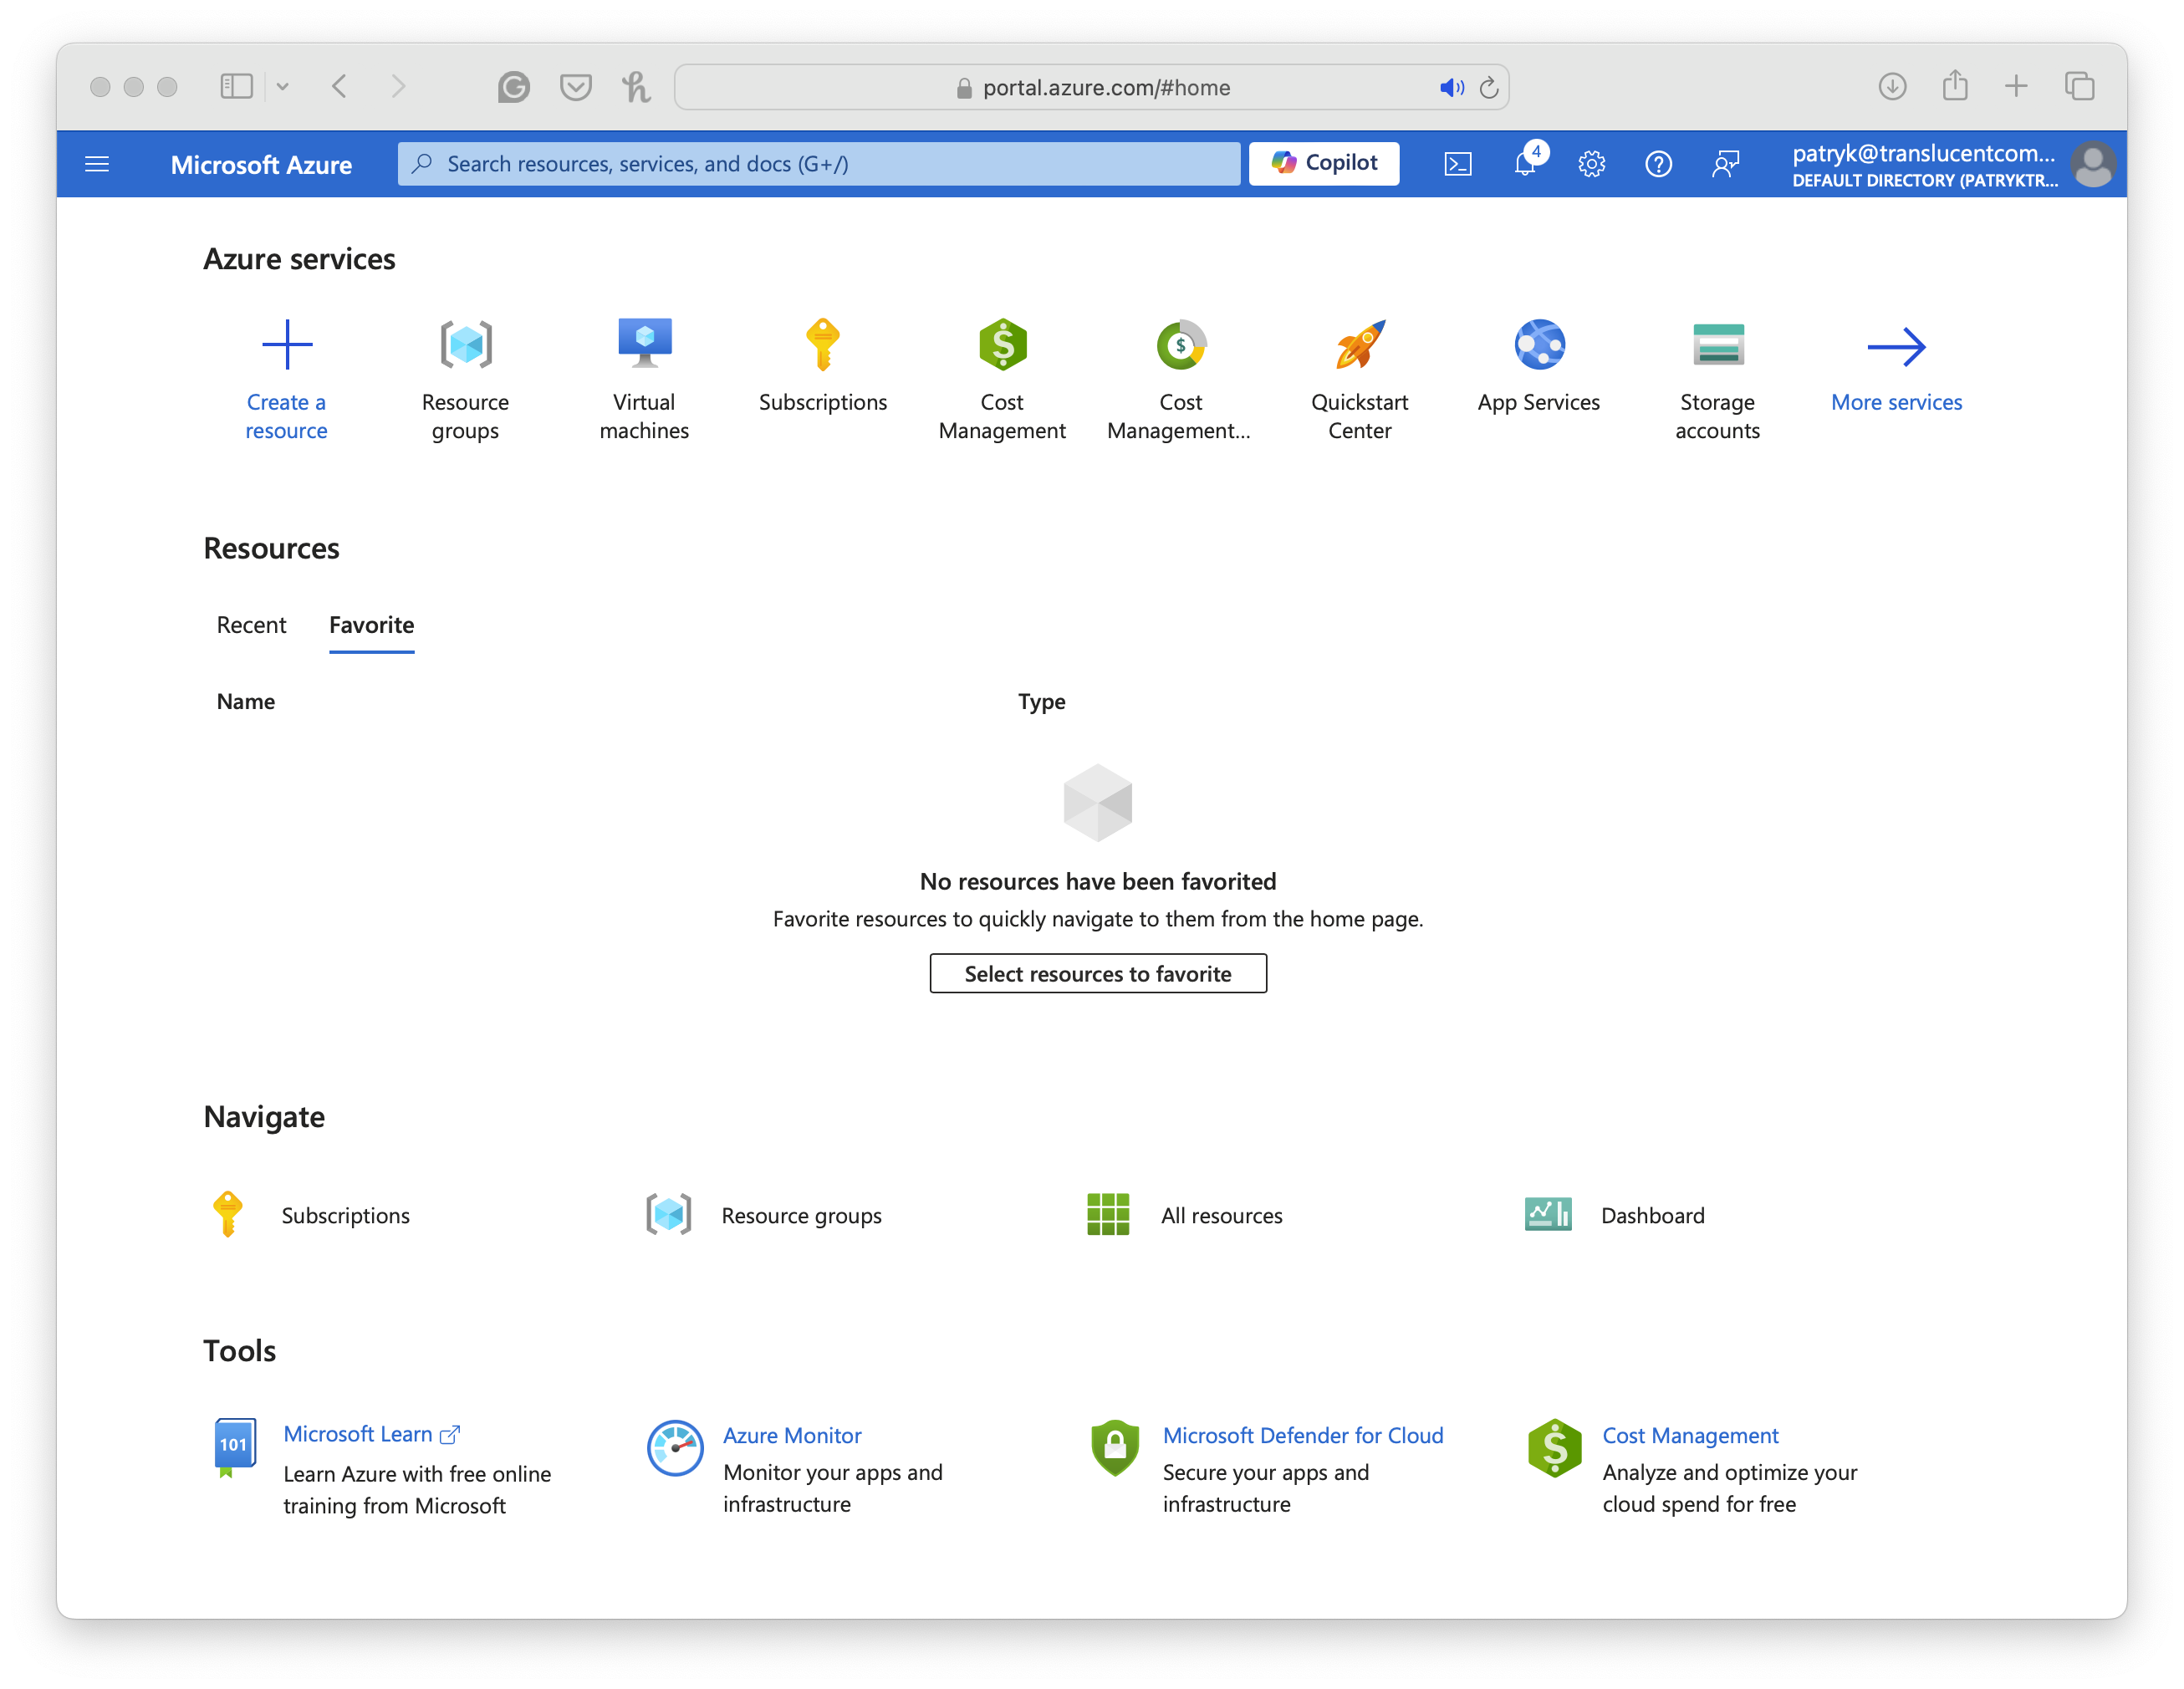
Step 1: Sign in to the Azure Portal
- Open your web browser and go to the Azure Portal.
- Sign in with your Microsoft account.
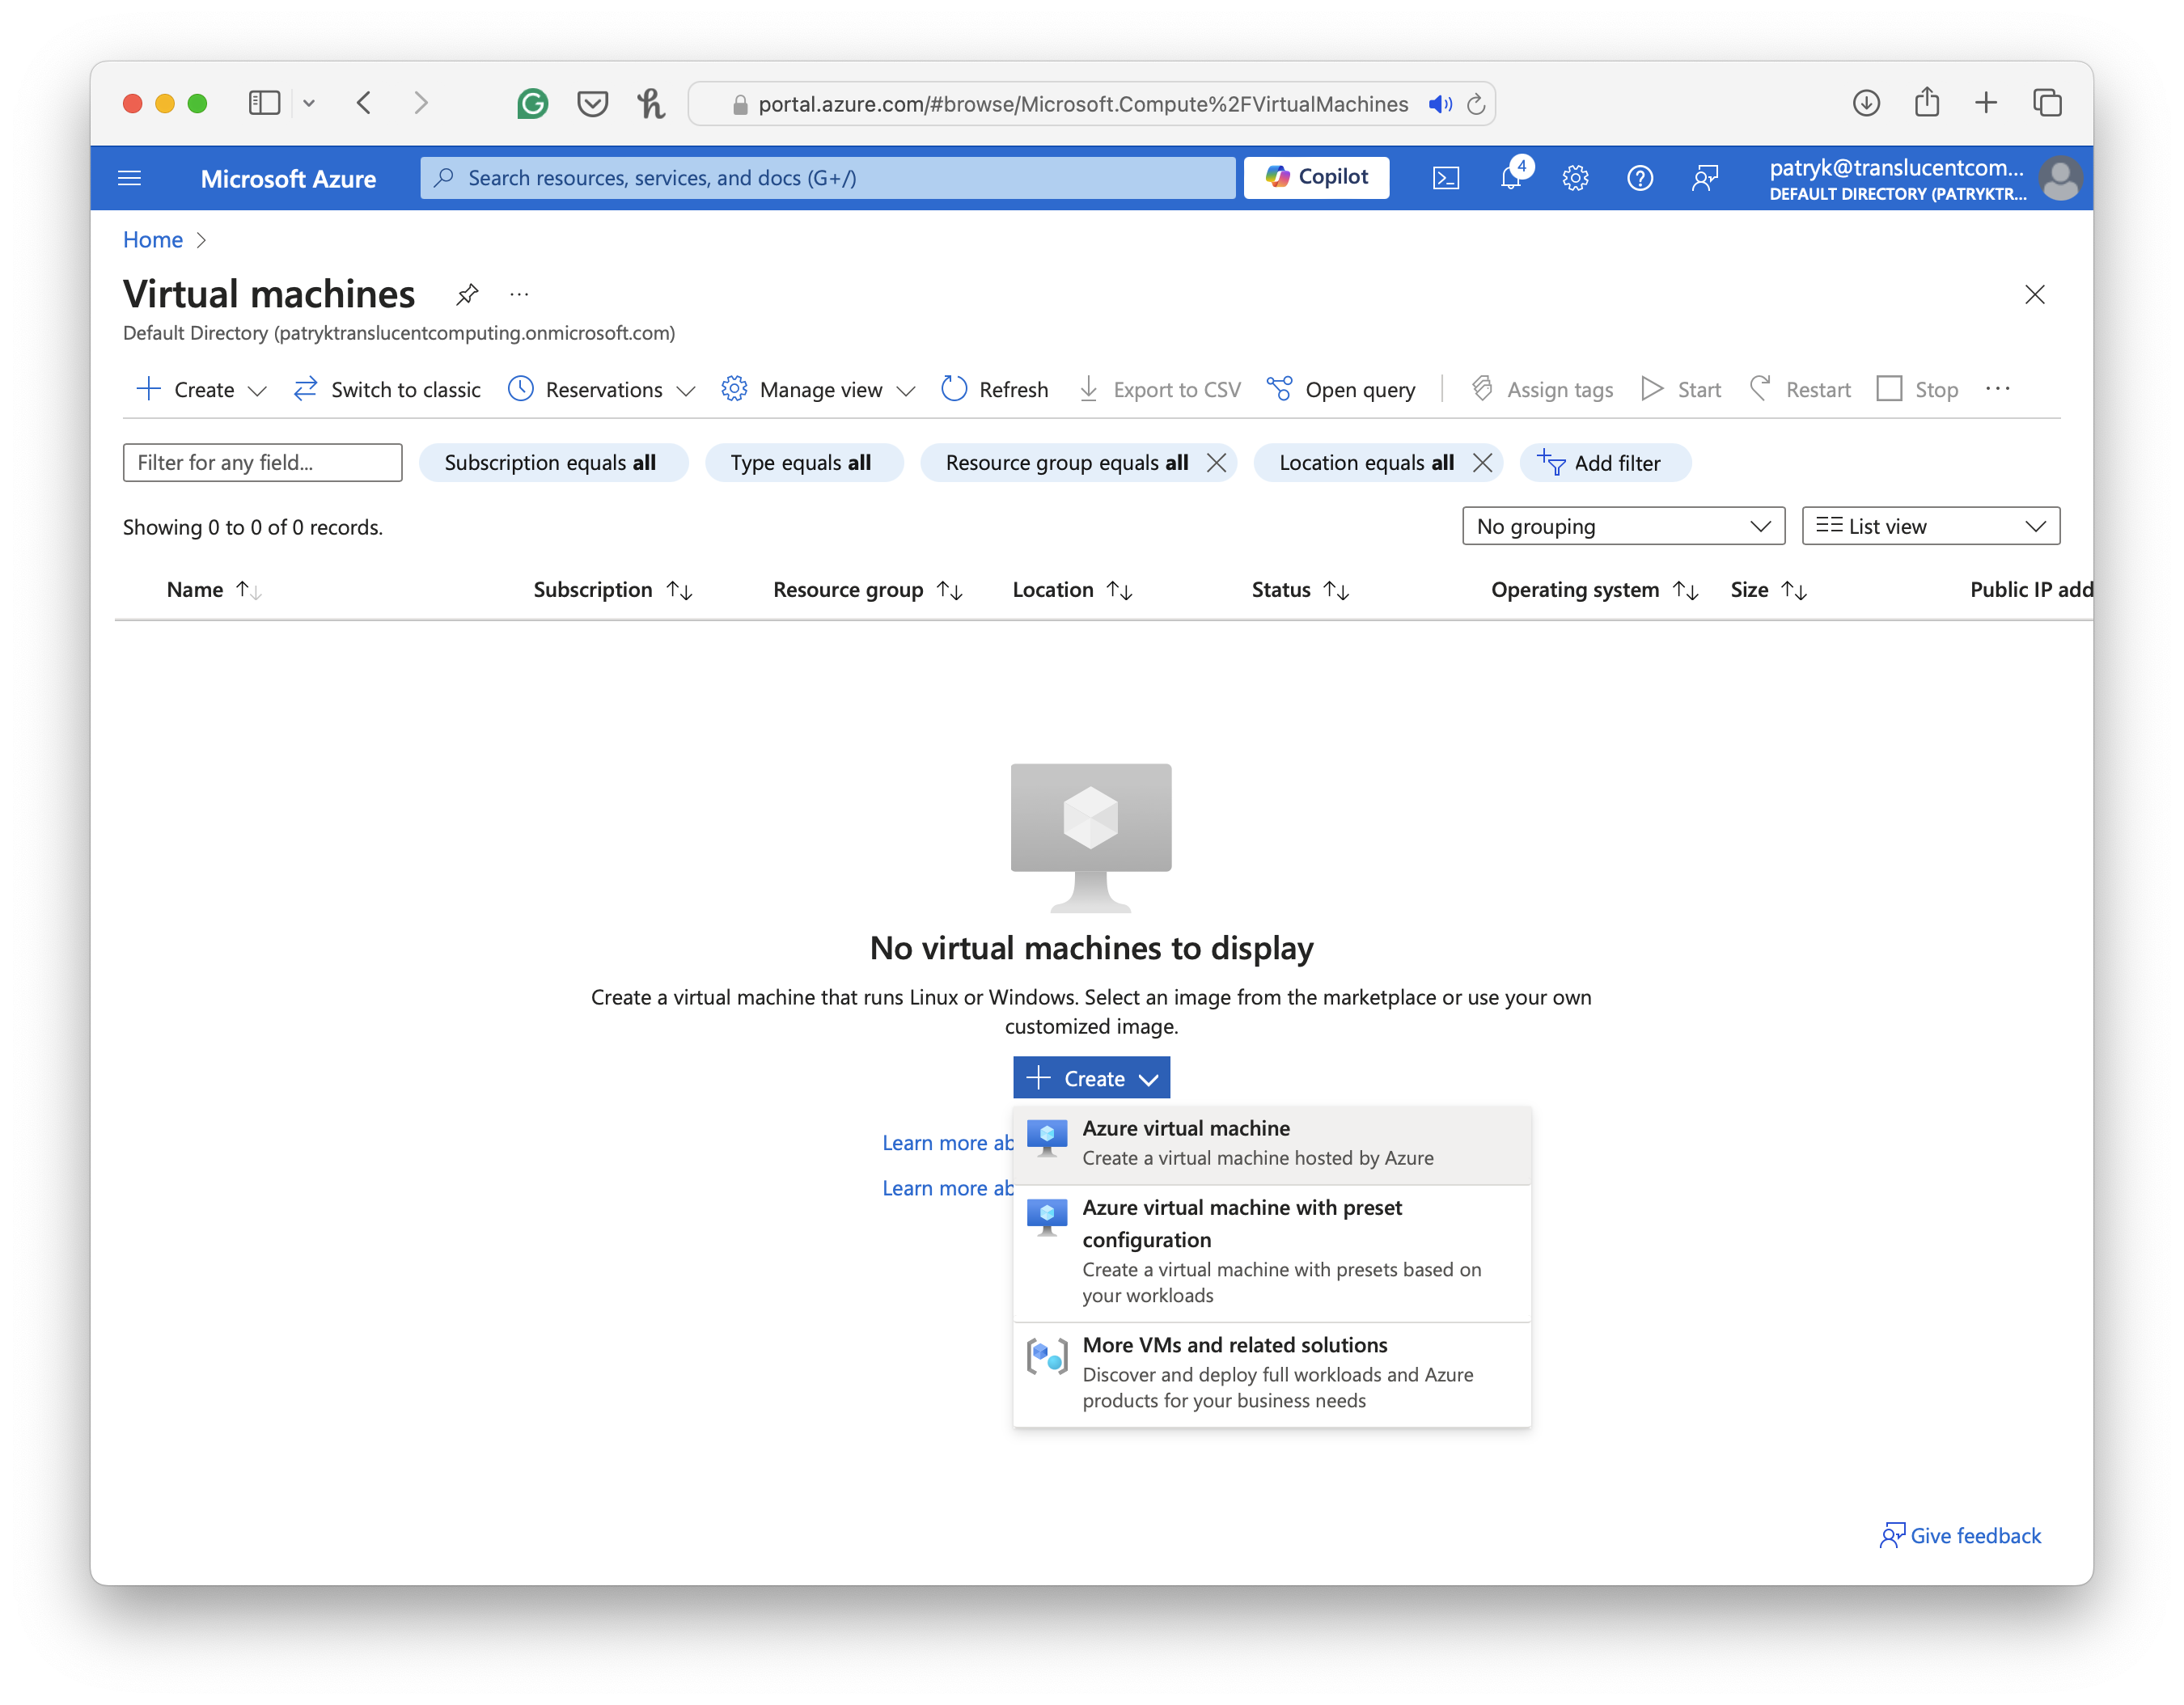
Step 2: Create a Virtual Machine
- Navigate to the “Virtual Machine” section in the Azure Portal.

- Click “Create” and select “Azure virtual machine”.
Step 3: Configure the VM
-
Start by creating a new, click “Create a resource”.
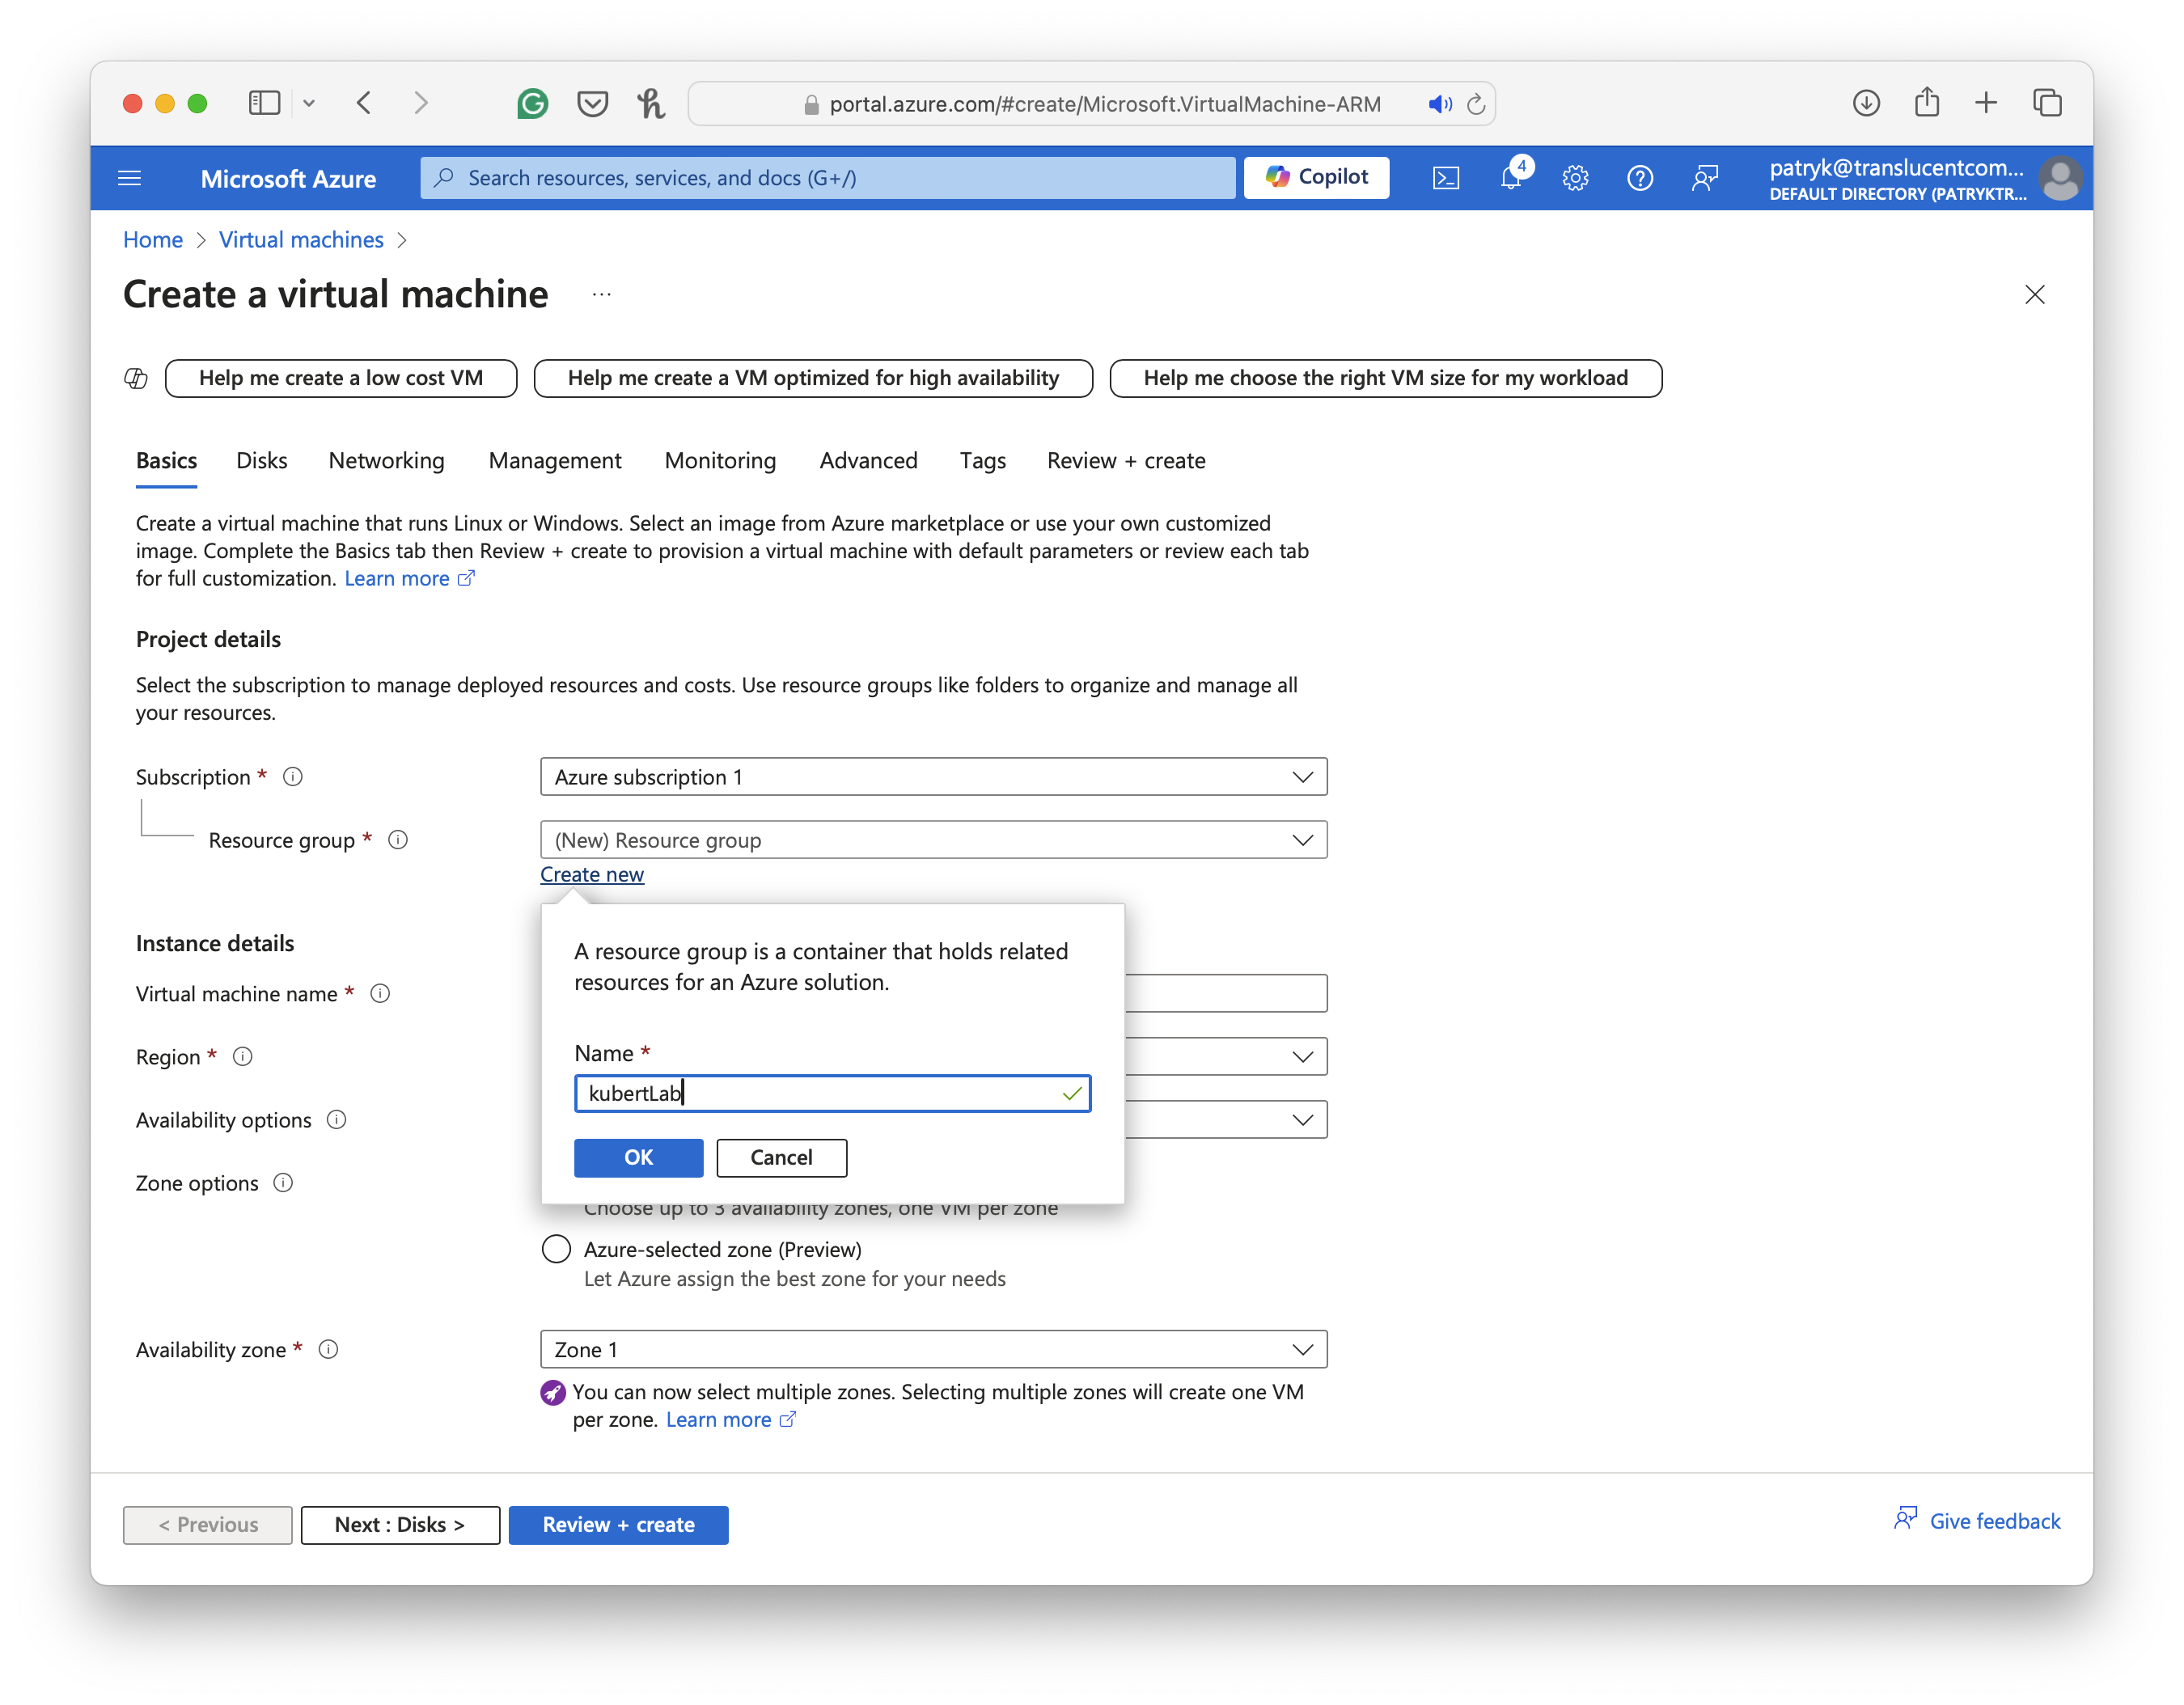
Note-> Benefits of Using a Resource Group for Cleanup:- Centralized Management: A resource group allows you to manage all related resources as a single unit. This means that all components related to your VM (e.g., virtual network, public IP address, network interface, storage accounts) are organized under one resource group.
- Simplified Deletion: If you no longer need the VM and its associated resources, you can delete the entire resource group in one action. This ensures that no orphaned resources are left behind, which can otherwise incur unnecessary costs.
- Cost Management: By grouping related resources together, you can more easily track the costs associated with a specific project or environment. When you’re done with the project, deleting the resource group removes all associated costs.
- Isolation: Resource groups help isolate environments, especially in cases where you might have multiple projects or environments (e.g., development, testing, production). This reduces the risk of accidentally deleting or modifying resources that are unrelated to your current task.
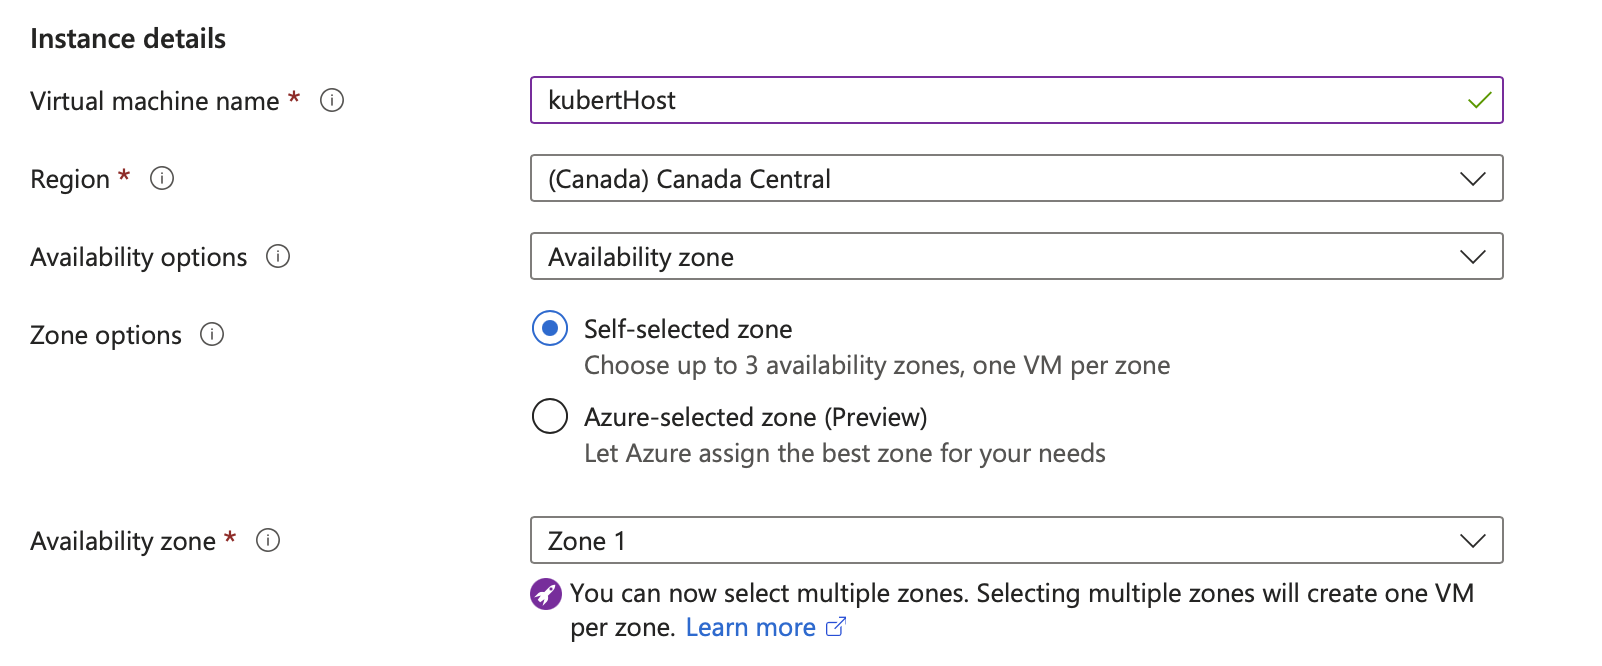
- Enter the host name and choose the region where you want to deploy the VM.
-
Select image and security type.
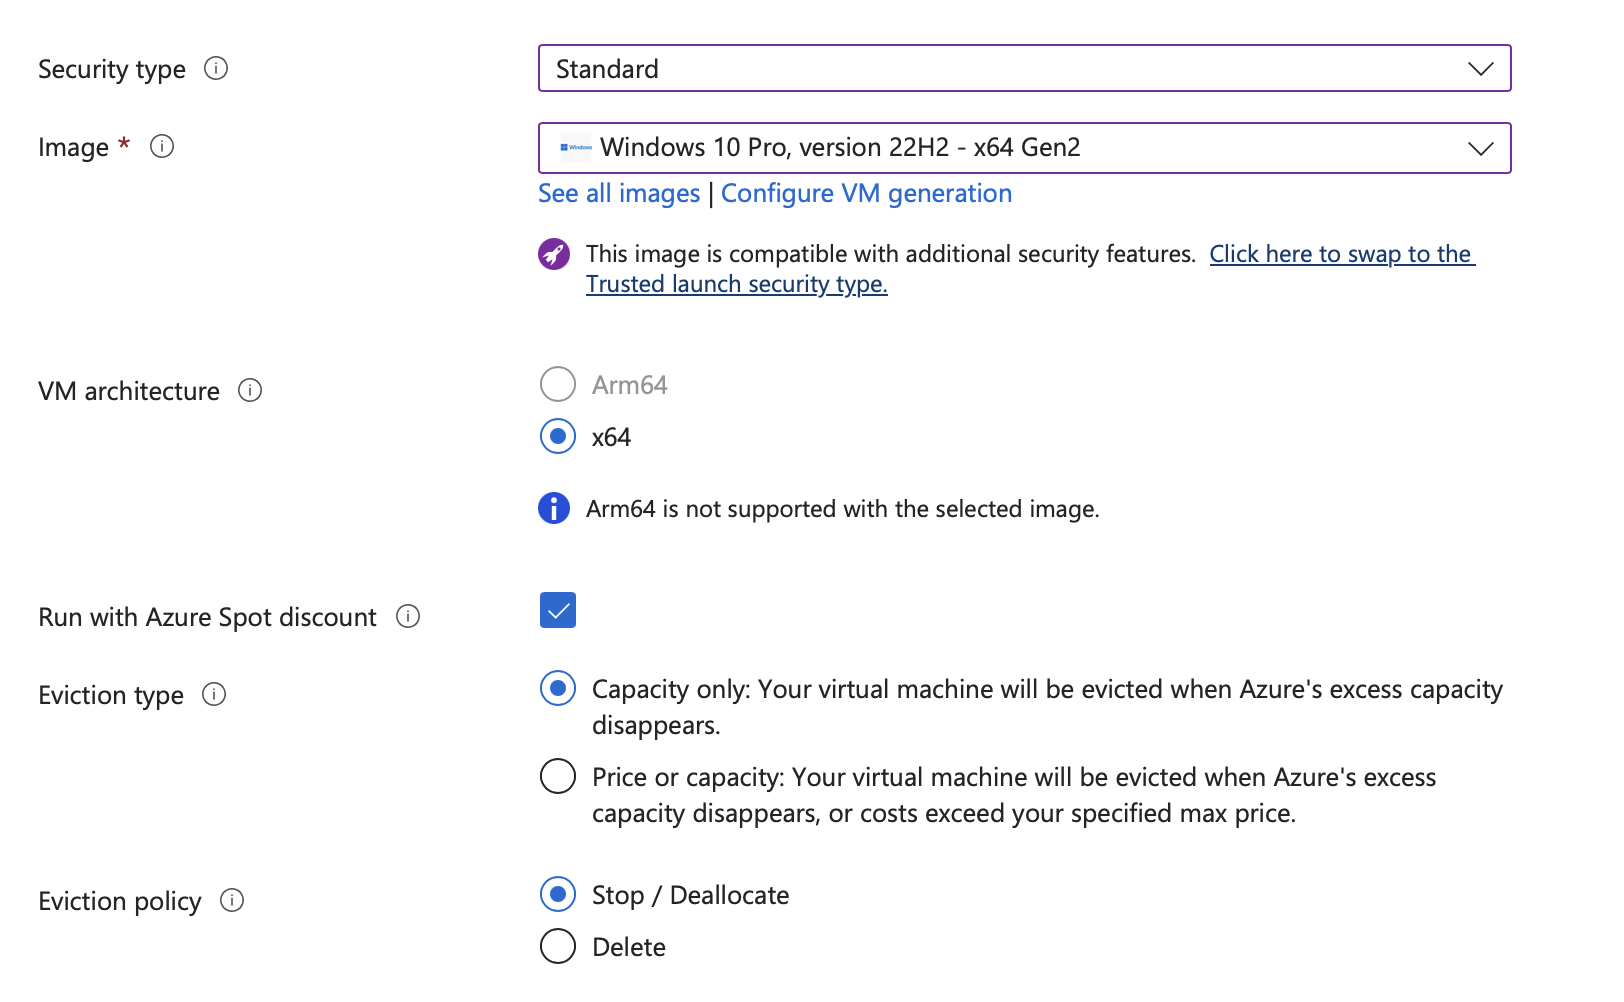
Note-> For the security type, select “Standard” to support nested virtualization, more on that in the size section. We selected the Windows 10 Pro image and chose “Run with Azure Spot discount.” There is no expectation for this VM, which is used for development and testing, to run for a long time uninterrupted. Therefore, using the spot discount can significantly reduce costs. -
Select the size.

Note-> We plan to run Windows Subsystem for Linux (WSL) within the VM, it’s crucial to select a VM size that supports nested virtualization. Nested virtualization allows you to run a virtual machine inside another virtual machine, which is necessary for WSL.Not all Azure VM sizes support nested virtualization. Typically, VMs in the Dv3, Ev3, and newer series (like Dv4 or Ev4) support this feature. Ensure you select a VM size from a CPU family that offers nested virtualization support. List of CPU families that support nested virtualization can be found here.
Information about the CPU family used in this deployment can be found here.
-
Account and inbound ports.
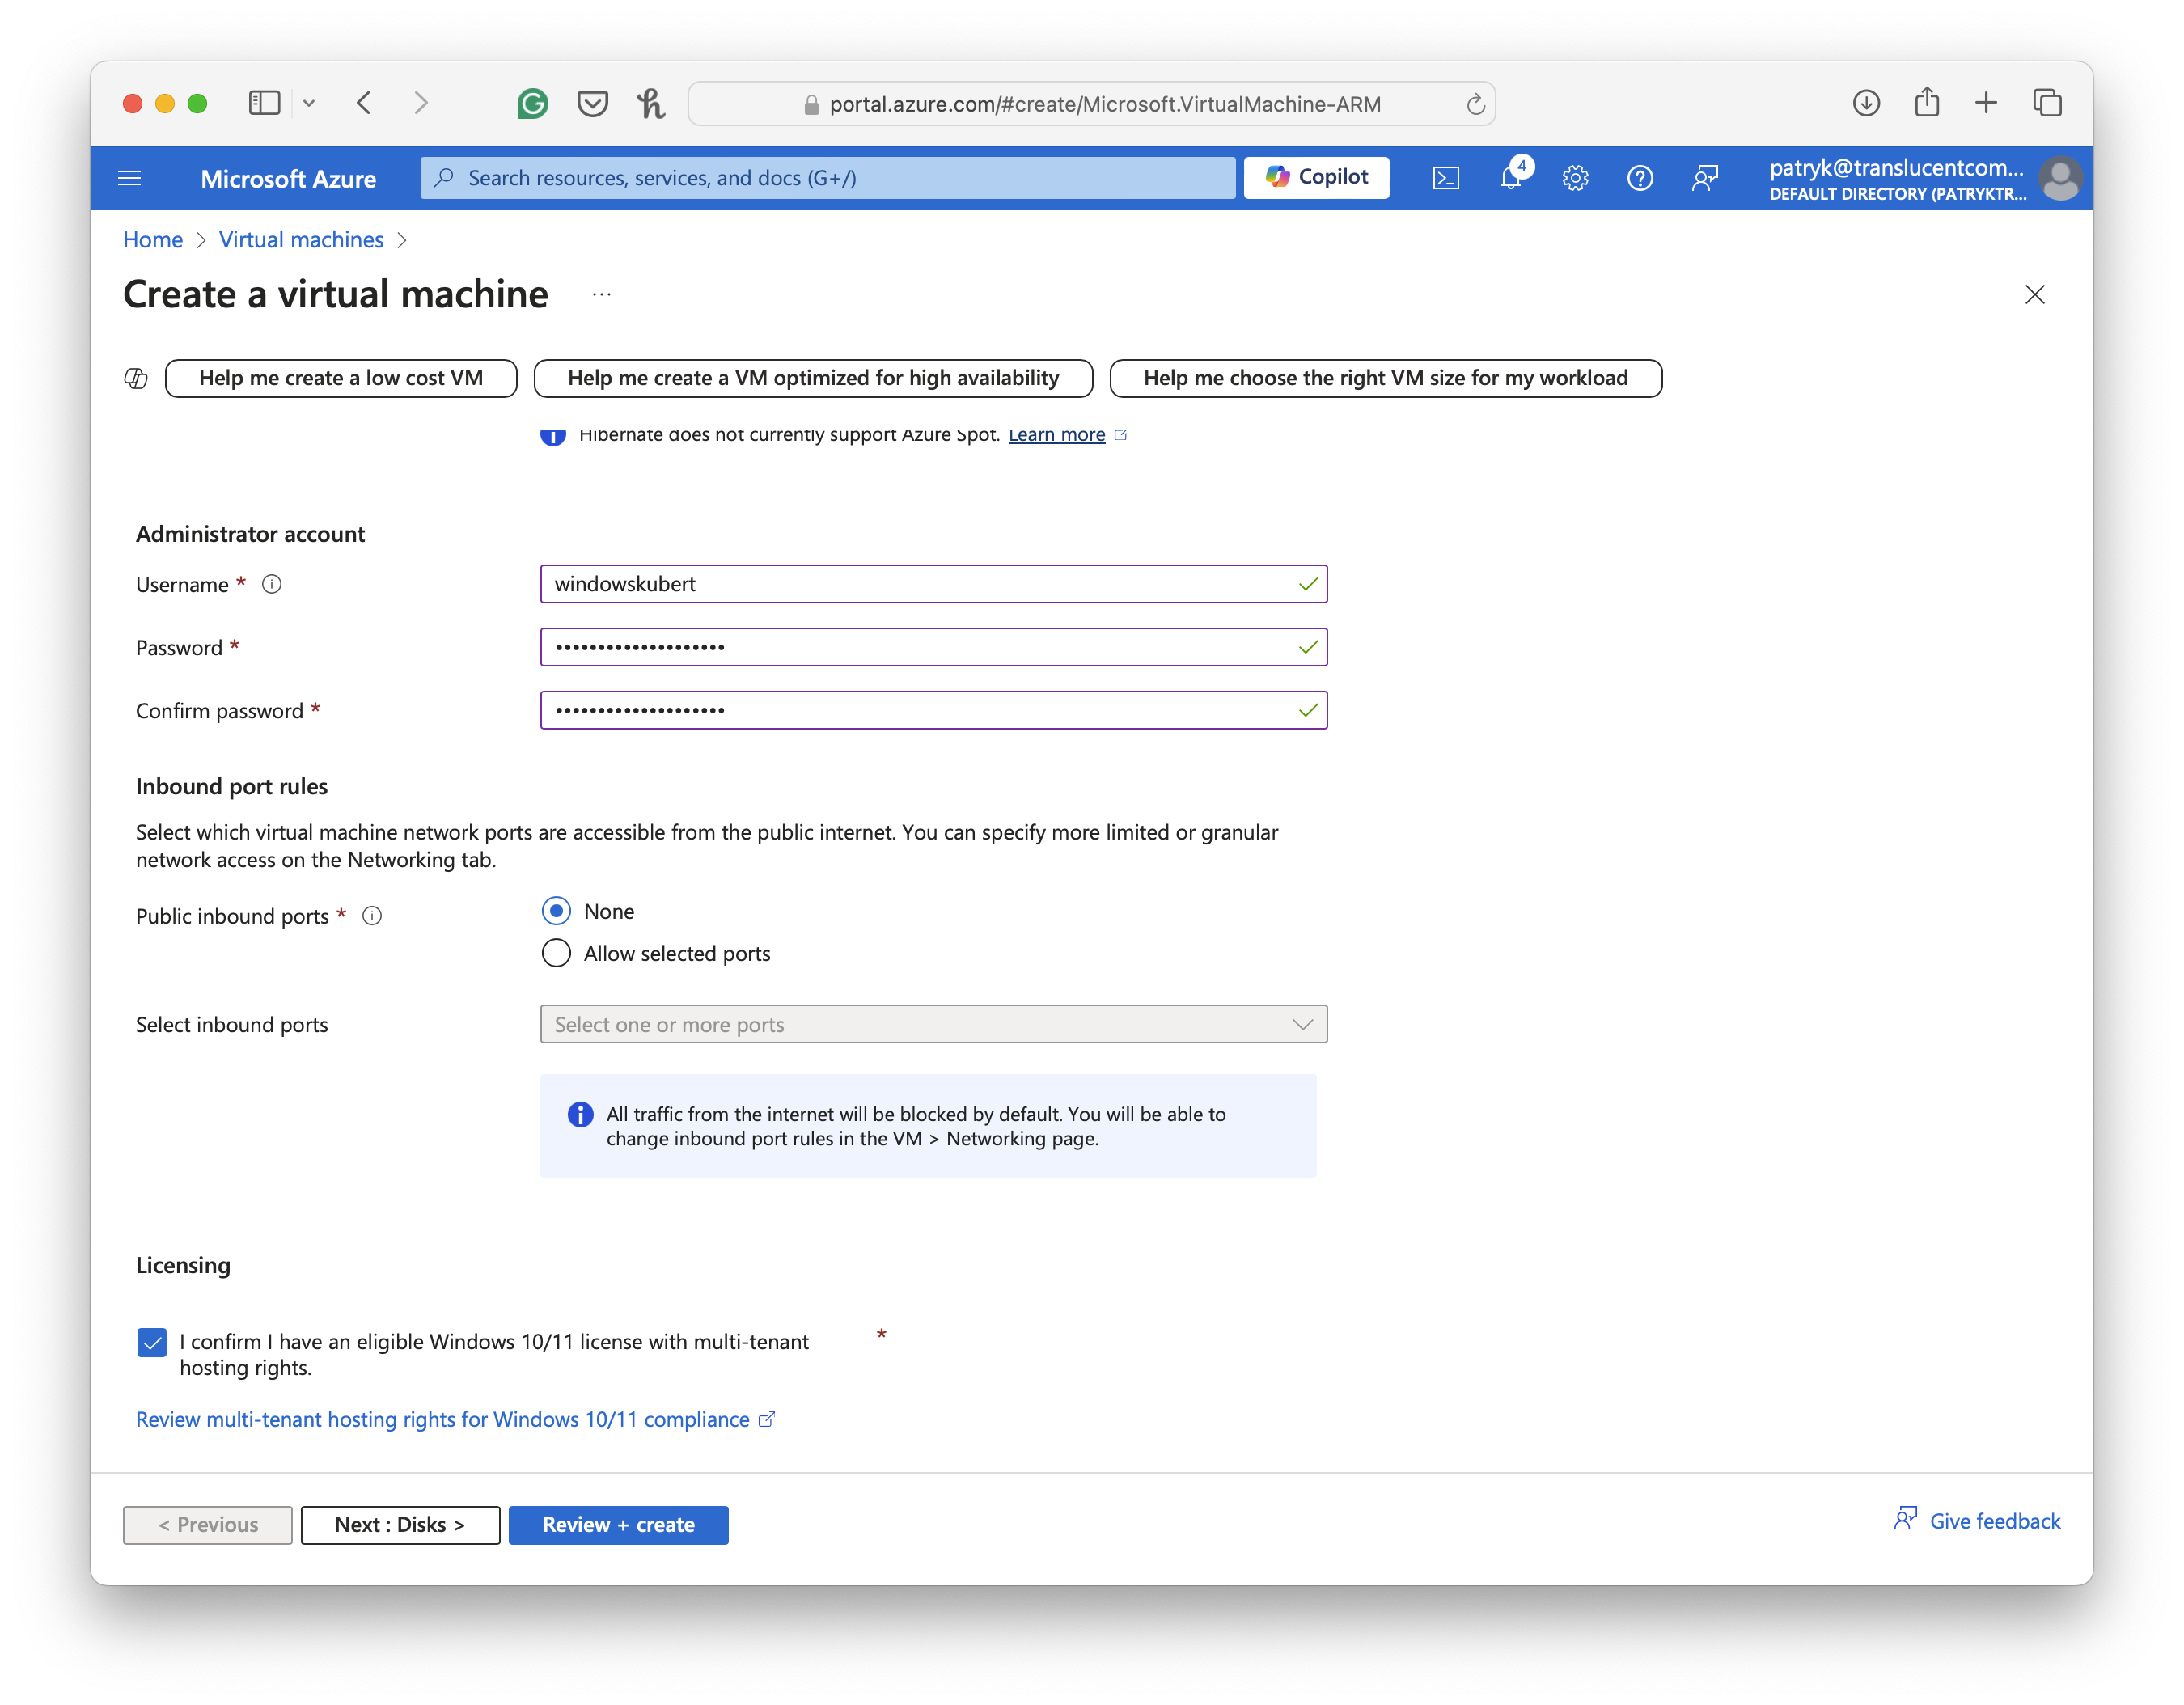
Note-> Enter the username and password that will be used to log into Windows 10 pro. Disable the “Public inbound ports”. The specific inbound ports will be configured once the VM has been deployed. Accept the licensing and click “Next: Disks >” to continue the configuration. -
Disks
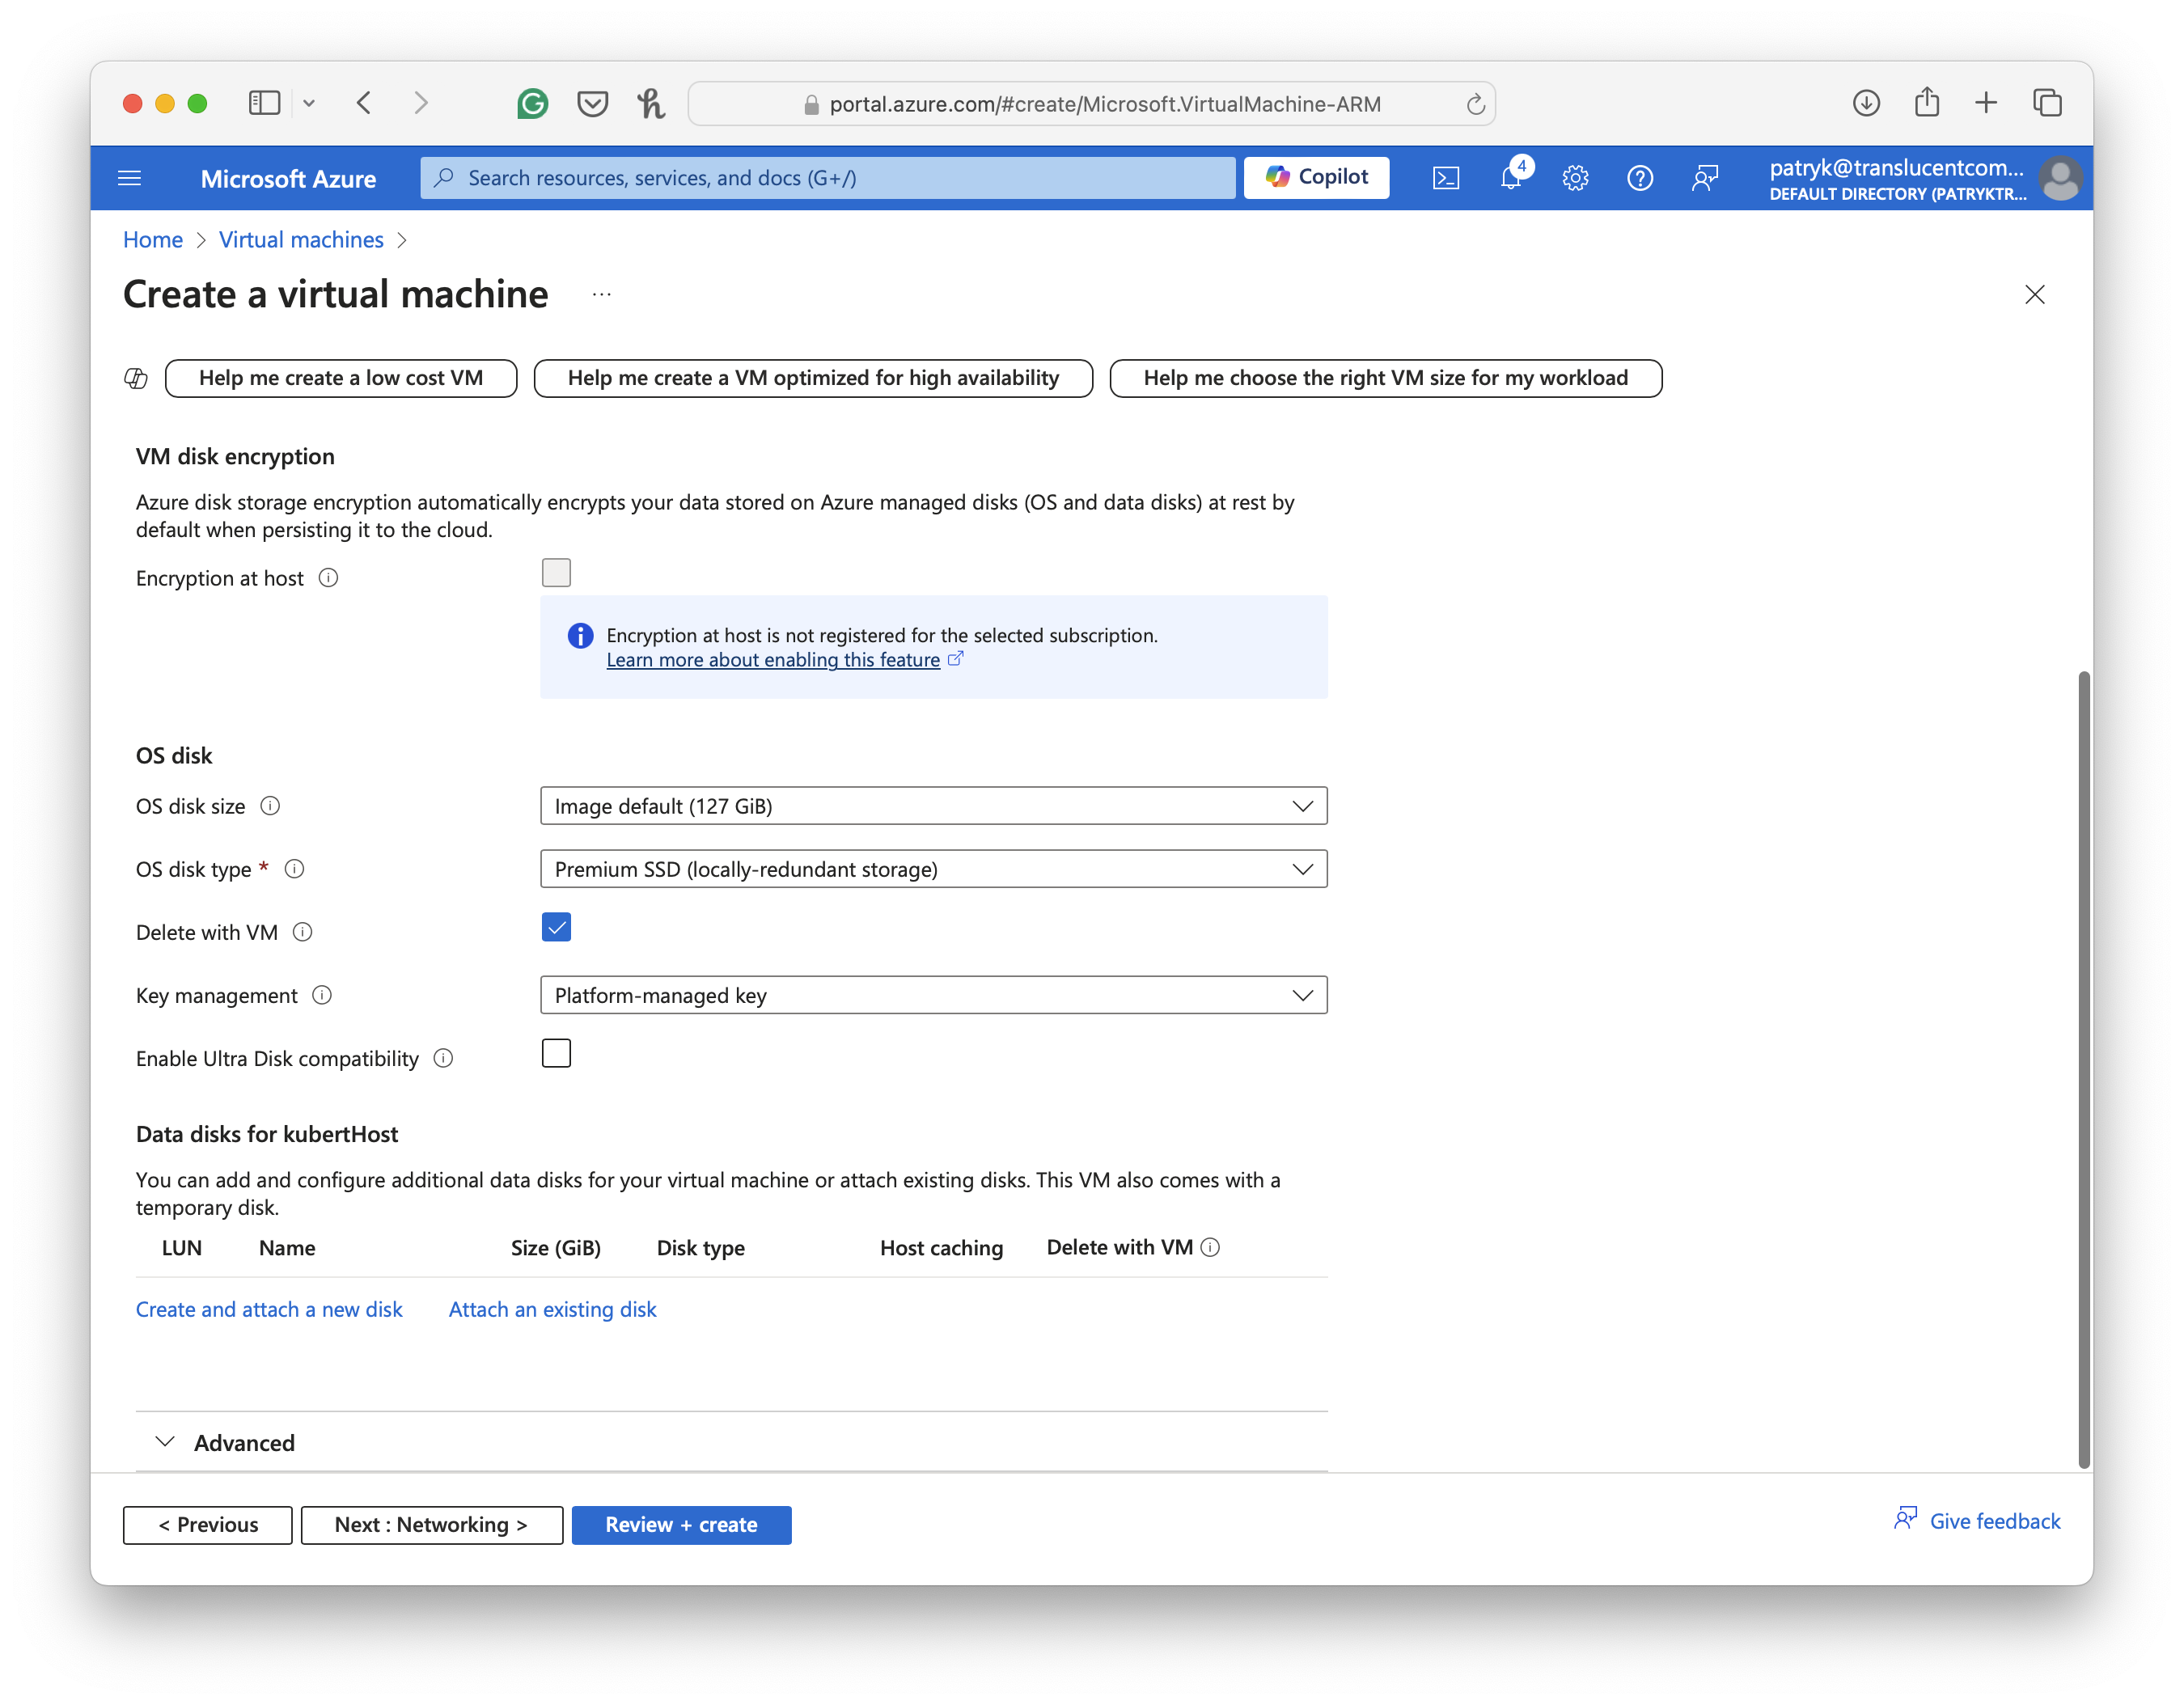
Note-> No updates are required in this section, click on the “Next: Networking >” to continue the configuration. -
Networking
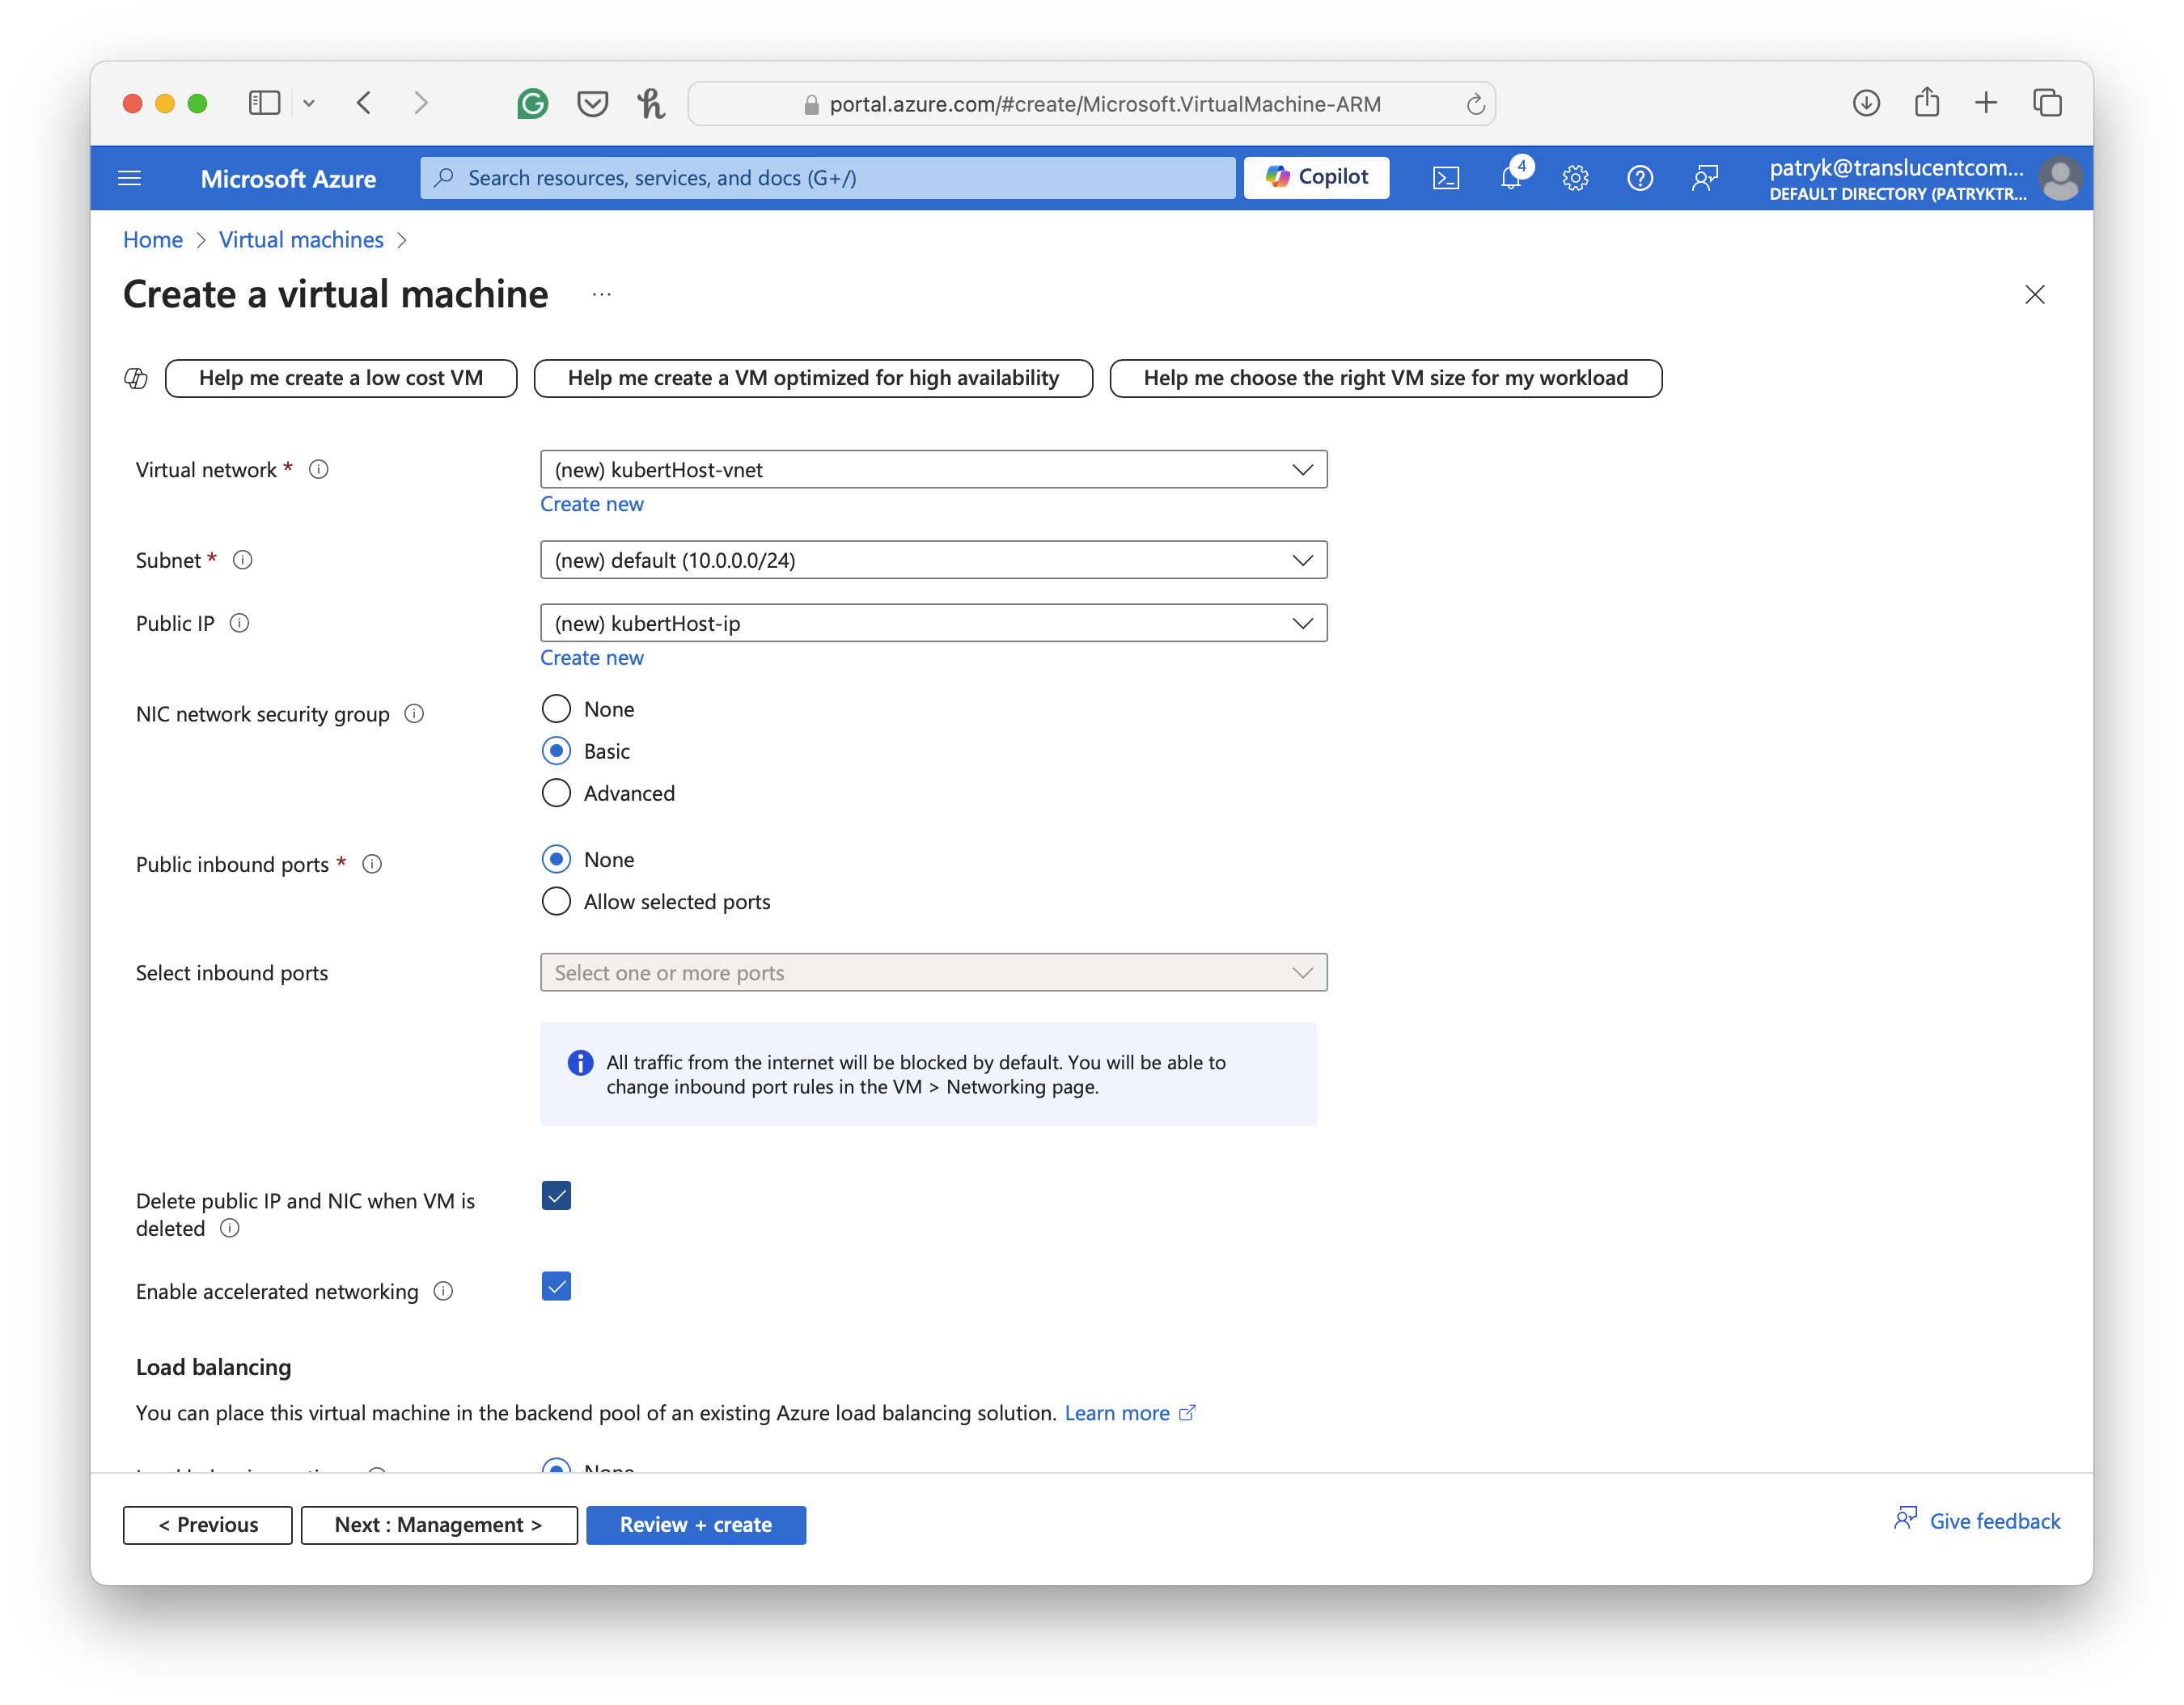
Note-> Check of the “Delete public IP and NIC when VM is deleted” to help with resource cleanup once the VM has been deleted. Click on the “Next: Management ->” to continue the configuration. -
Auto-shutdown
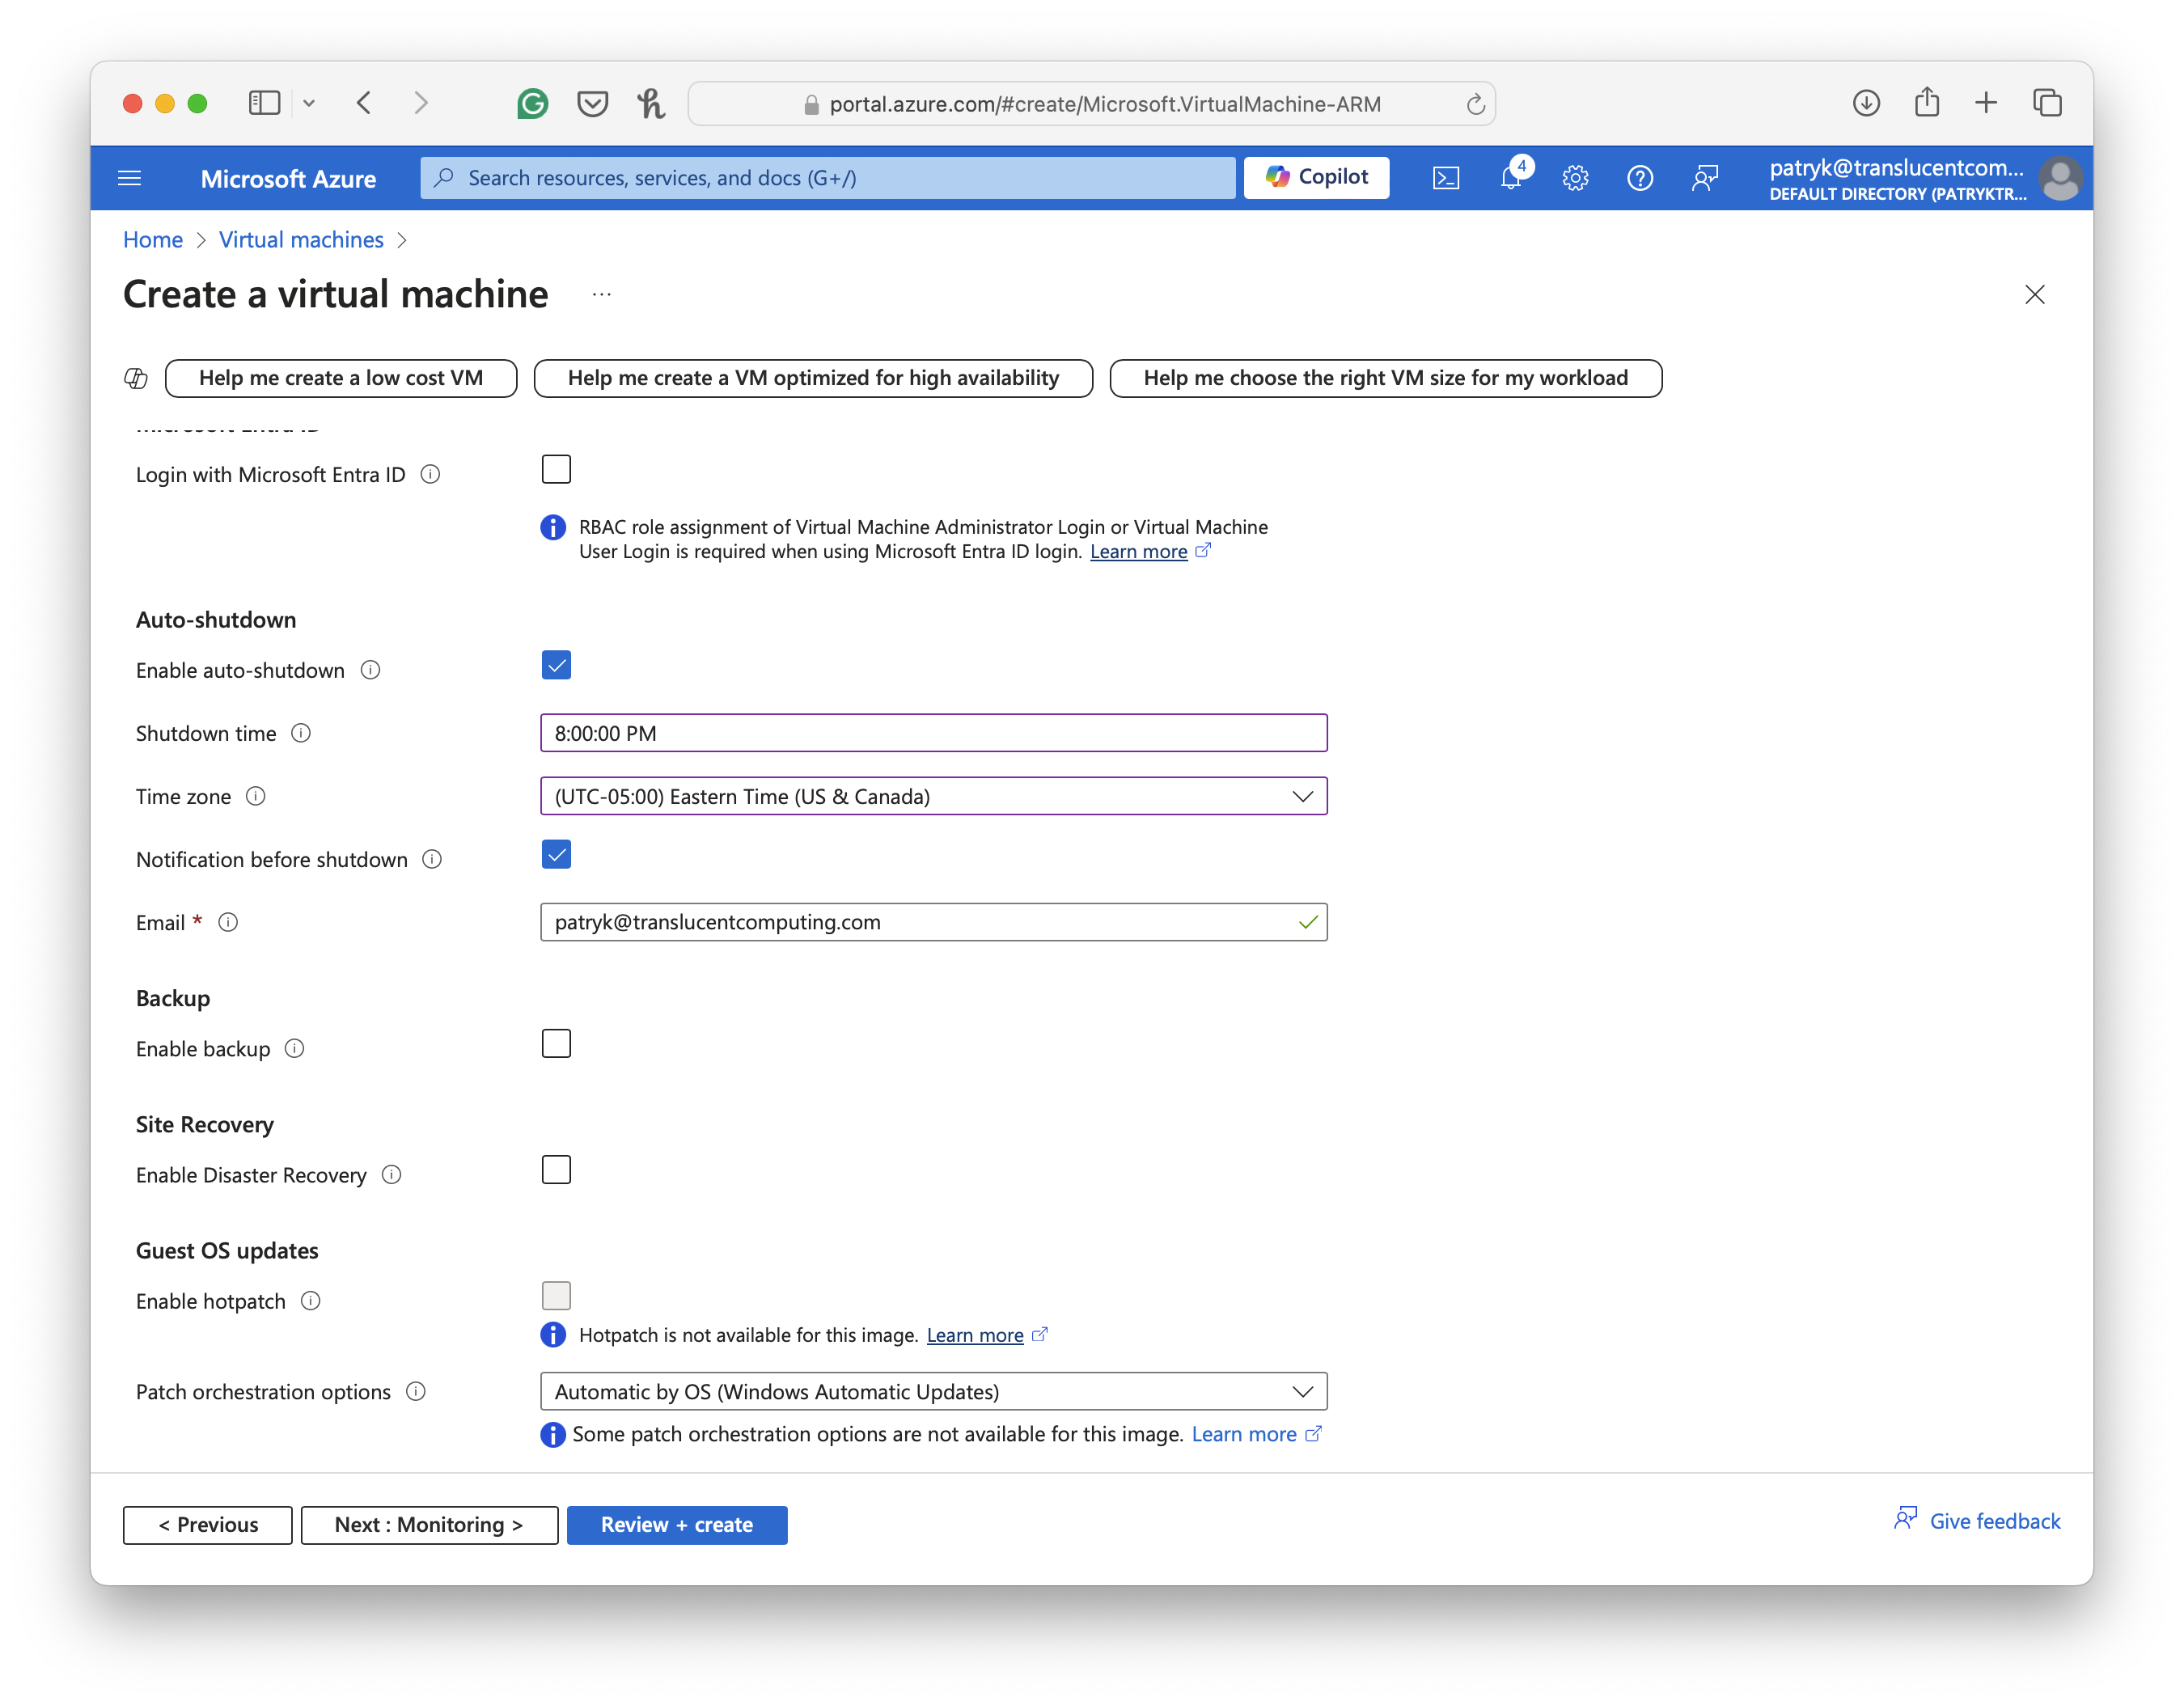
Note-> Don’t leave you VM running, enable the auto-shutdown and the time and timezone, to shutdown the VM automatically. We will stop the configuration here, click on “Review + create”. For advance use case continue the configuration to the monitoring section. -
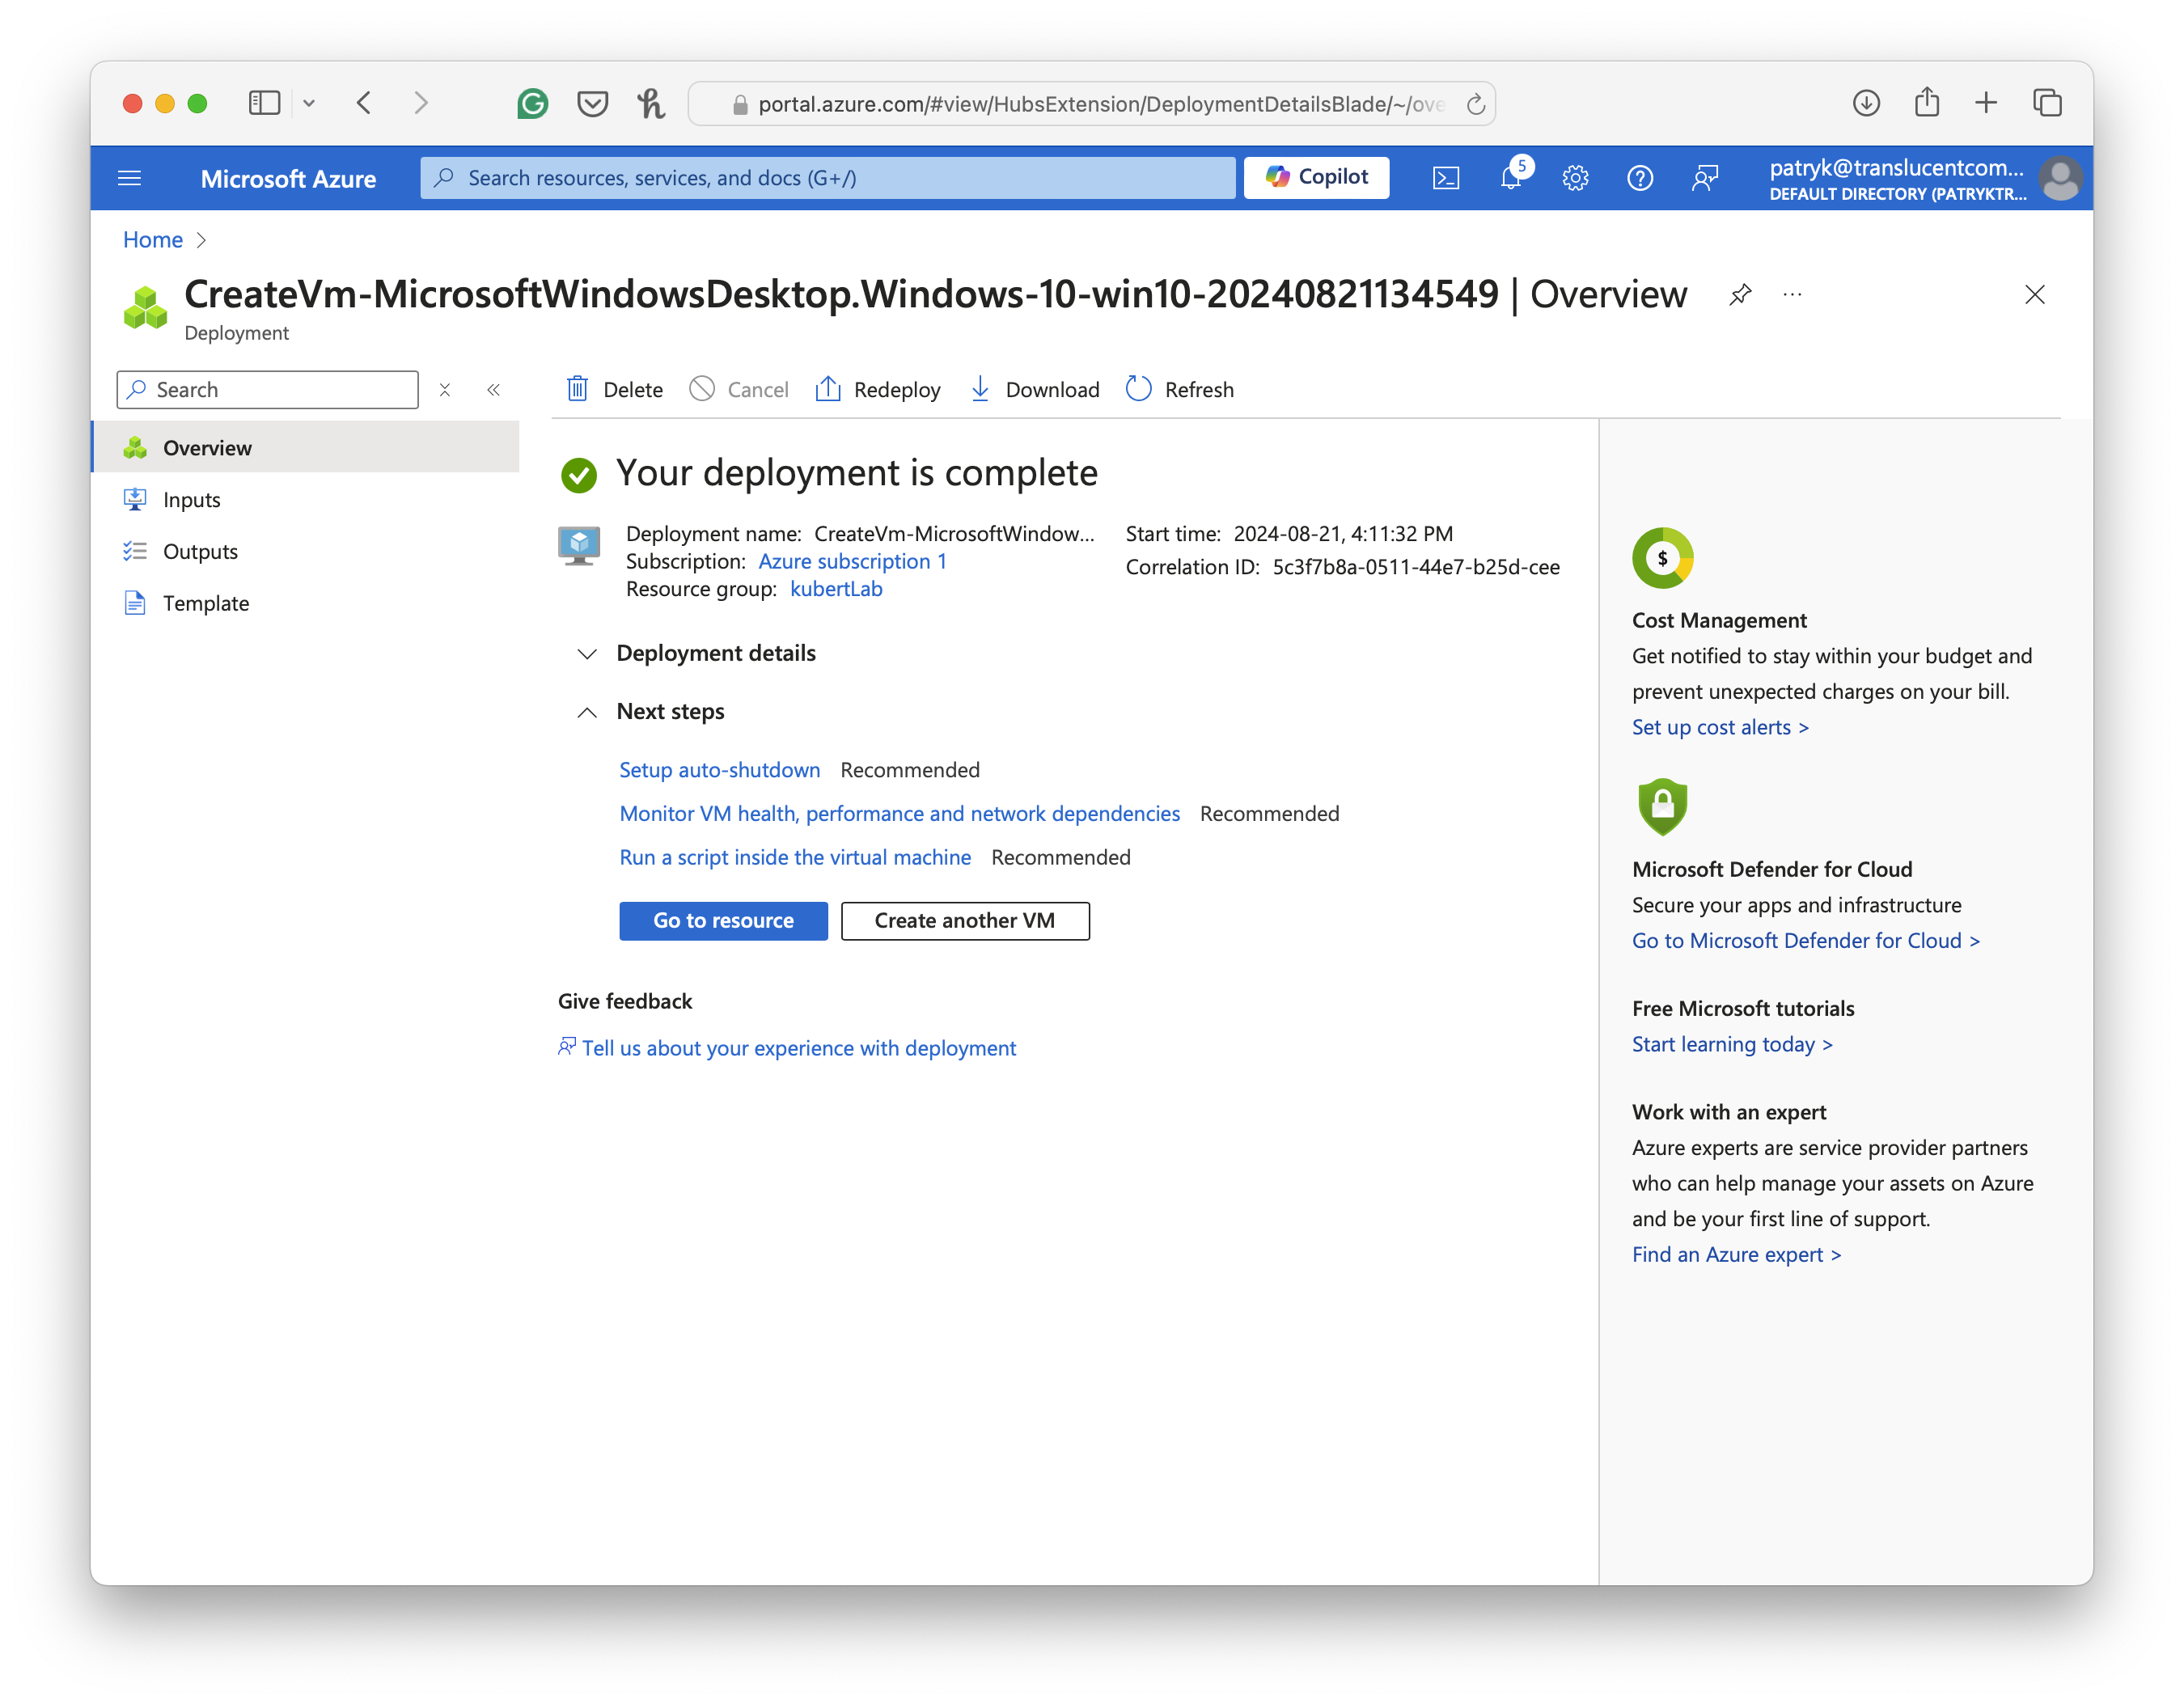
Trigger deployment.
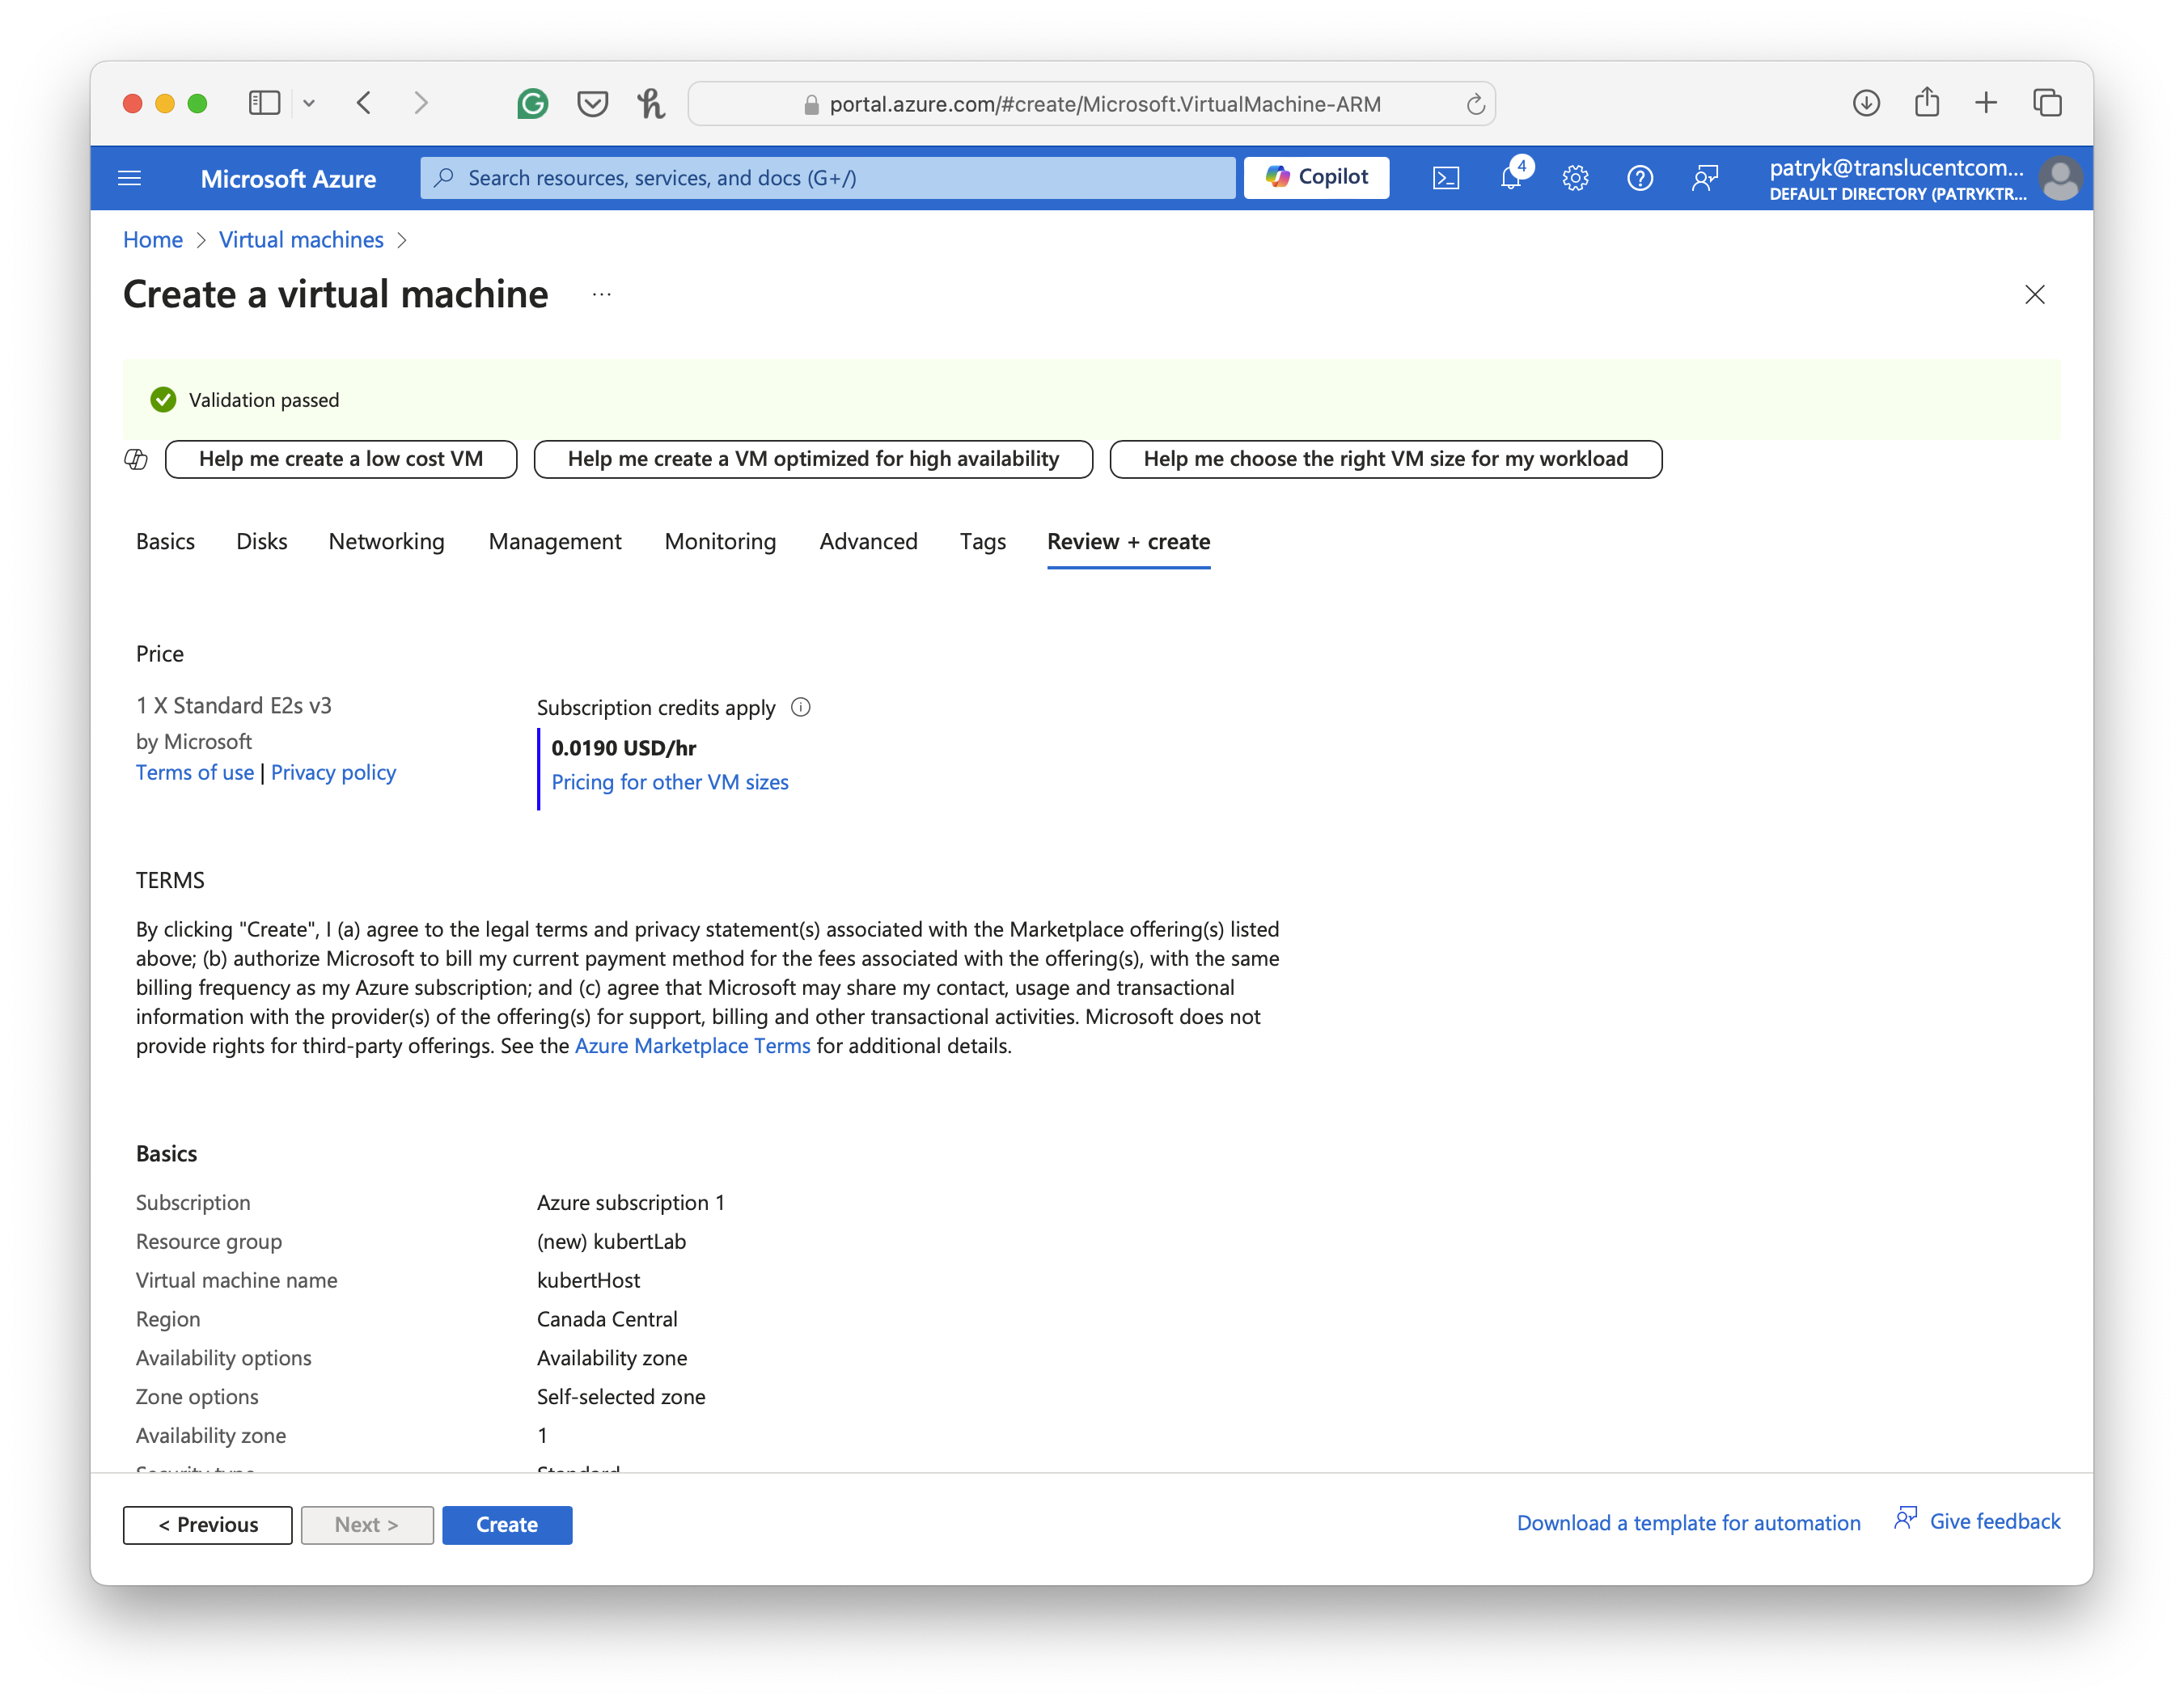
Note-> Review the configuration and click “Create” to start the deployment. - Deploying
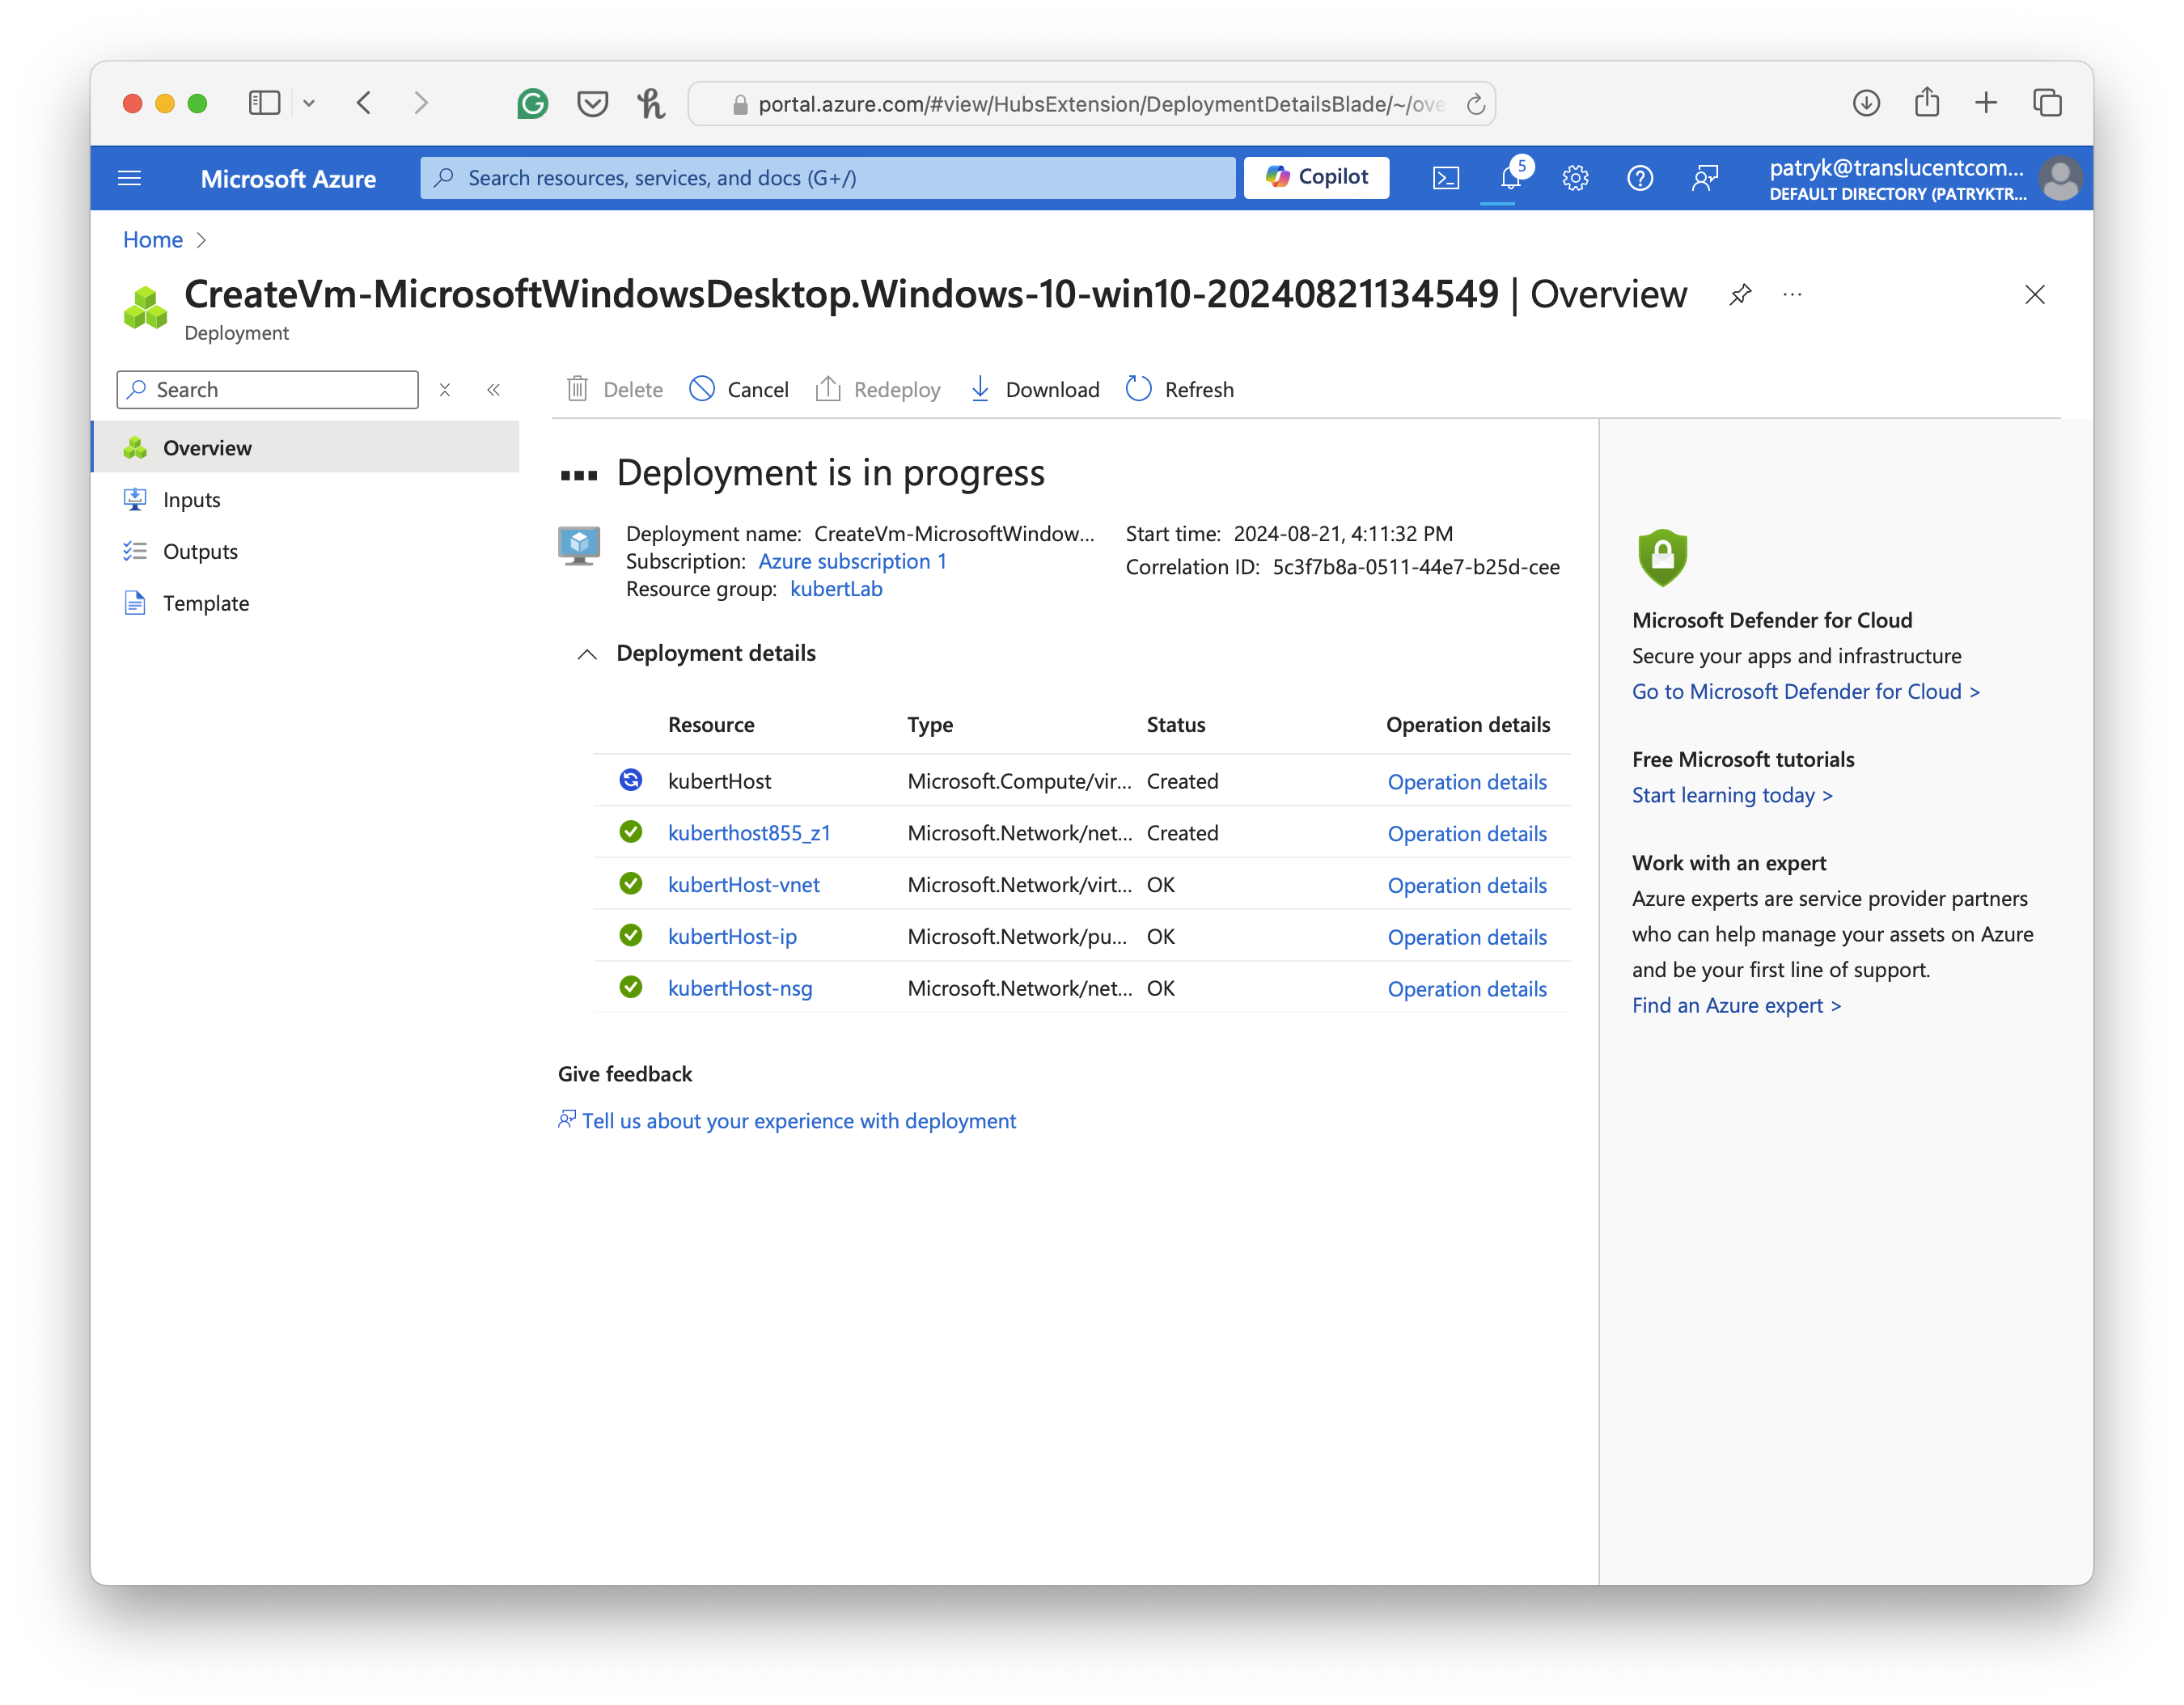
- Deployment completed, go to the resource.
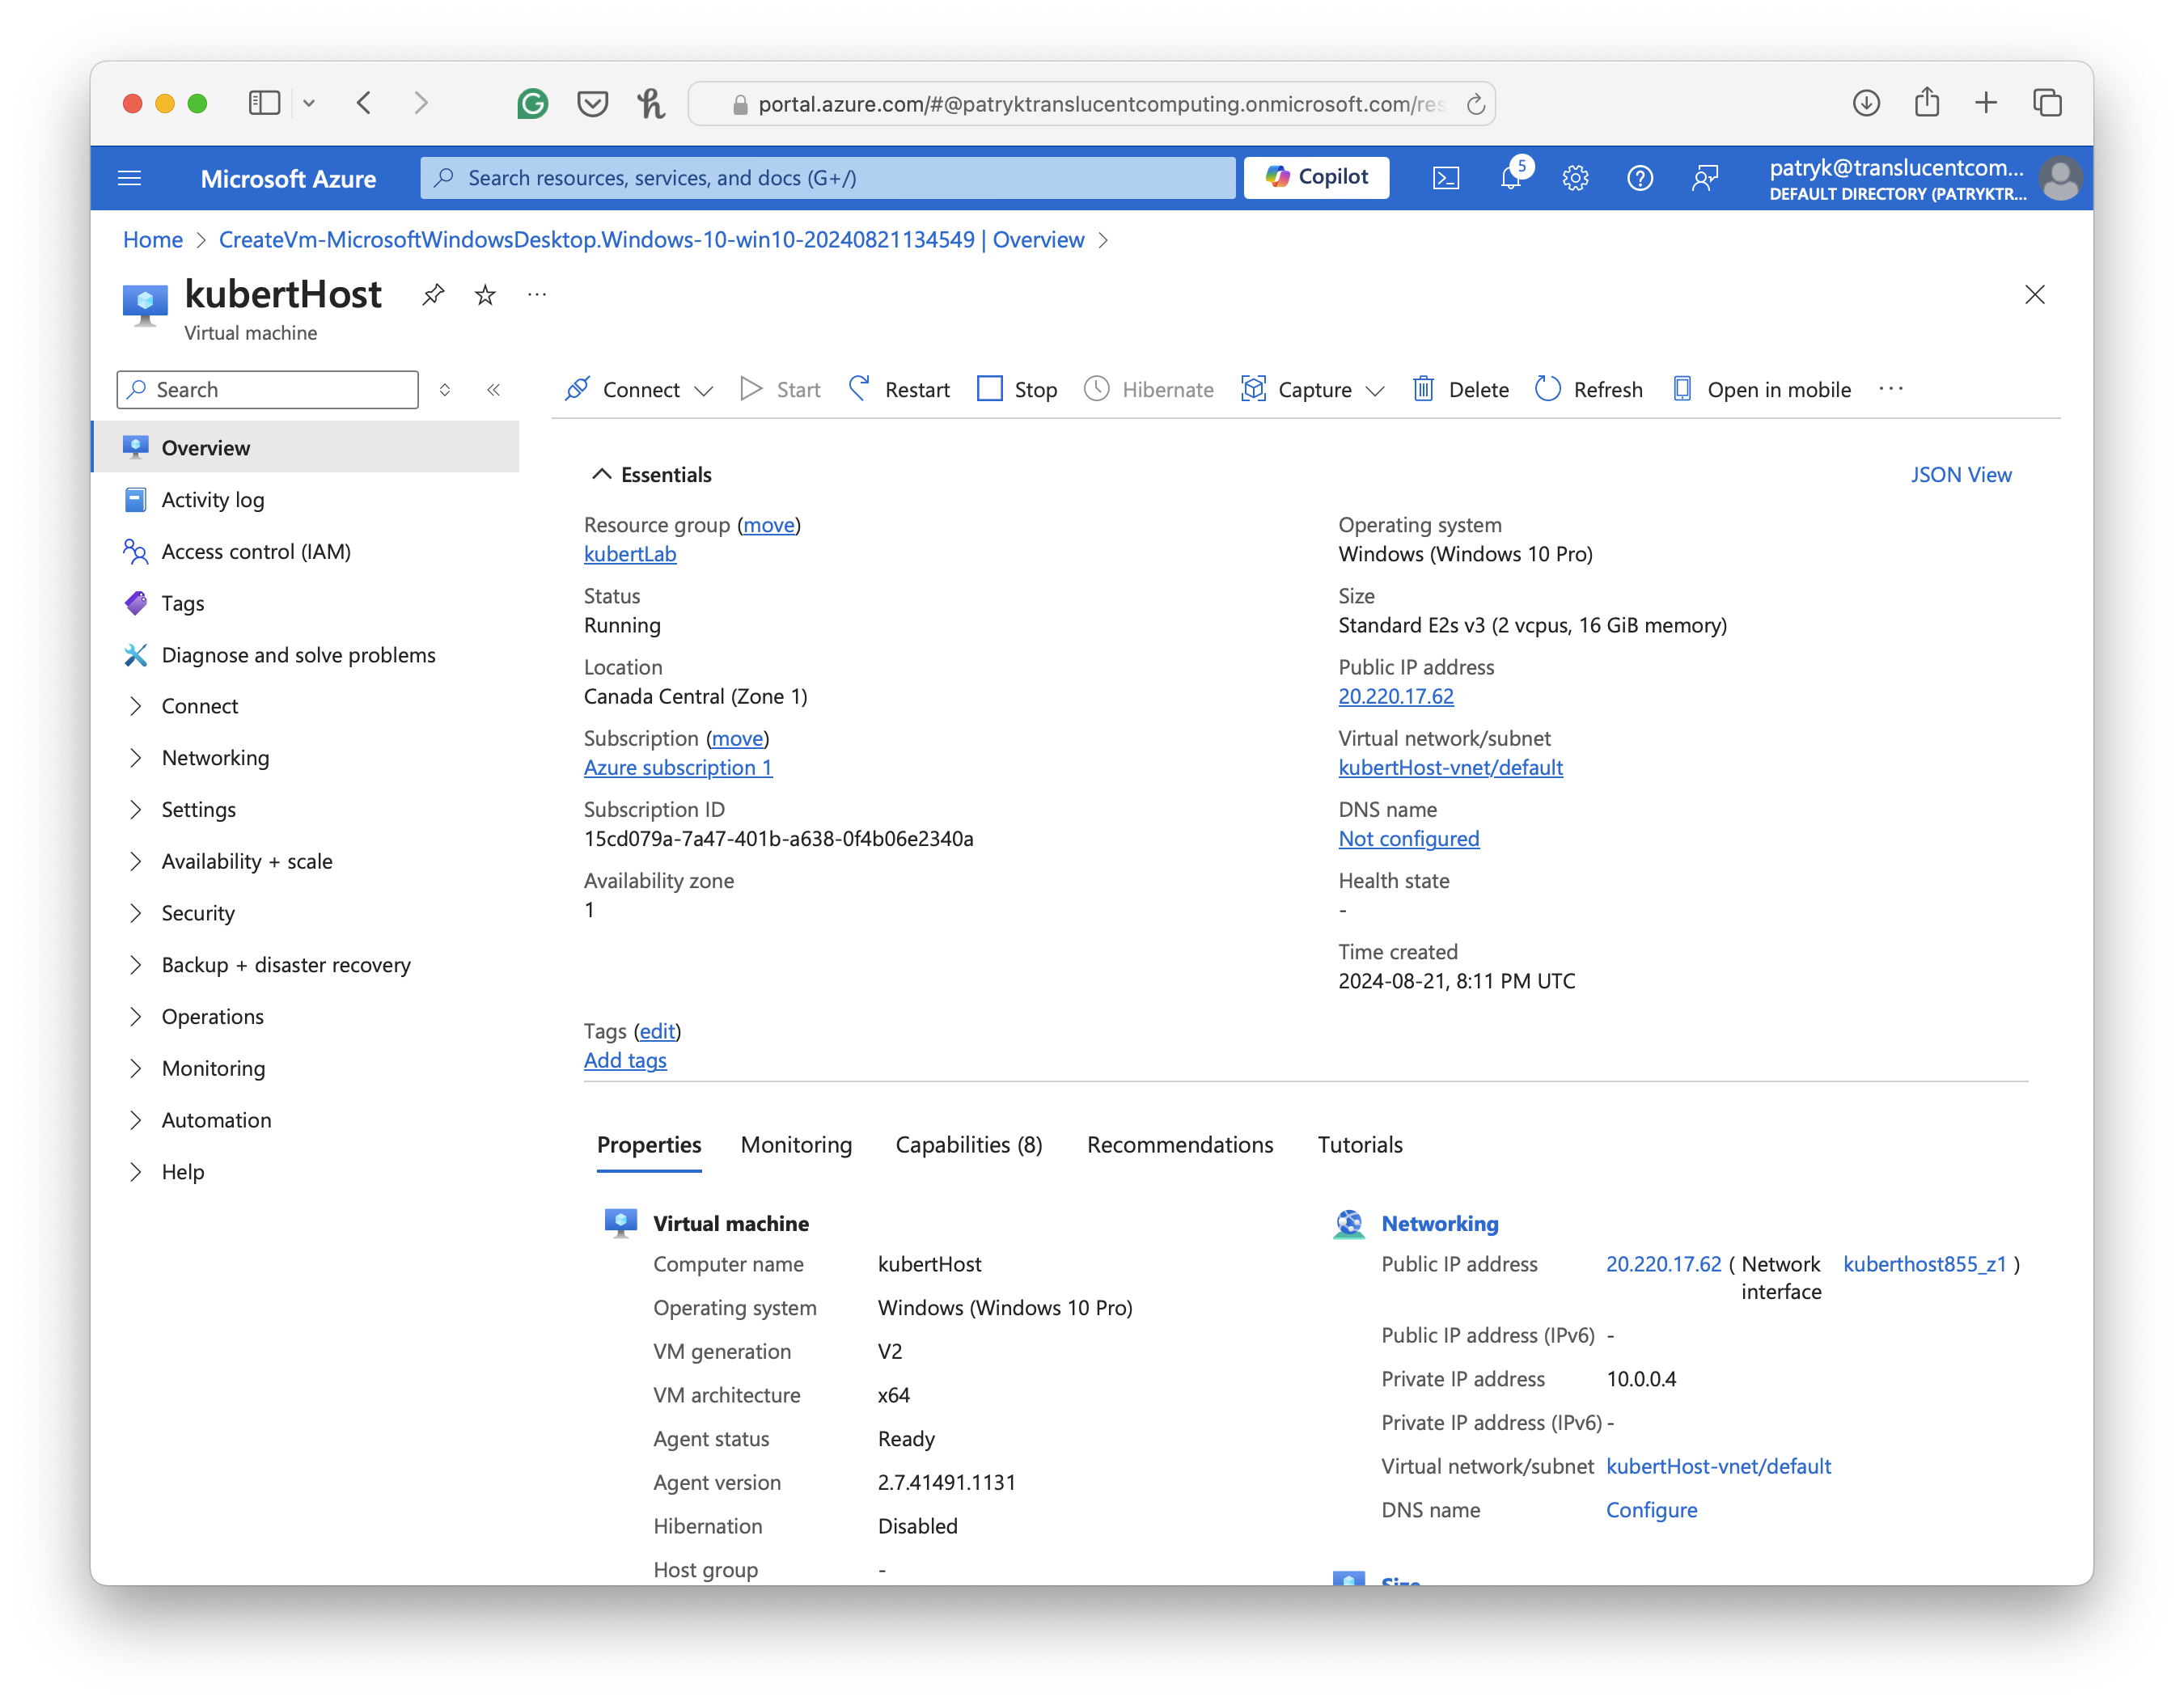
- Deployed host
-
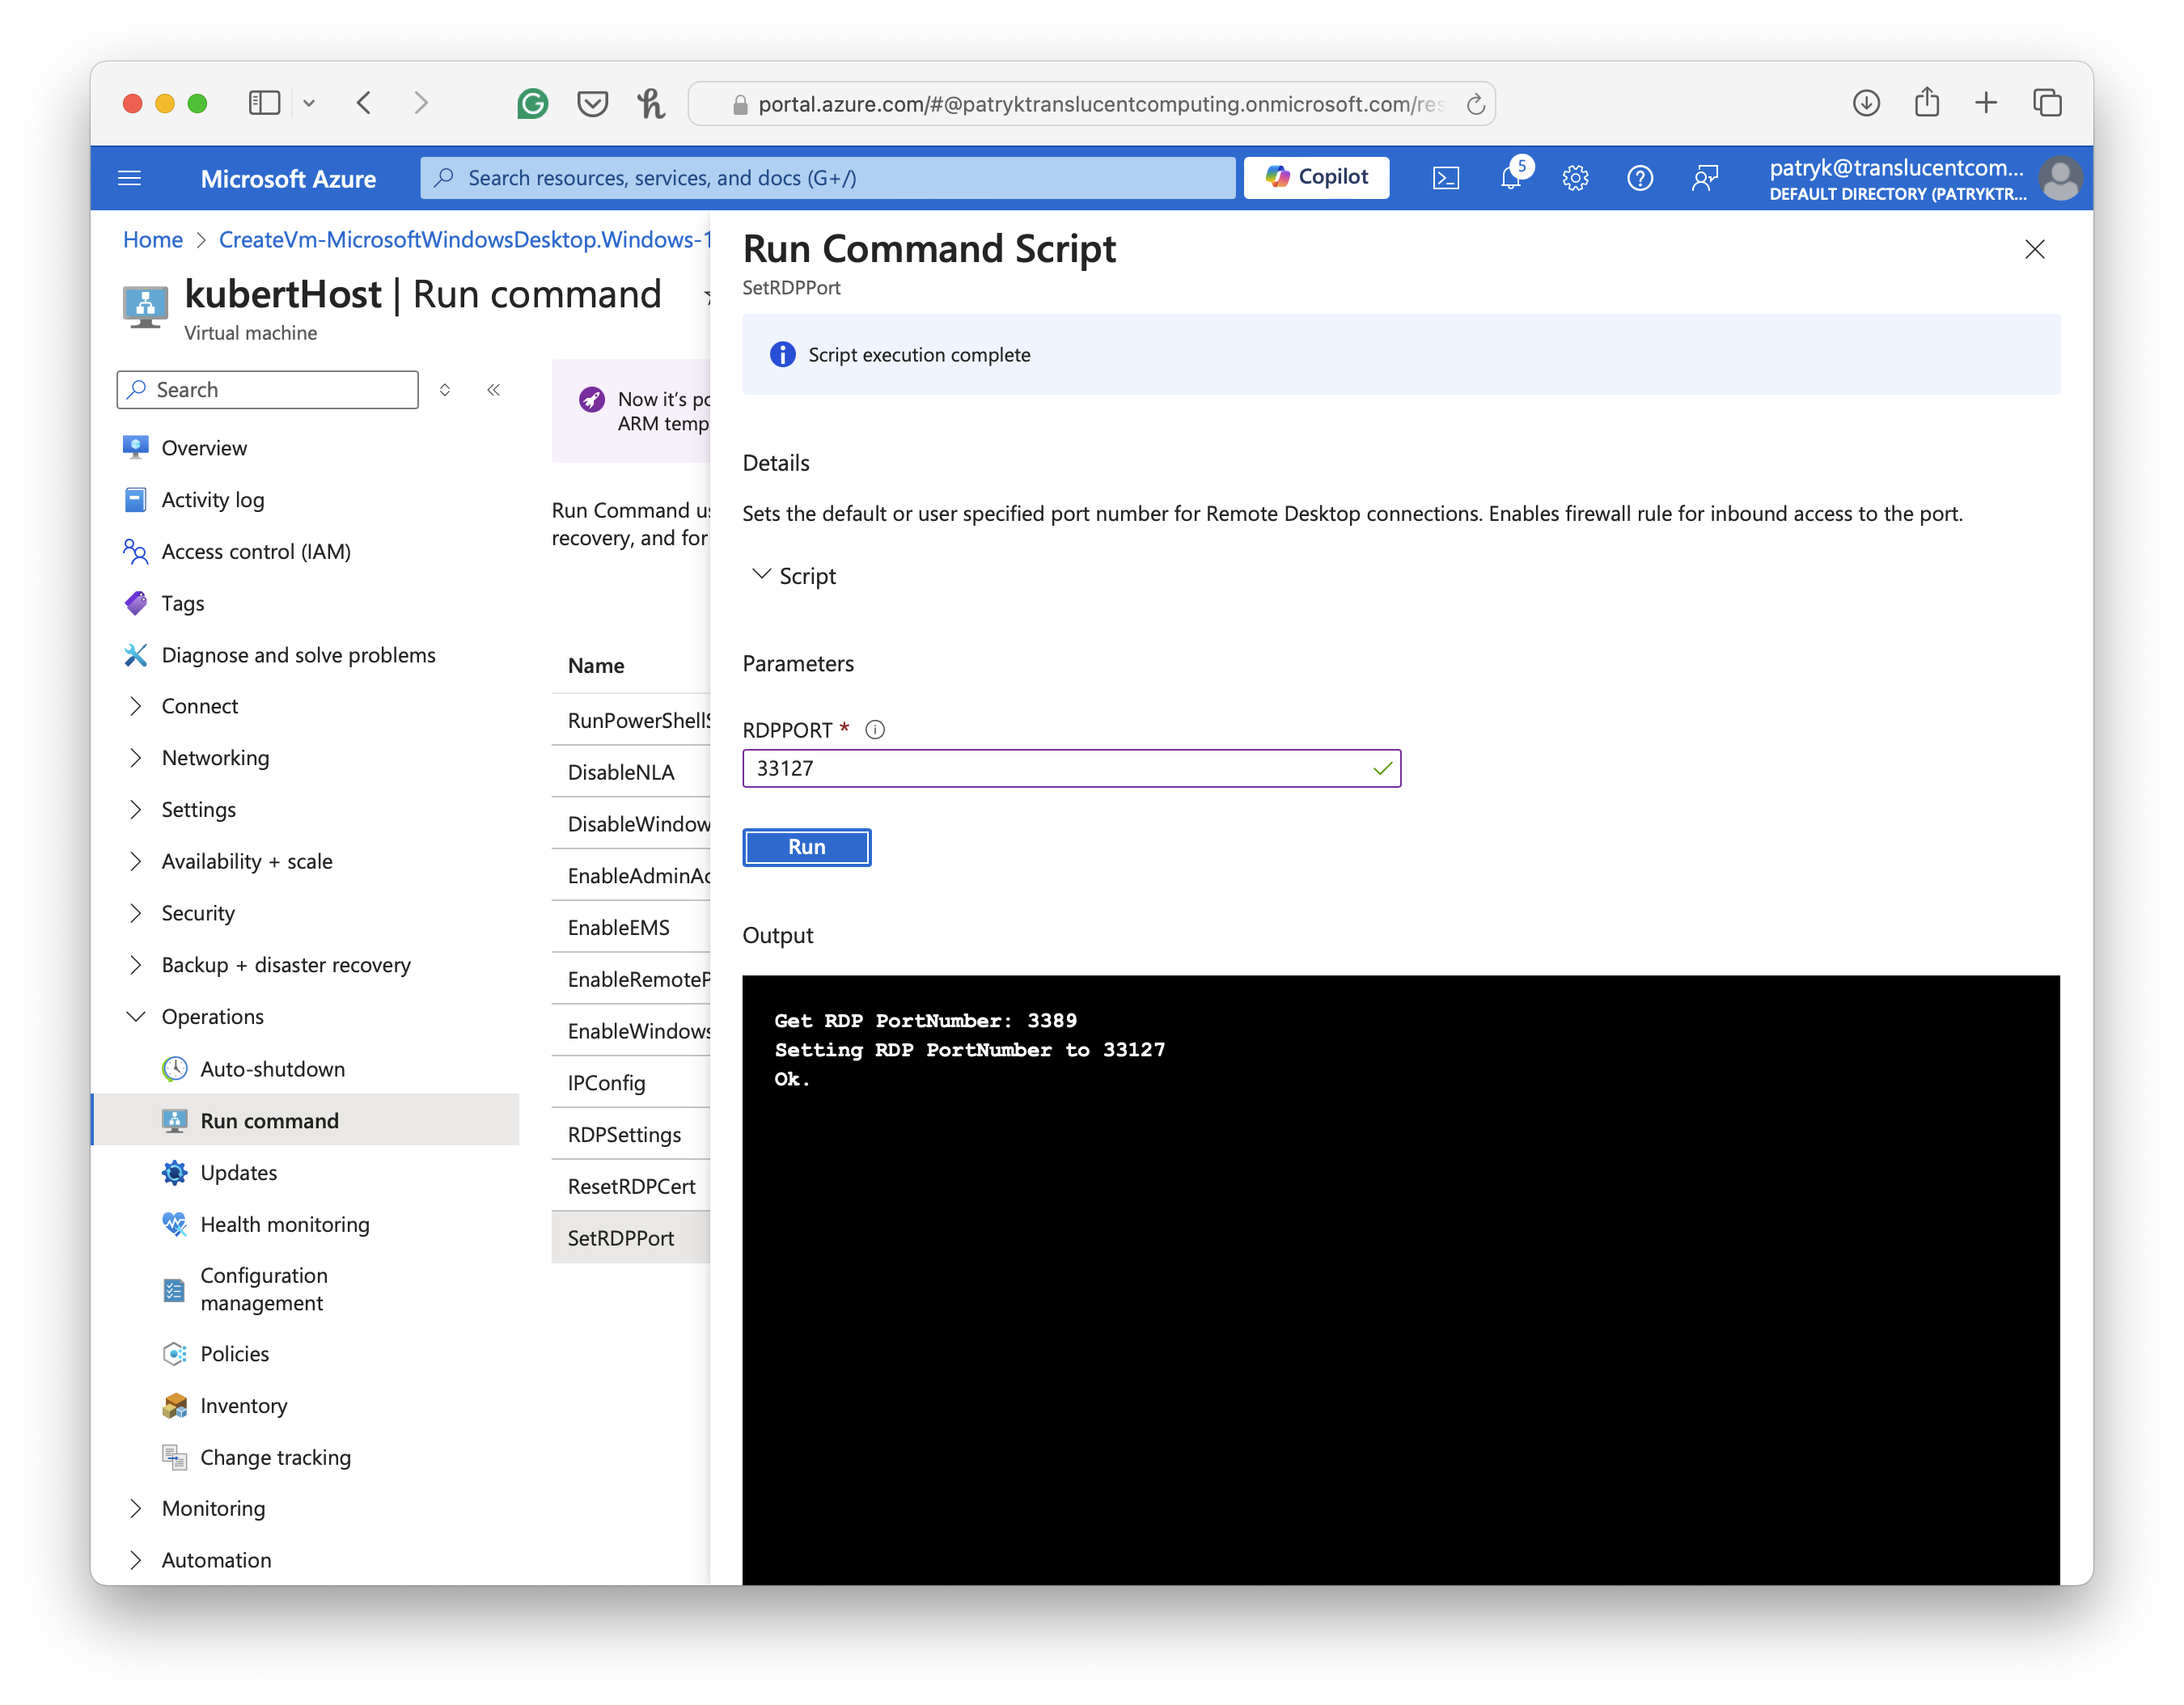
Set RDP port
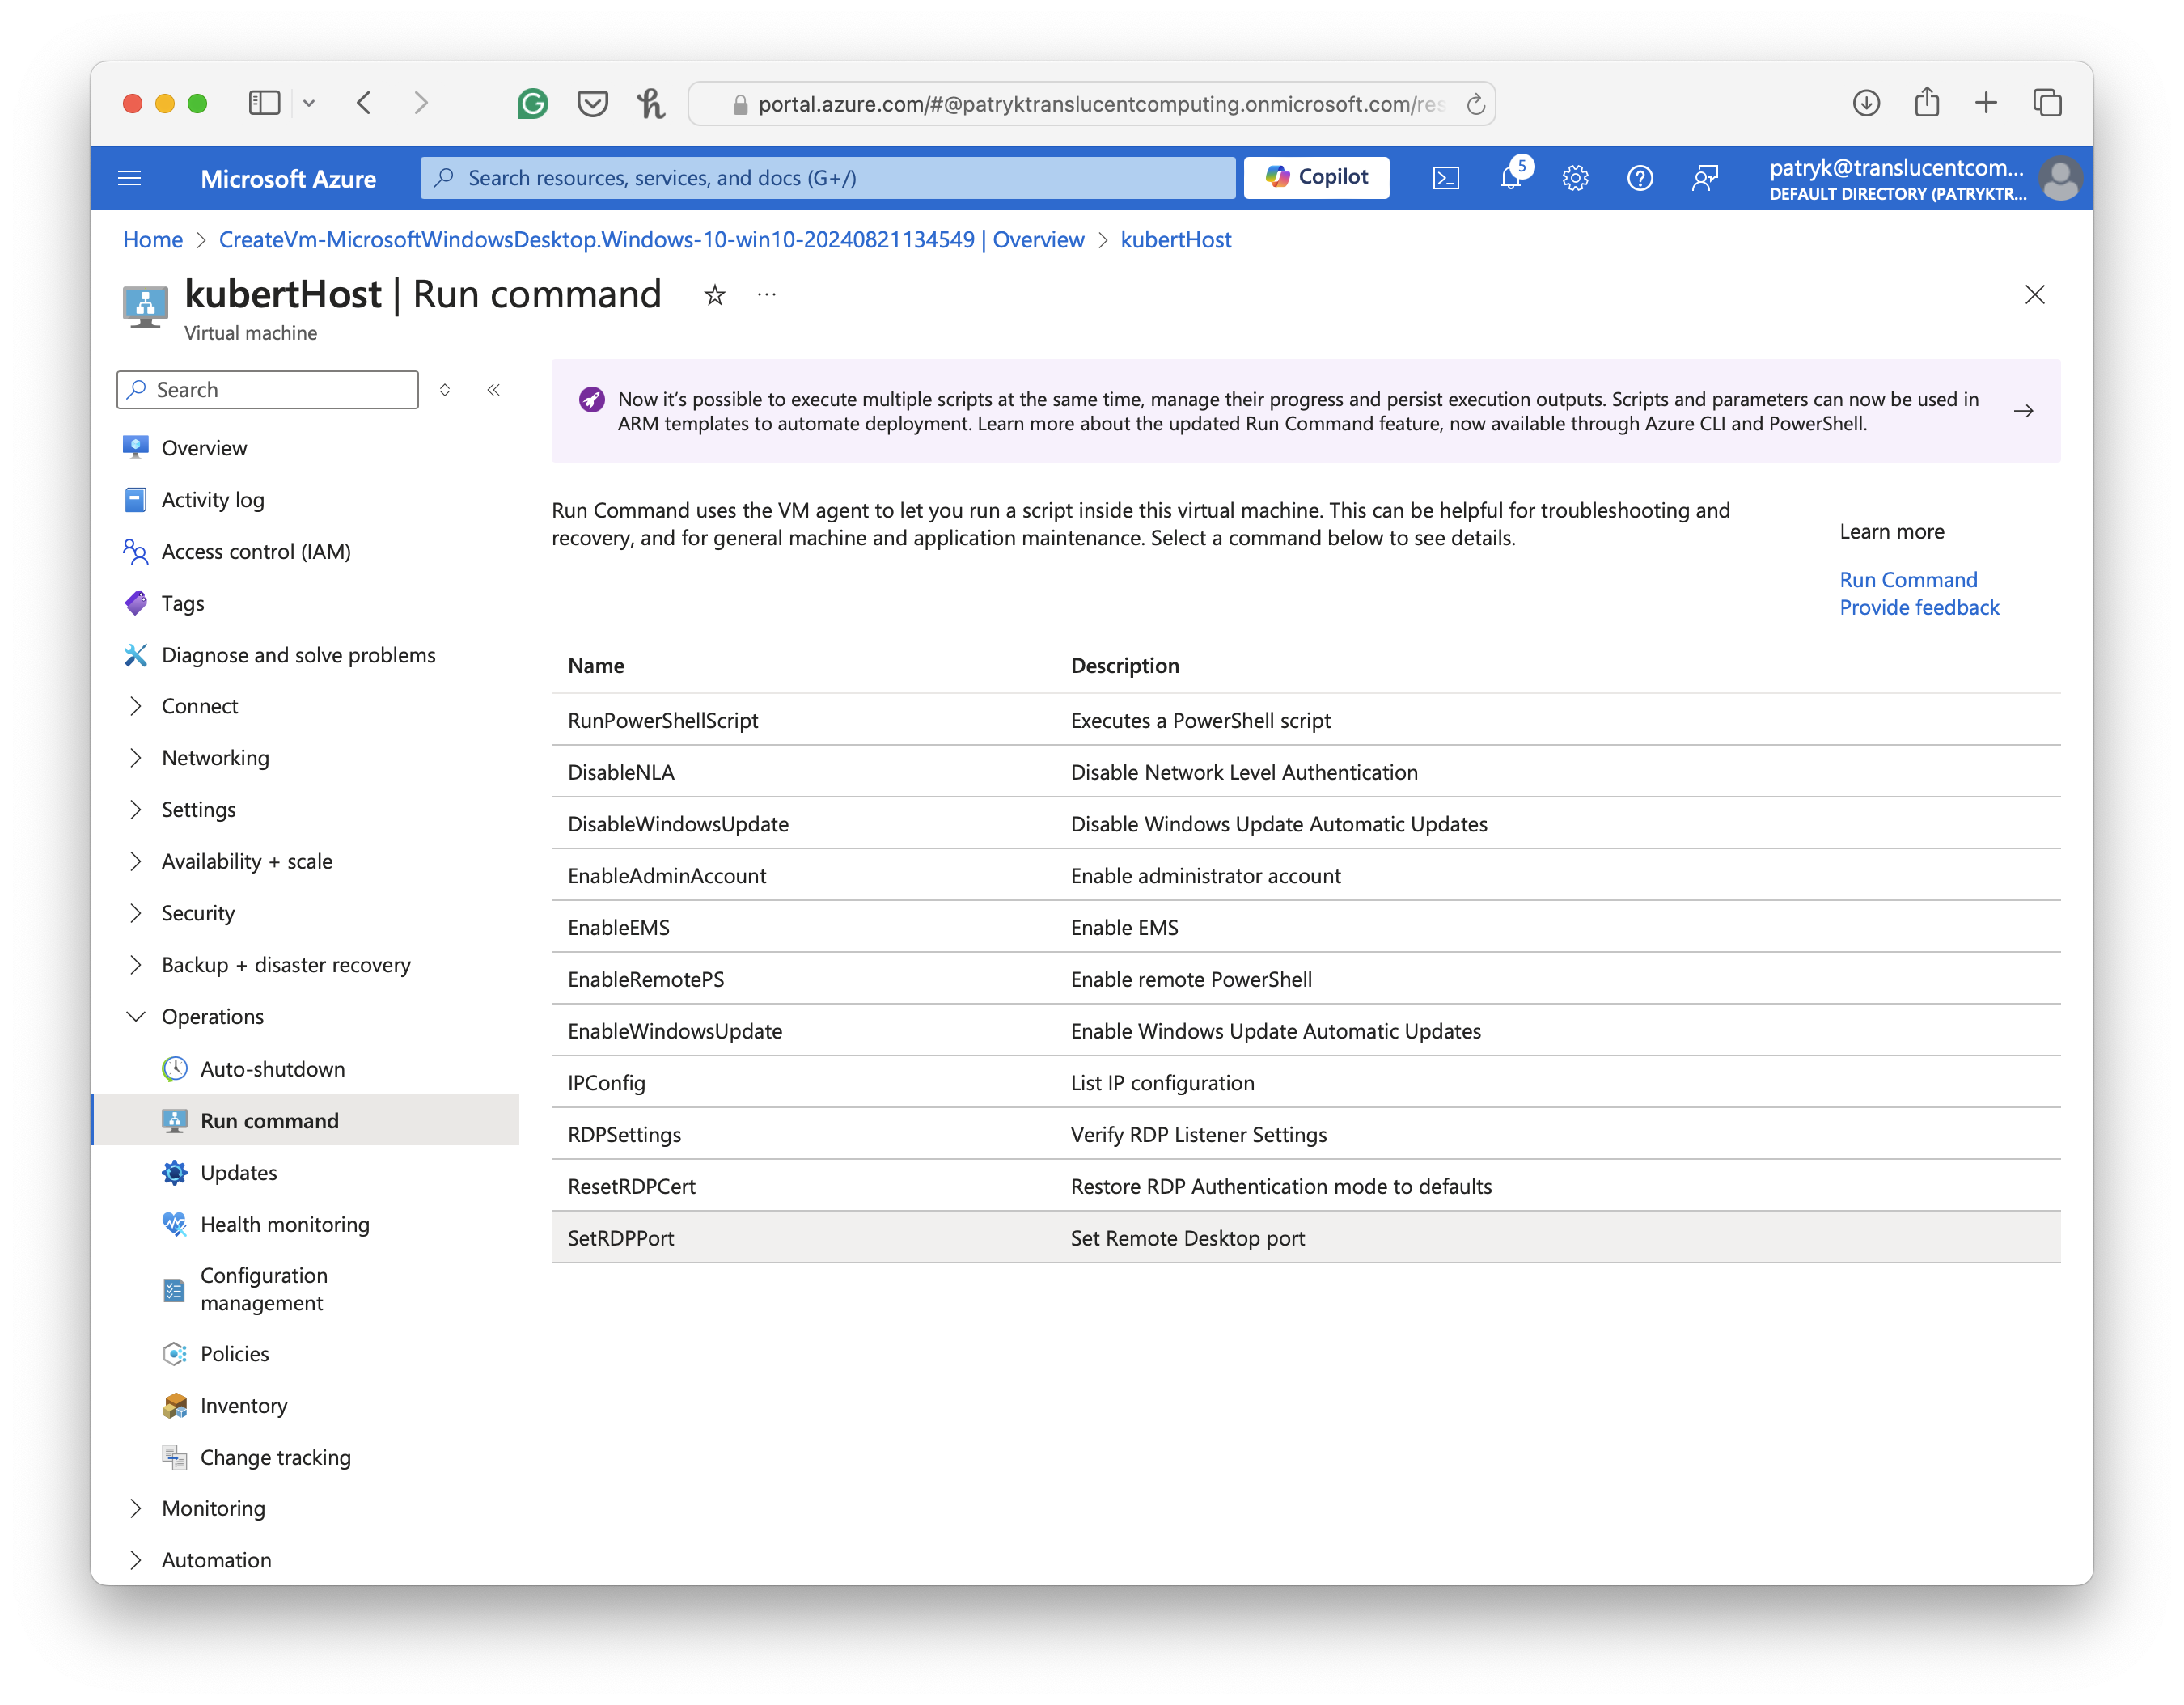
Note-> Go to the “Operations” section, then “Run command”, select the “SetRDPPort” - Enter the RDP port and execute the script.
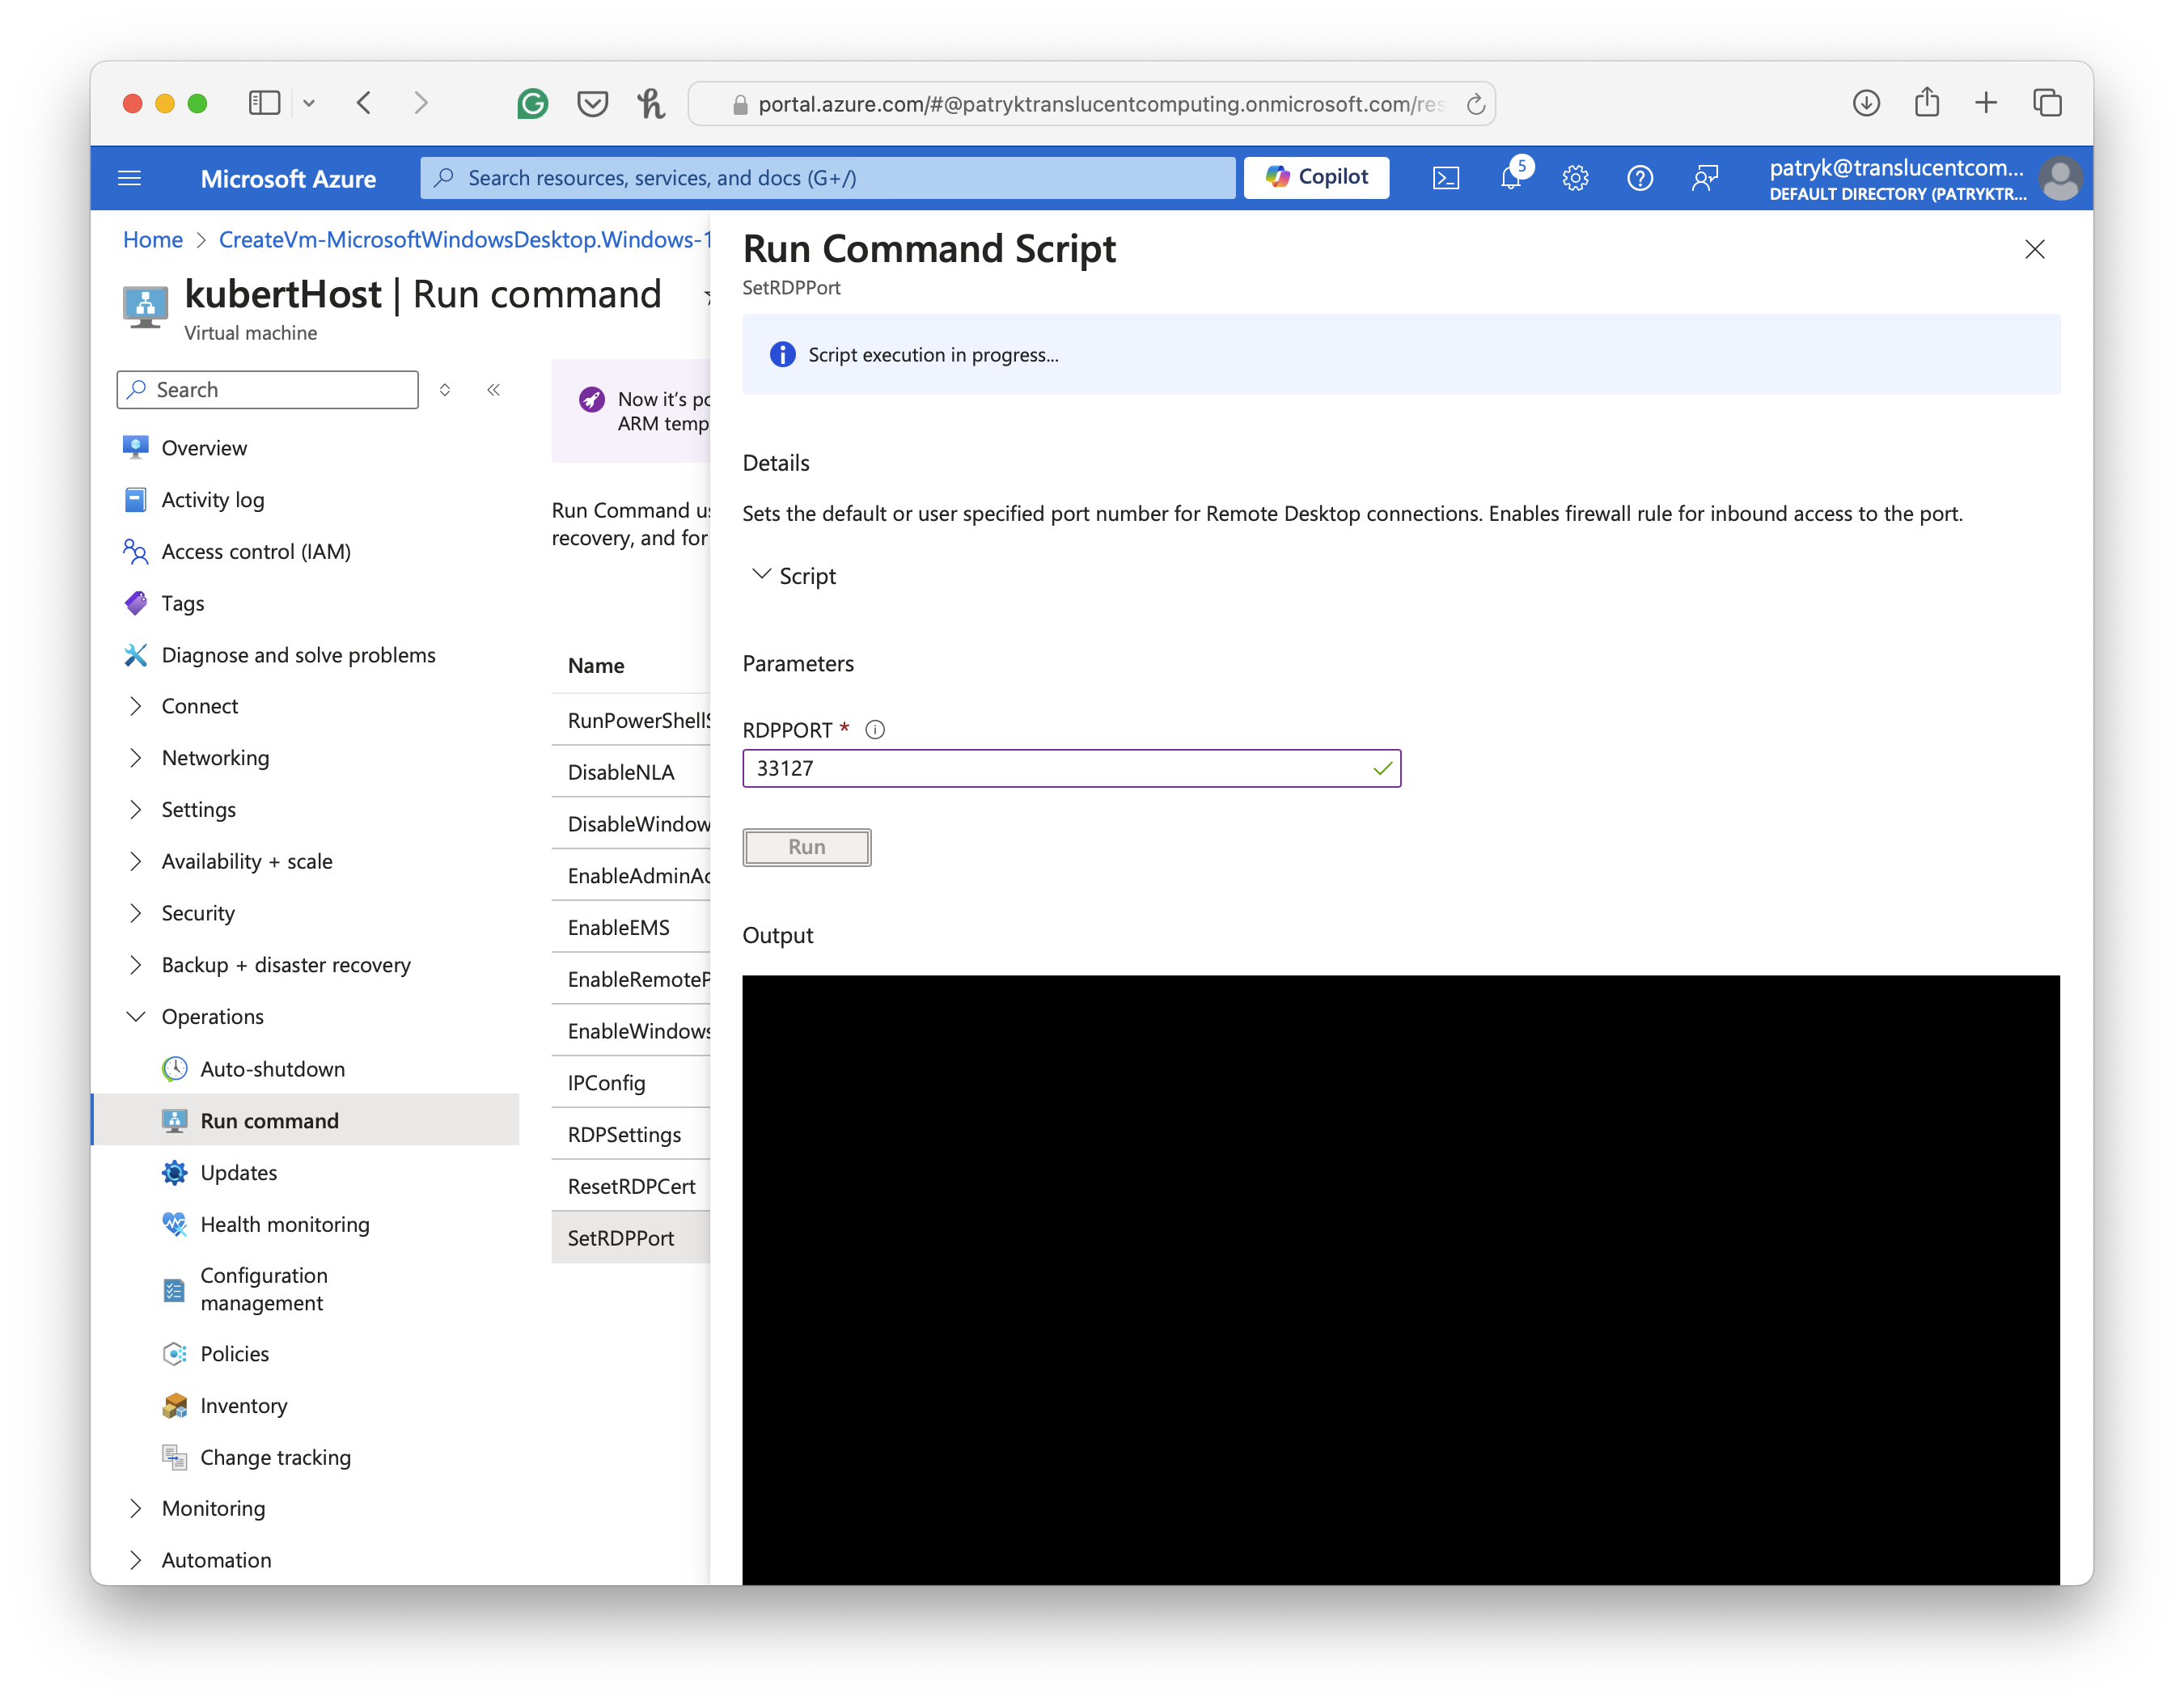
- RDP port updated
-
Set inbound networking rule
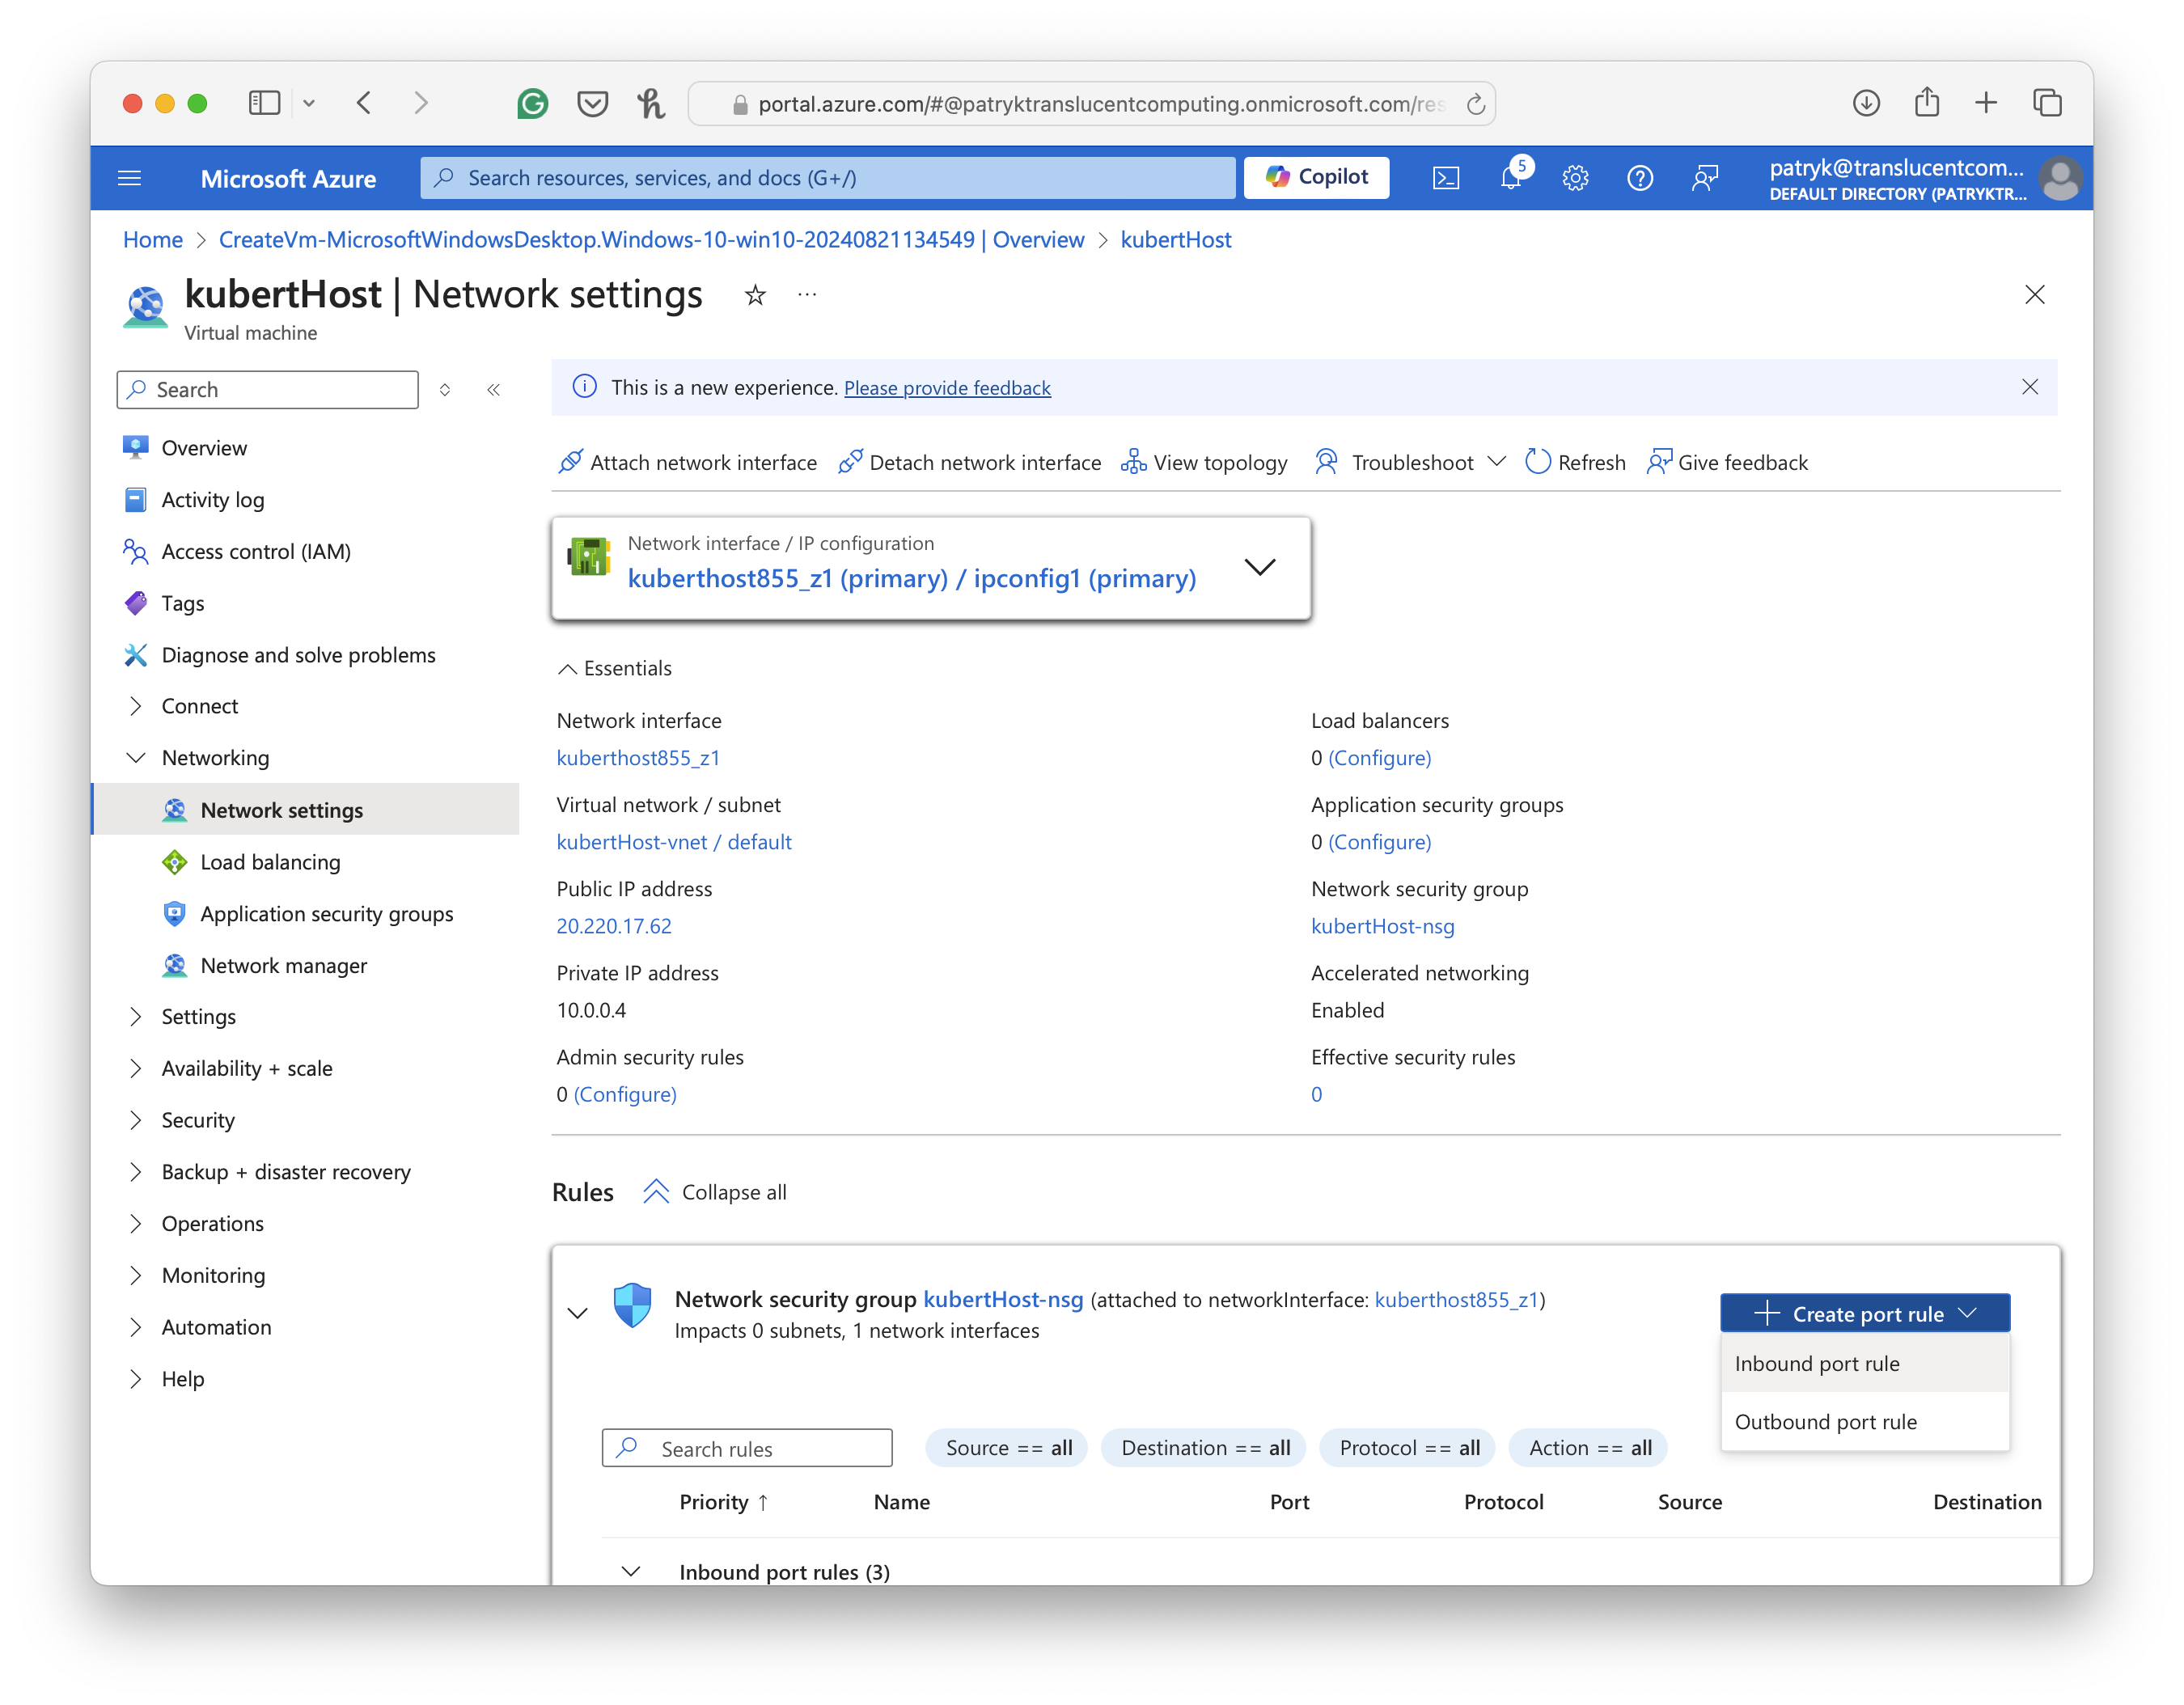
Note-> Go to the “Networking” section, then “Networking settings”, click “Create port rule” and select “inbound port rule” -
Configure “My IP address” security rule
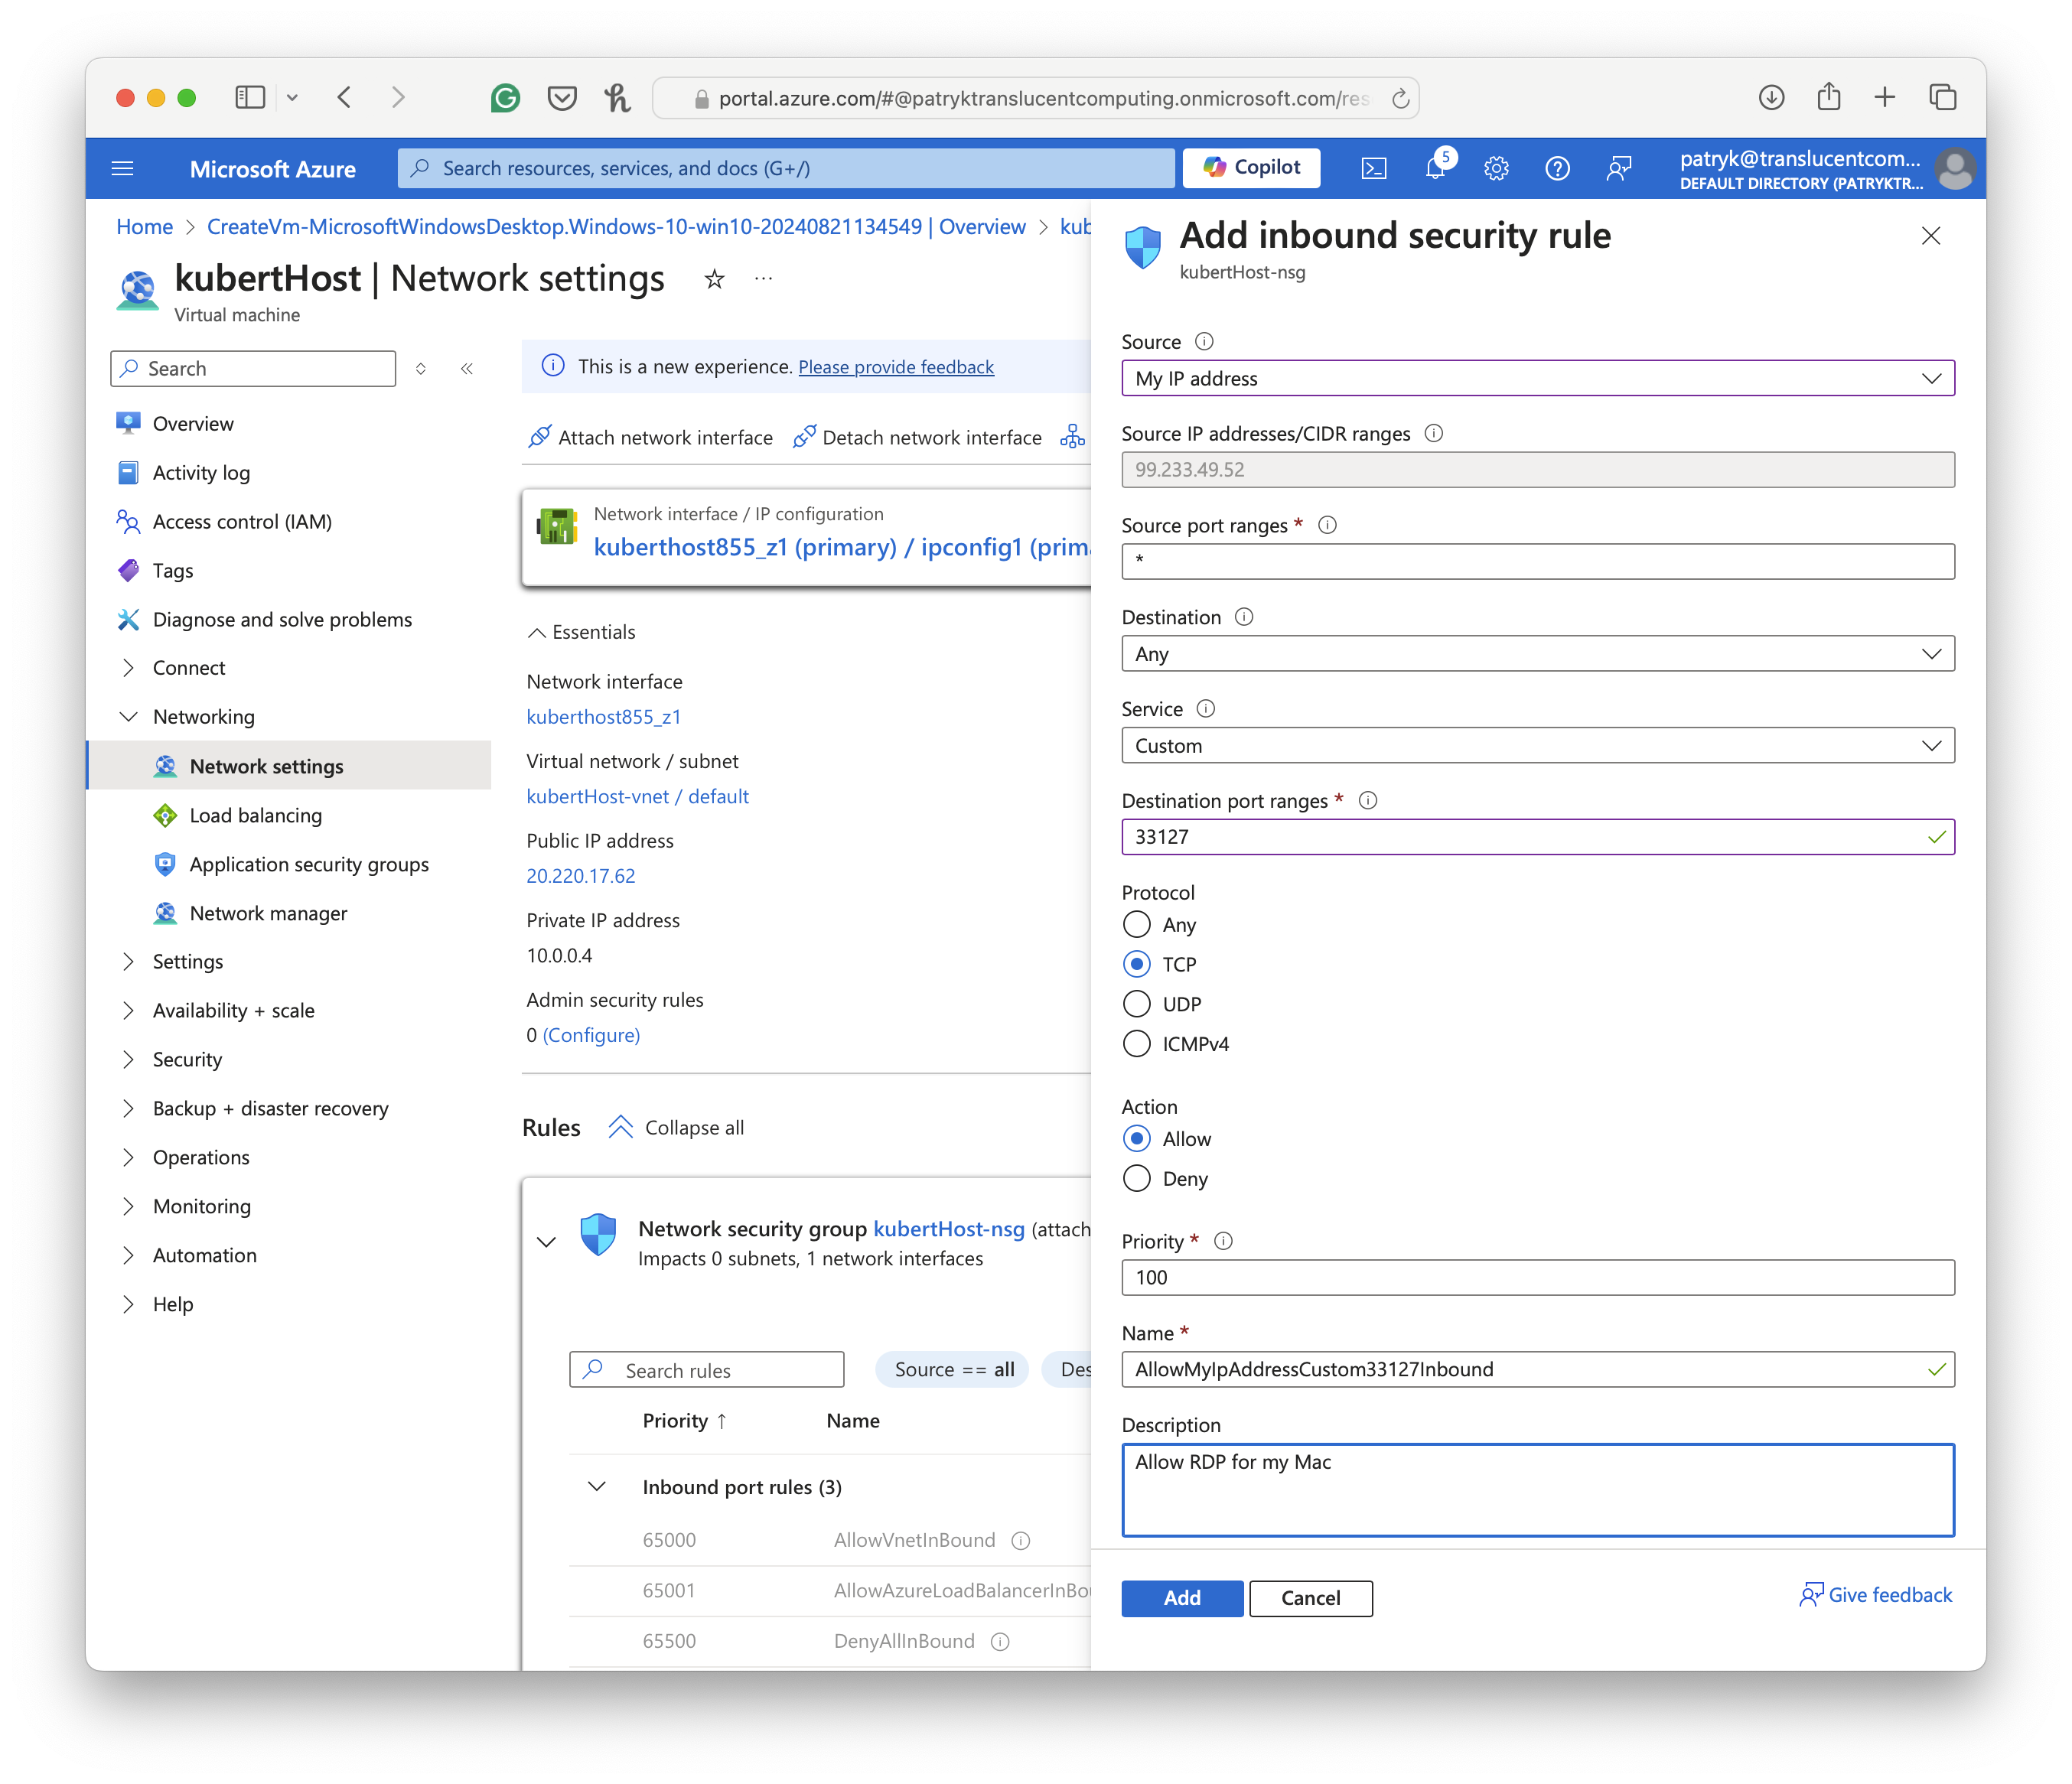
Note-> For the source, select “My IP address”; it will auto-populate the Source IP with your IP address. For the “Destination port ranges,” add the RDP port used in the previous step. The protocol should be TCP, and provide a description for clarity. - Download RDP file
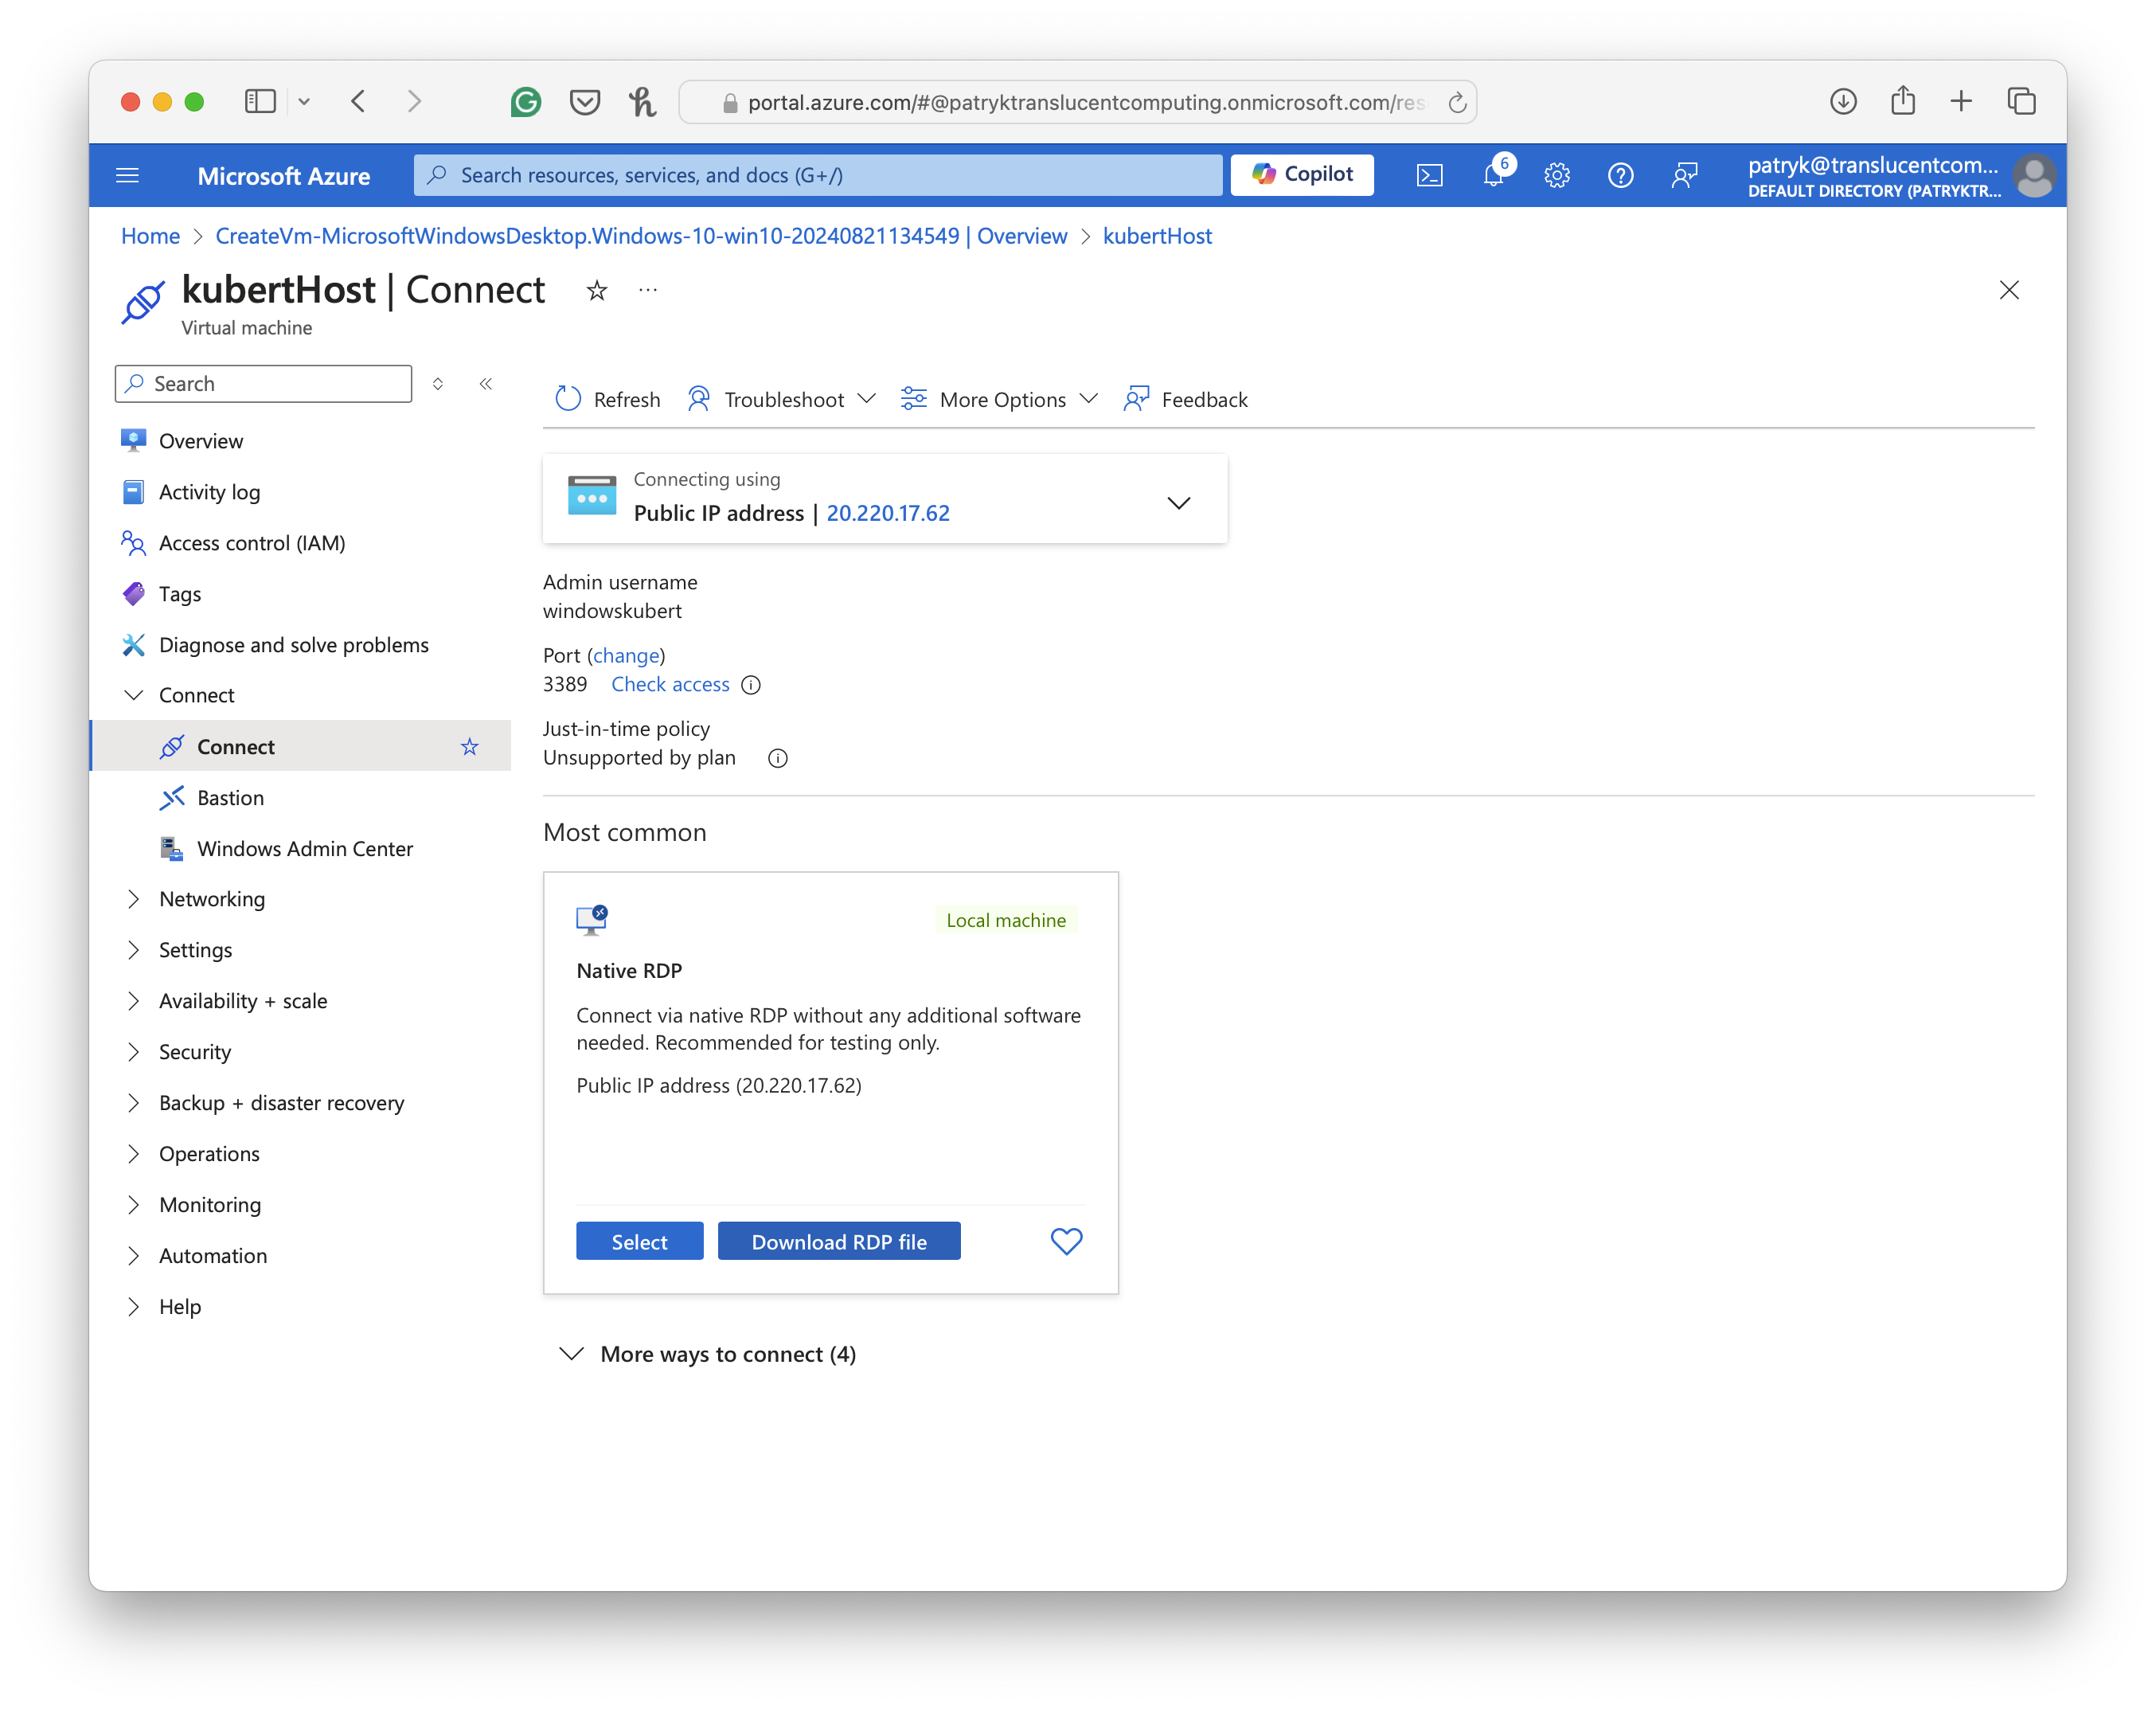

Step 4: Remote Desktop
-
Edit the downloaded RDP file.
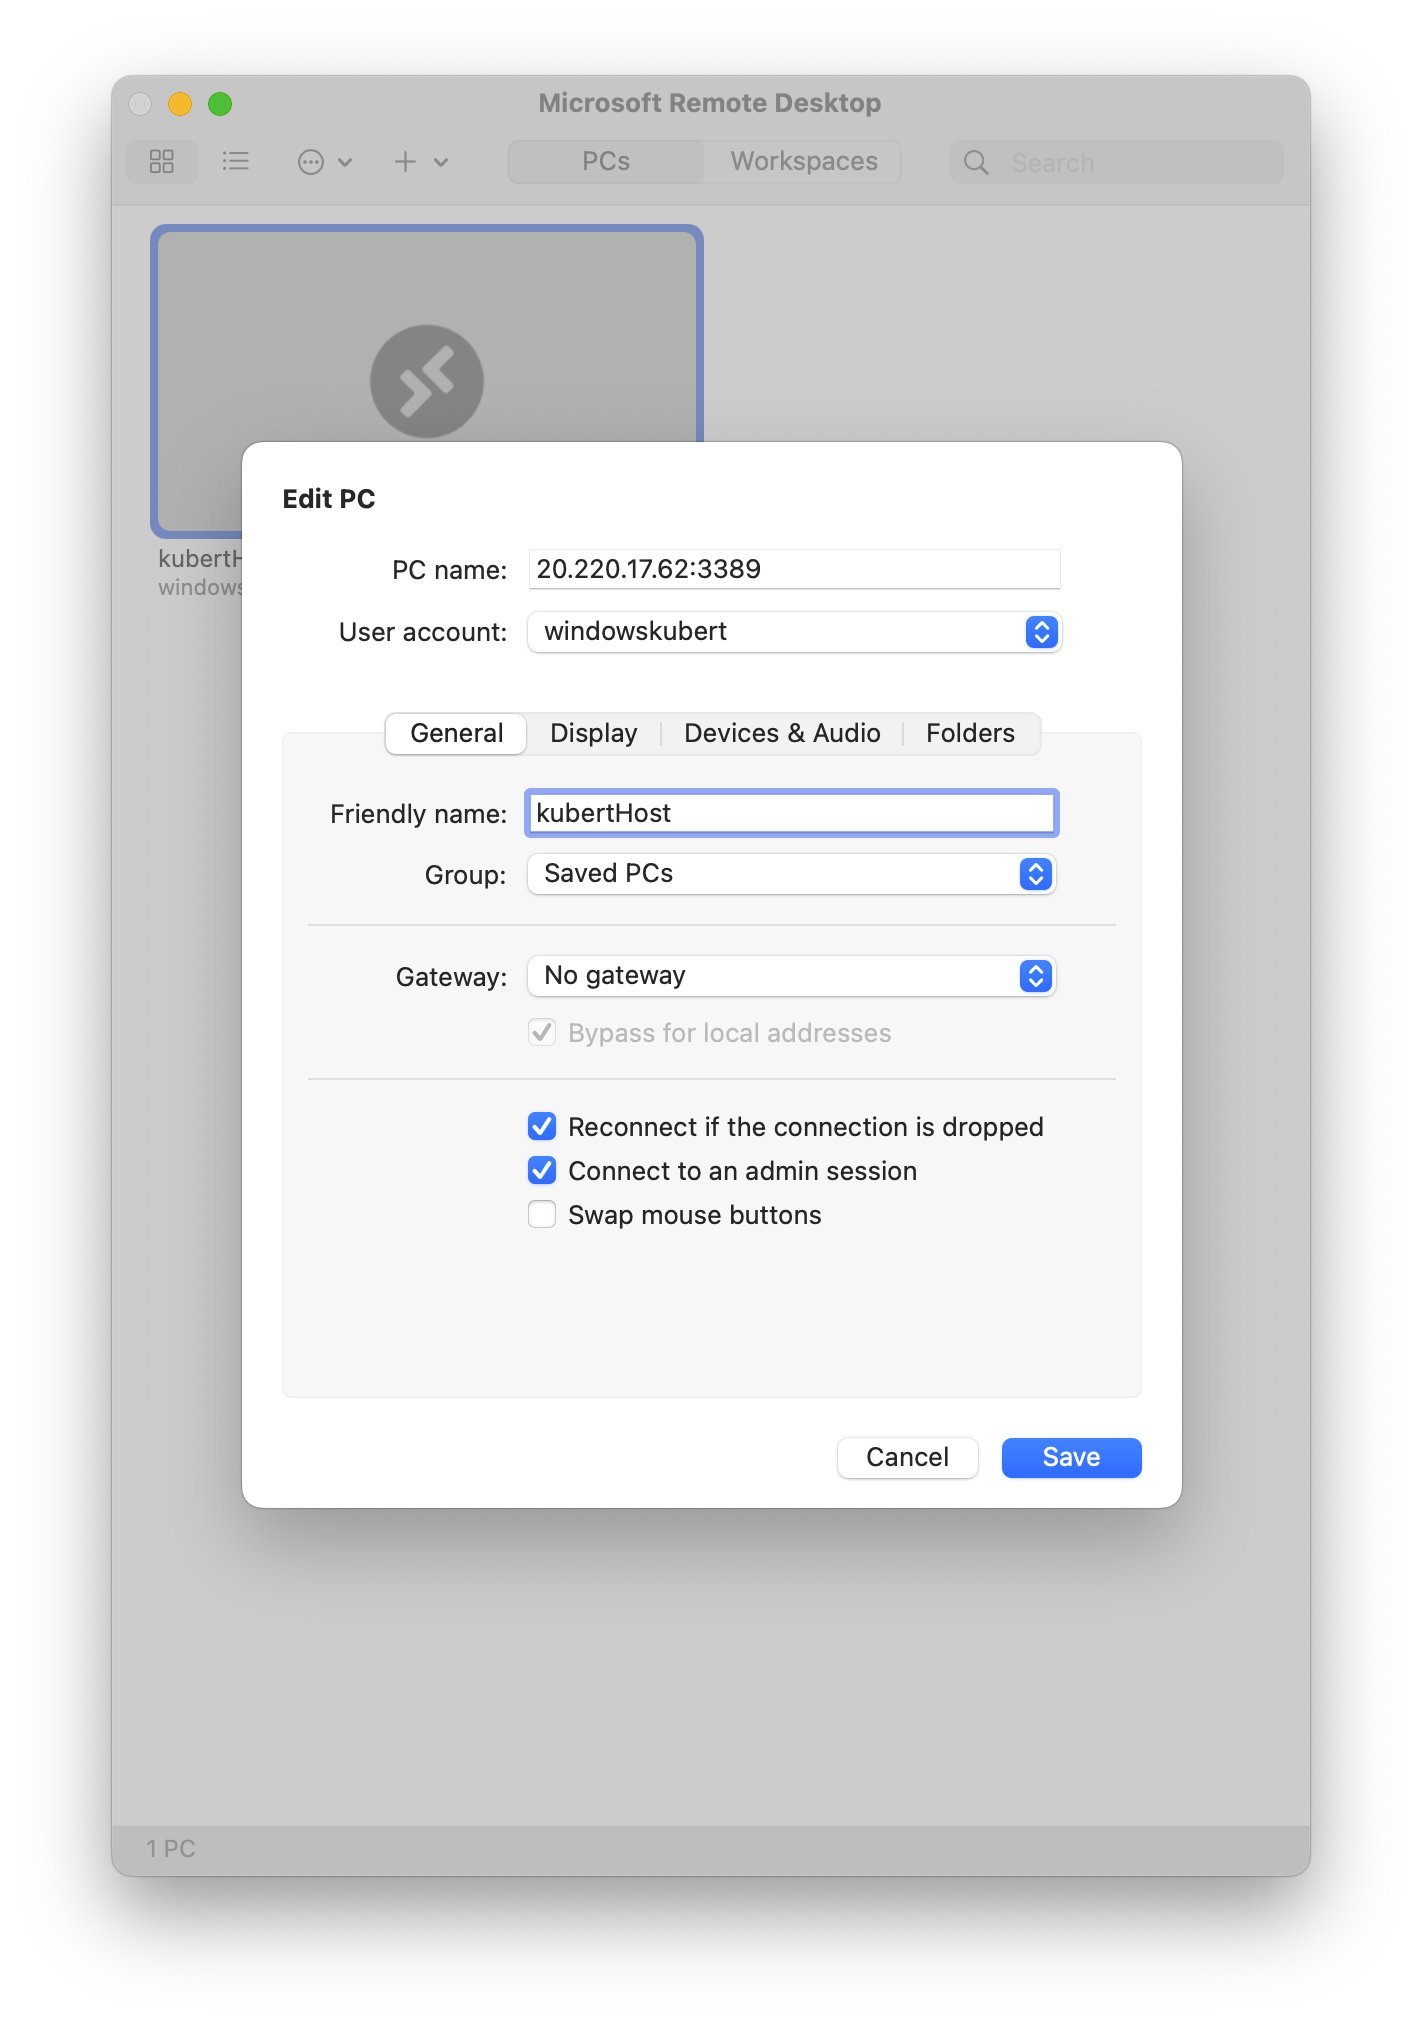
-
Update the port.
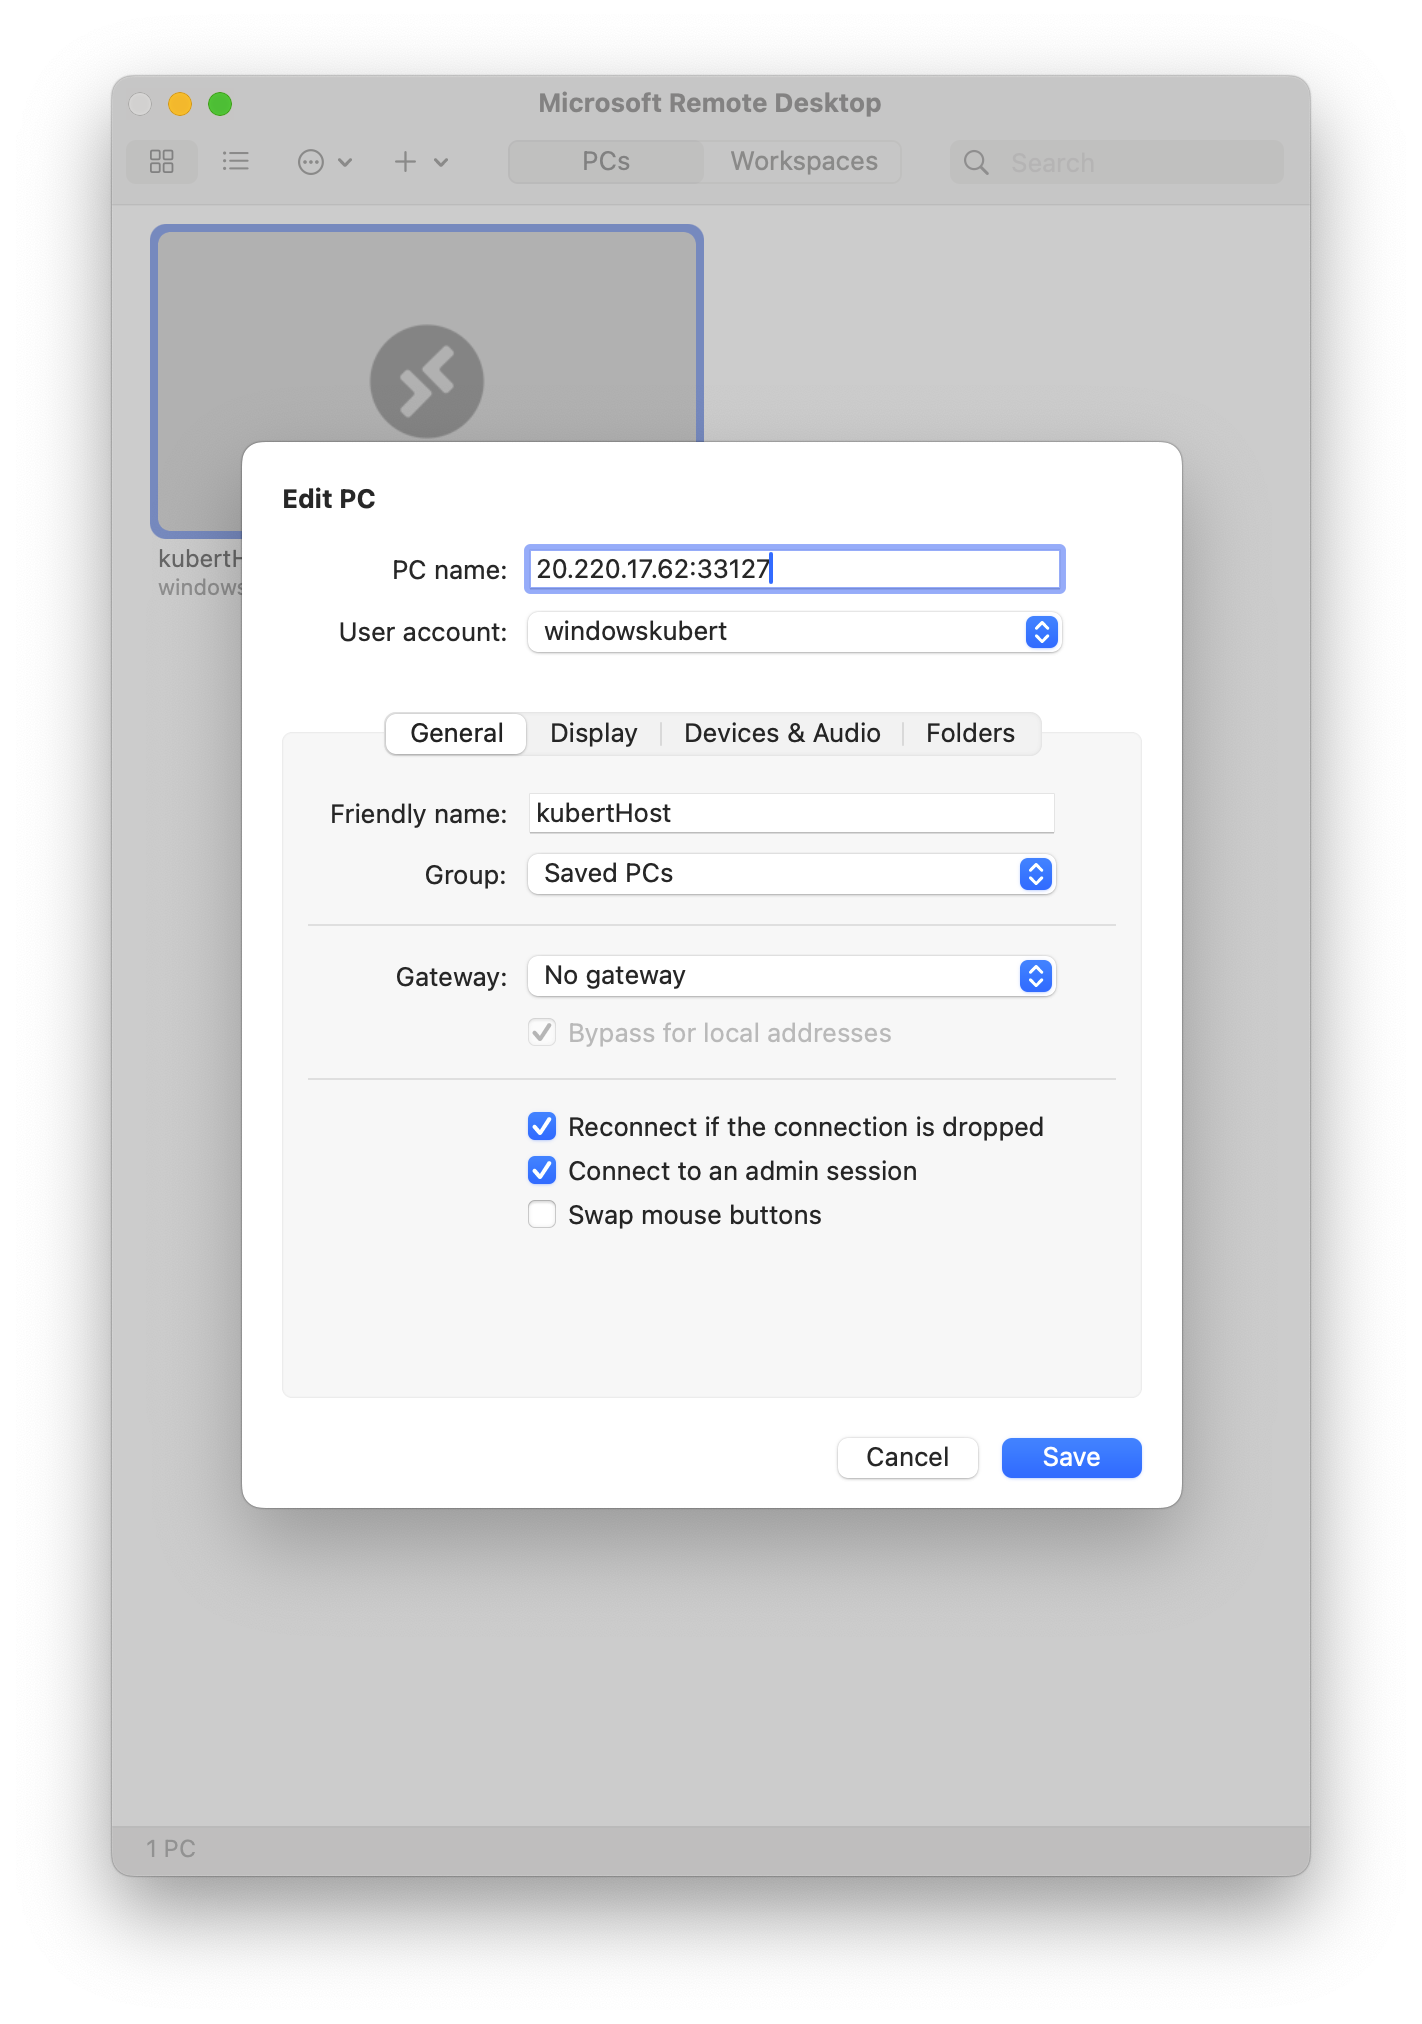
-
Start remote desktop and log into Windows.